
AWS re:Invent 2023 was nothing short of a tech enthusiast’s dream, bringing together innovators, experts, and enthusiasts from around the globe. Generative AI was top of mind for everyone here and Amazon Bedrock was a big part of many conversations. Bedrock is a fully managed service that offers a choice of foundation models from vendors link Anthropic, Cohere, Meta, and Amazon’s own model Titan. One of the biggest benefits of Bedrock is that it’s serverless, reducing the need to manage any infrastructure, and allowing you to securely integrate and deploy generative AI capabilities into your applications.
Bedrock Model customization enables you to deliver differentiated and personalized user experiences by privately fine-tuning FMs using your own labeled datasets. But what does this process look like and how can MuleSoft help? This blog post will walk you through an example that we presented at the event.
Prepare Dataset
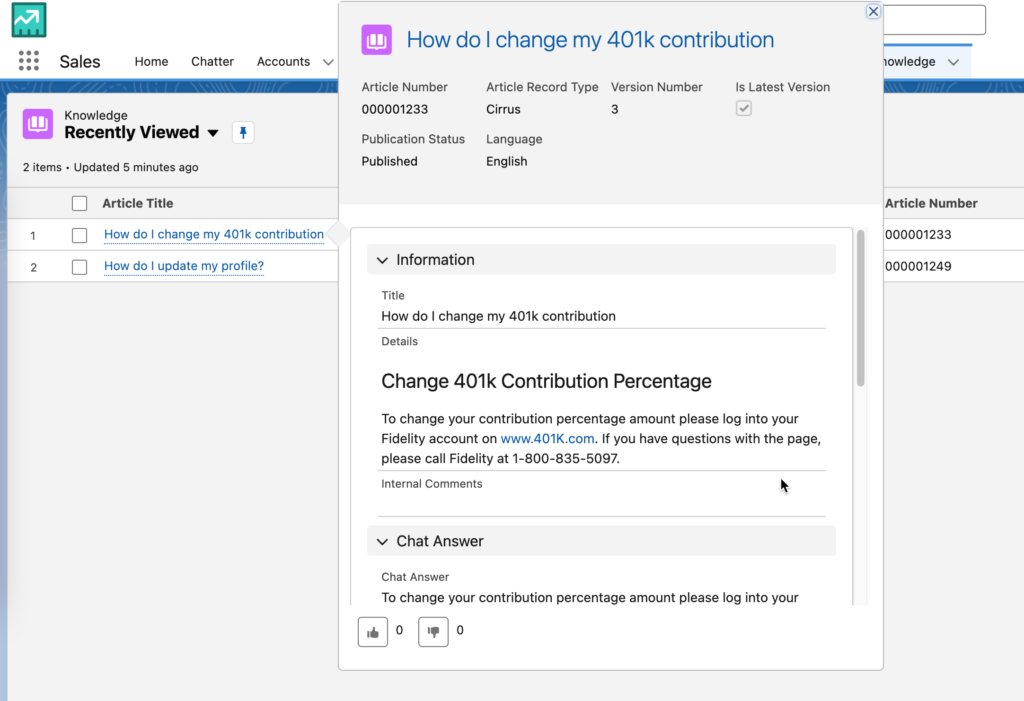
For the data we used in the demo, we loaded Knowledge Articles from Salesforce. The content was already in the perfect “prompt/completion” format in order to fine tune a FM. As you can see from the screenshot, the content consists of a “Title” and “Chat Answer” already.
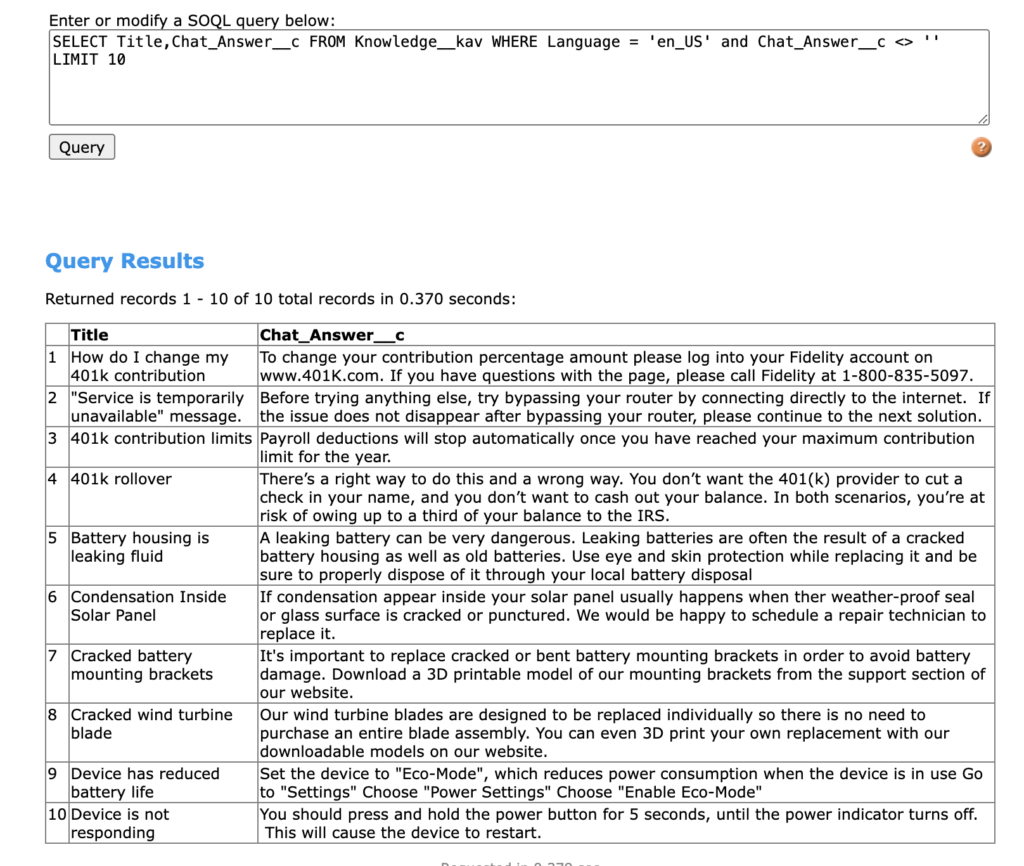
Running the following SOQL query returns the fields you need.
SELECT Title,Chat_Answer__c FROM Knowledge__kav WHERE Language = 'en_US' and Chat_Answer__c <> '' LIMIT 10
But how can we use this data with Amazon Bedrock. That’s where MuleSoft comes in.
Fine-tuning datasets for Amazon Bedrock needs to be a file with multiple JSON lines. This is also known as JSONL. It should look like the following format:
{"prompt": "", "completion": ""}
{"prompt": "", "completion": ""}
{"prompt": "", "completion": ""}
If you’re planning to train an Amazon Titan model, the format needs to have a different set of keys.
{"input": "", "output": ""}
Go to this Github link (https://github.com/djuang1/generate-aws-jsonl-dataset) to download the MuleSoft project. Once you import the project, you’ll see the following flow below.
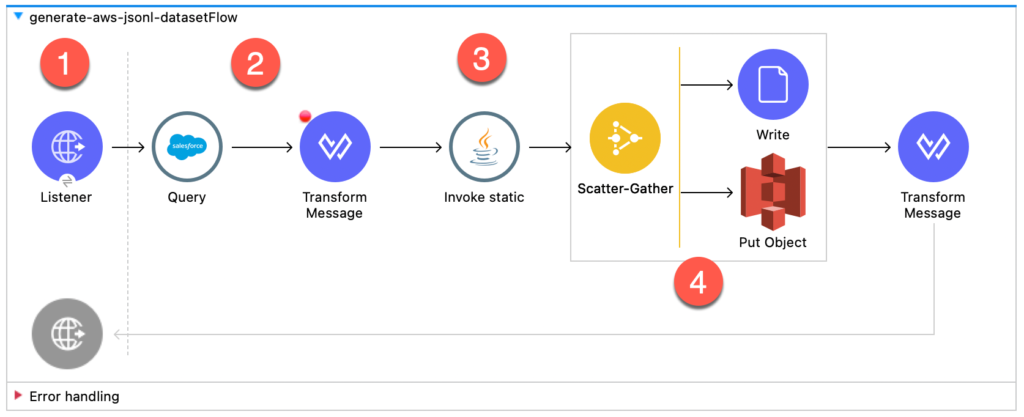
Let’s walk through the different parts of the flow.
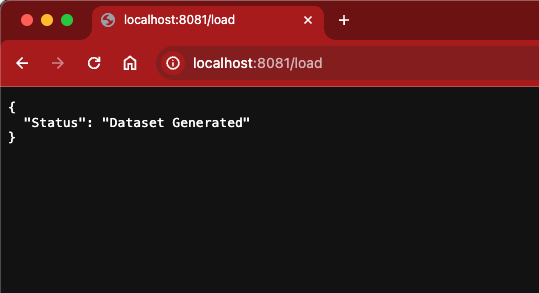
- The flow has an HTTP Listener that allows you to kick off the flow manually. Once the Mule project is running, you can go to http://localhost:8081/load to prepare the dataset.
- The Salesforce Connector is next and leverages the Query operation to go and grab the Knowledge Articles using a SOQL query. The same one we referenced above. With the response data, we transform the results into CSV first before we move to the next component. The DataWeave script to handle this transformation looks like the following:
%dw 2.0
output application/csv
---
payload map ( payload01 , indexOfPayload01 ) -> {
	'input': "'" ++ ((payload01.Title replace "\n" with " ") replace "\"" with "'" default "") ++ "'",
	'output': "'" ++ ((payload01.Chat_Answer__c replace "\n" with " ") replace "\"" with "'" default "") ++ "'"
}
- The Invoke static operation is from the Java connector. This project uses Java code to convert the CSV stream into JSONL. Here’s the function:
public static String convertCSVtoJSONL(InputStream csvInputStream) throws IOException {

		StringBuilder jsonlString = new StringBuilder();

		// Create BufferedReader to read CSV content
        try (BufferedReader br = new BufferedReader(new InputStreamReader(csvInputStream))) {
            // Read the header
            String headerLine = br.readLine();
            String[] headers = headerLine.split(",");

            String line;
            while ((line = br.readLine()) != null) {
                // Split the CSV record using StringTokenizer
                StringTokenizer tokenizer = new StringTokenizer(line, ",");
                ObjectNode jsonNode = new ObjectMapper().createObjectNode();

                // Populate JSON object with CSV data
                for (String header : headers) {
                    if (tokenizer.hasMoreTokens()) {
                        jsonNode.put(header, tokenizer.nextToken());
                    }
                }

                // Convert JSON object to JSON string and append to the result
                jsonlString.append(jsonNode.toString()).append("\n");
            }
        }

        return jsonlString.toString();
	}
- Once the JSONL has been generated, the code leverages the Scatter-Gather scope to write the JSONL to two locations. A local folder so you can see the output, and an AWS S3 bucket that Bedrock will use to fine-tune the FM. Here’s what the file will look like:
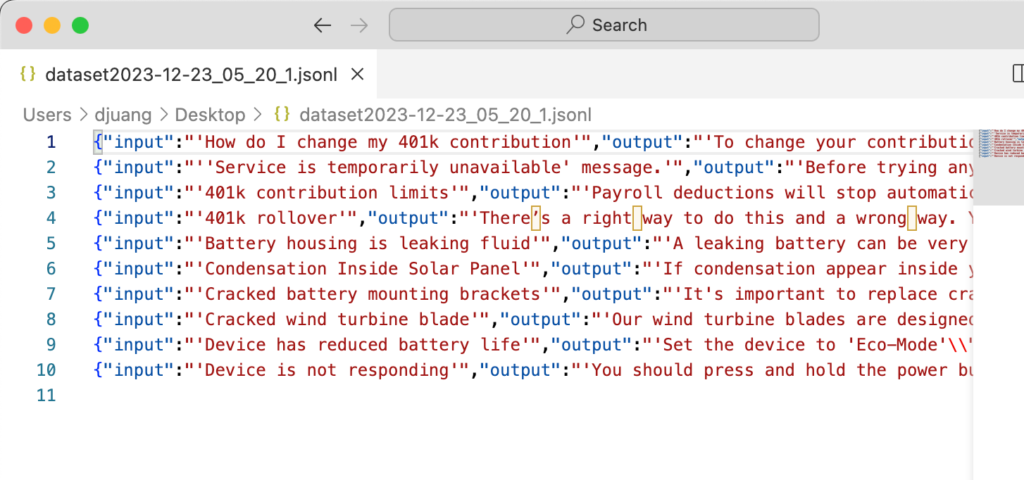
Once the JSONL file is loaded into S3, you can create a fine-tuning job in Amazon Bedrock. The output of the flow should look like the following screenshot below:
Create Fine-tuning Job
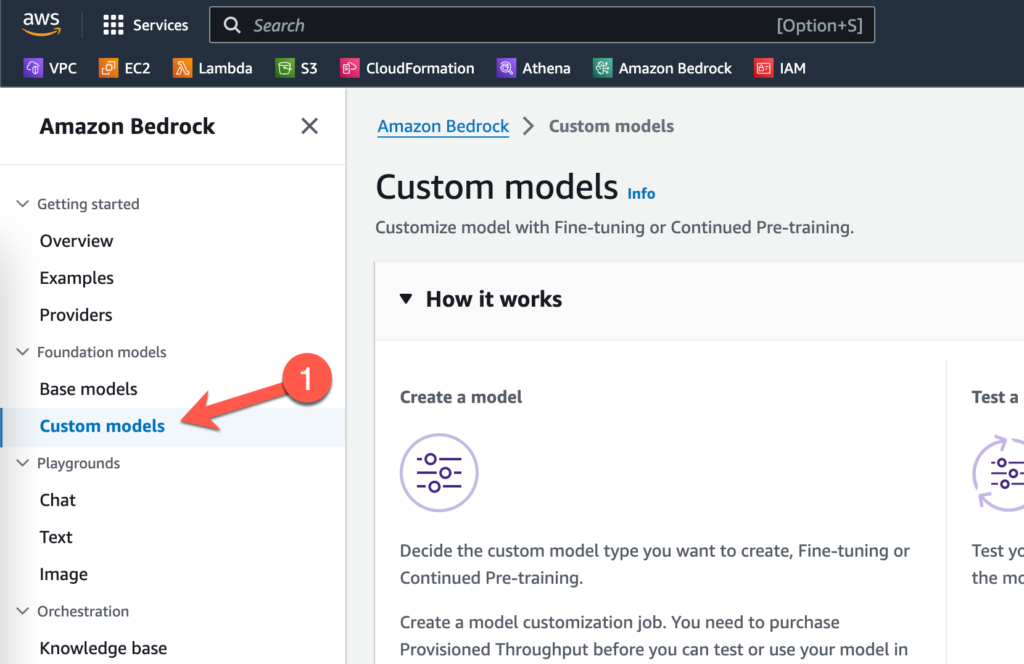
Switching over to Amazon Bedrock, let’s look at how to create a fine-tuning job. After you log into the AWS console and open Amazon Bedrock, navigate to Custom models in the left-hand navigation bar.
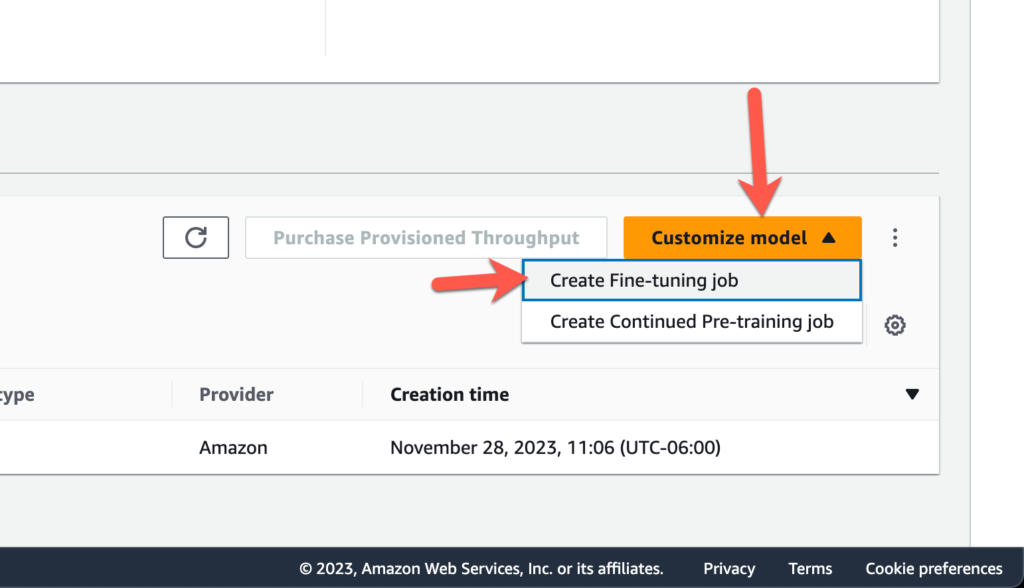
Click on Customize model and then click on Create Fine-tuning job
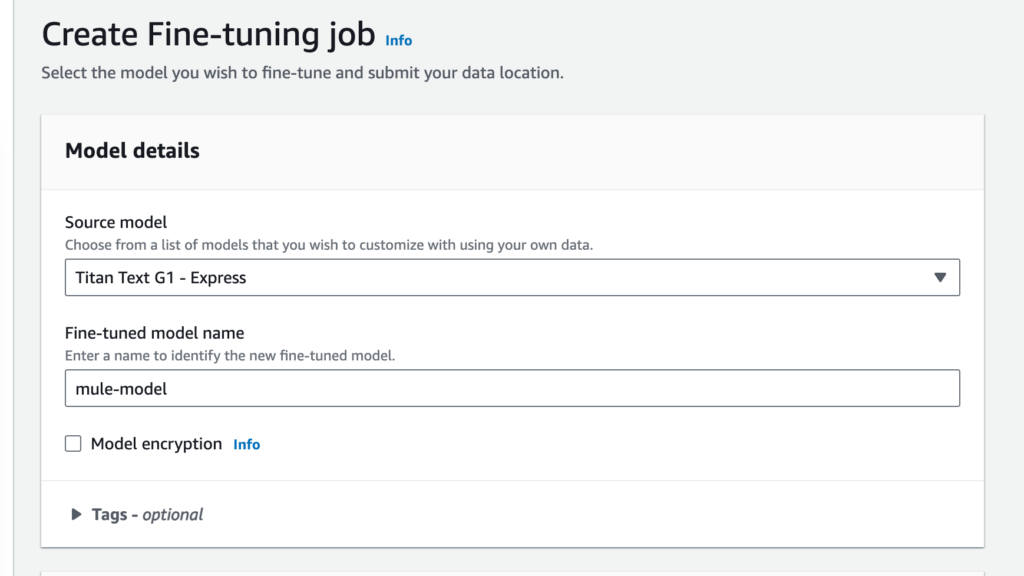
Select a source model. For the demo we used Amazon Titan Text G1 – Lite and then give the fine-tuned model a name (e.g. mule-model)
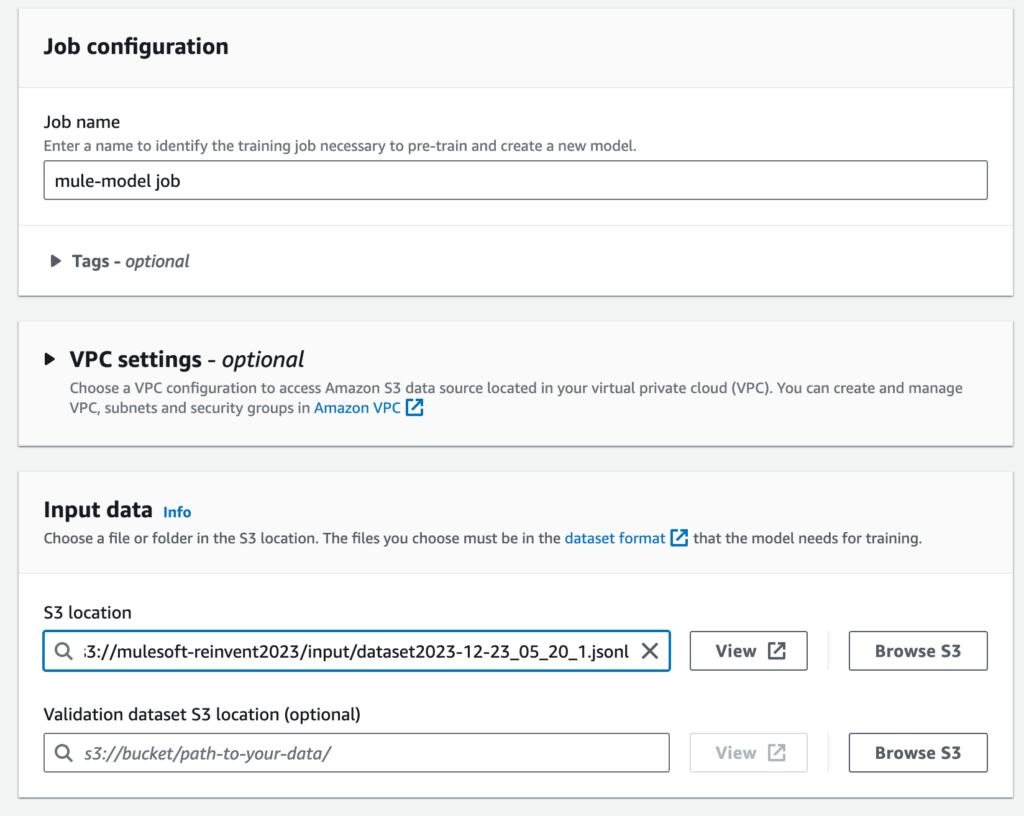
Give the job a name (e.g. mule-model-job) and then under the Input data section, select the location of the JSONL file that you created in S3
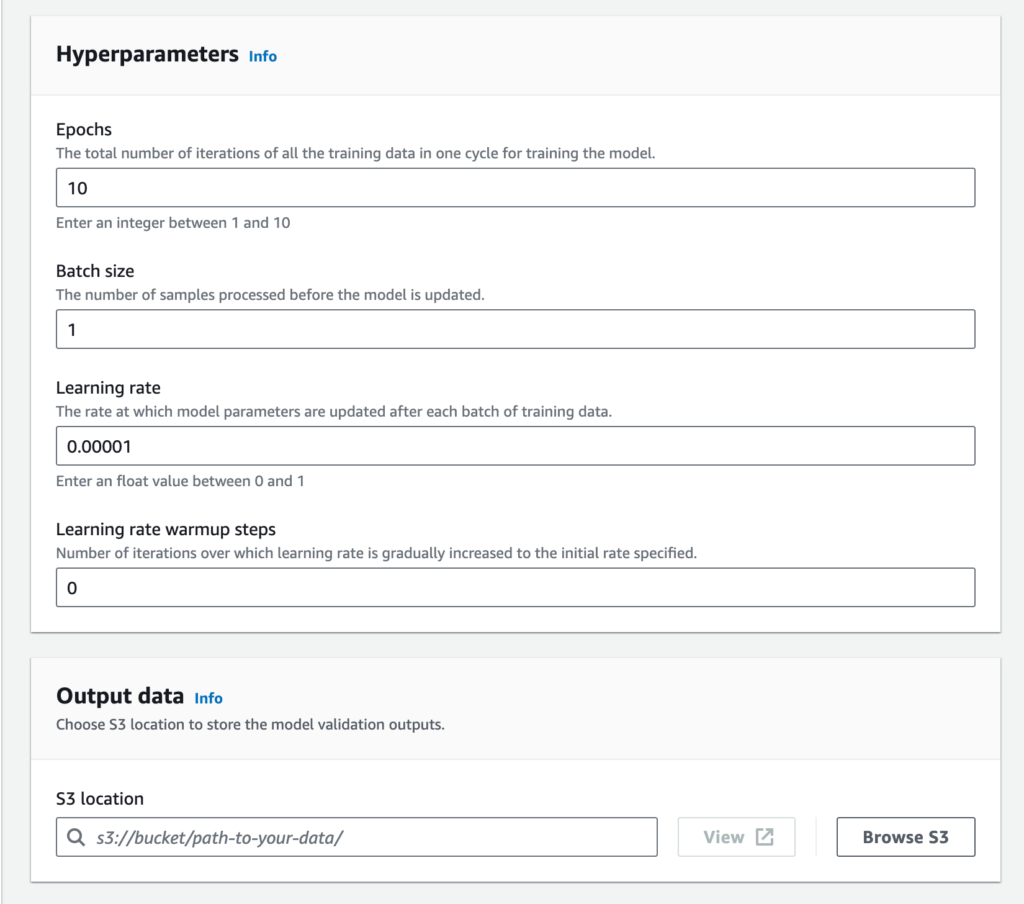
Adjust the Batch size under the Hyperparameters section if you have a small sample size to test against. In this case, I dropped it to 1. Then select the S3 location to store the tuned model under the Output data section.
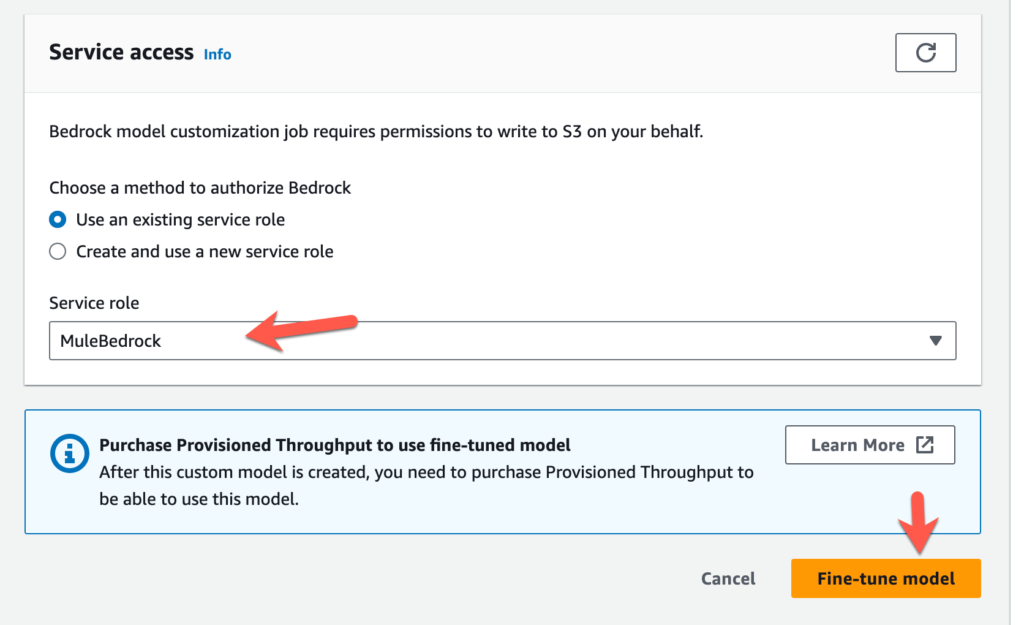
Lastly create a new service role or use an existing service role and click on Fine-tine model
When the job is completed successfully, you’ll see the fine-tuned model under the list of custom models

Using the Model
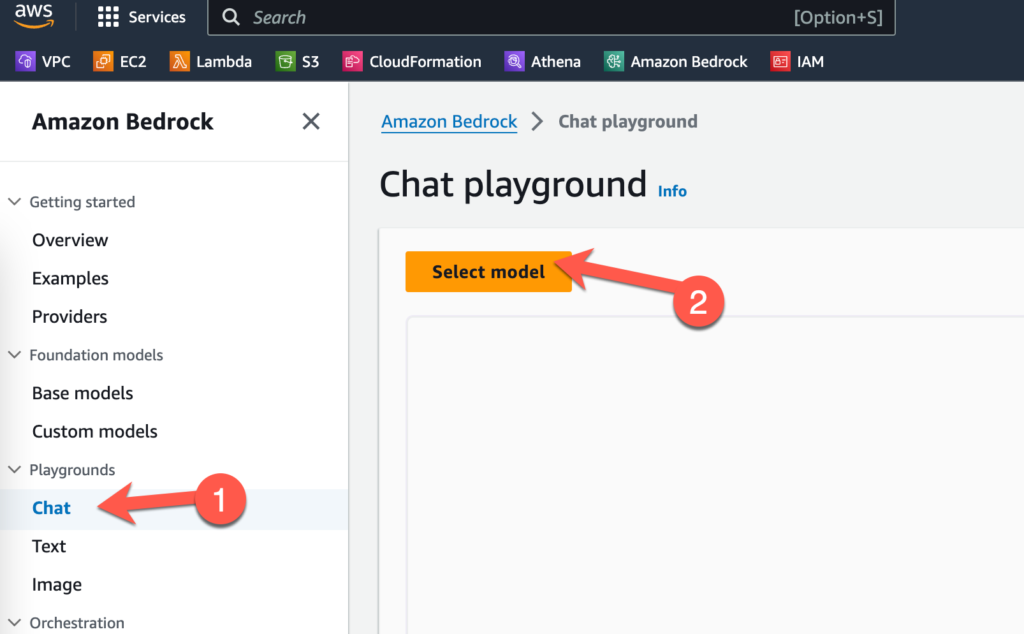
Before you can use the custom model, you’ll need to configure Provisioned Throughput. Once that is configured, you can test it out in the playgrounds. Click on Chat on the left-hand navigation bar and then click Select model
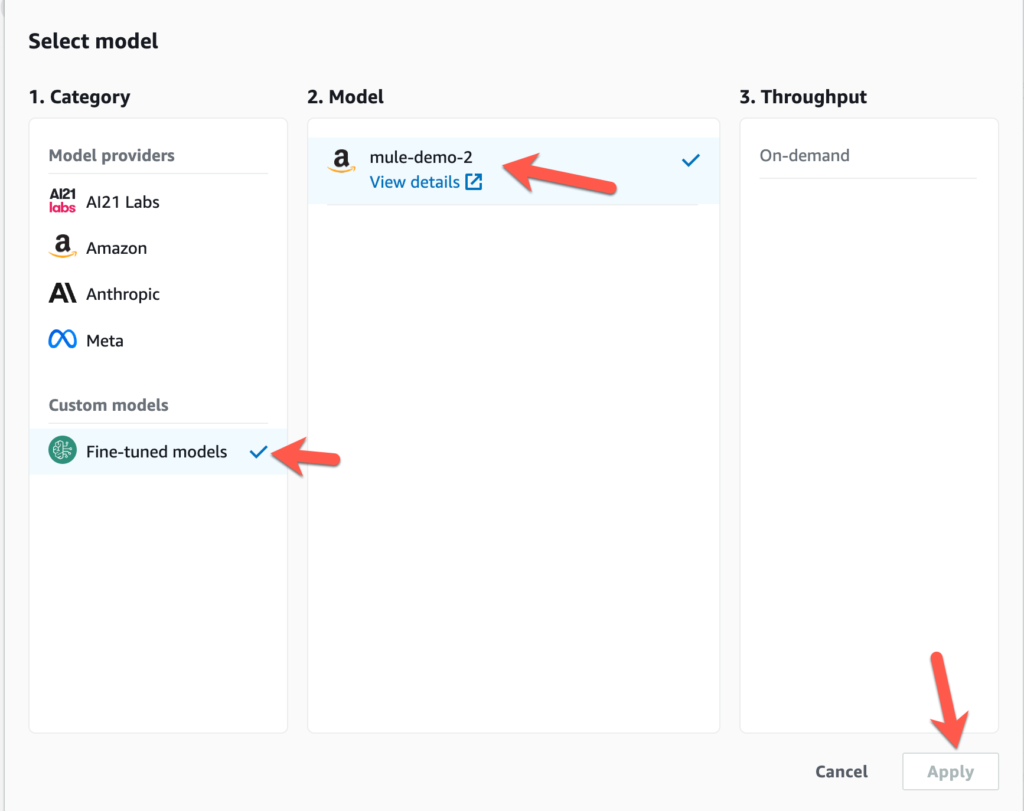
Select Fine-tuned models, the name of the model you created, and then the throughput you provisioned. Click on Apply.
Summary
Preparing the data to fine-tune the model is an important aspect of using Functional Models. Using MuleSoft, you can grab data from any system of record and transform it to the correct format in order to be used for training. Let me know how your experience is going with Amazon Bedrock or if you run into any issues in the comments below.
Leave a Reply