
The Microsoft 365 Business Central connector enables you to manage entities for your companies. In this codelab you’ll learn how to set up the connector to work with Business Central. We’ll be configuring the connector to use OAuth2 Connection Provider.
Setup Azure Active Directory App
Before we create the MuleSoft app, we need to set up an Application in Azure Active Directory (a.k.a as Entra ID) to allow the connector to communicate with Business Central.
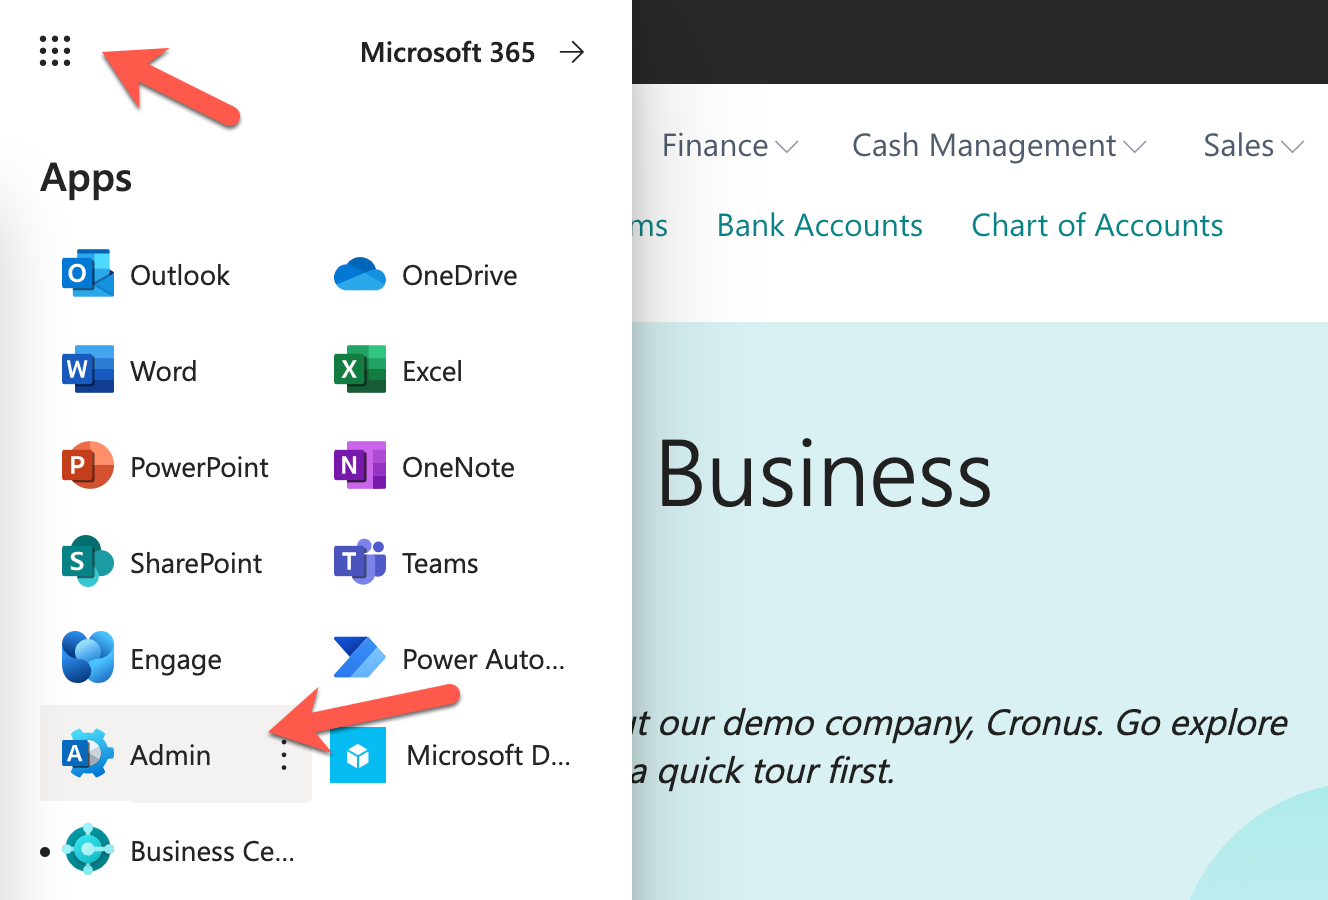
Switch to your browser and login to Business Central. Click on the App Launcher in the top left and click on Admin
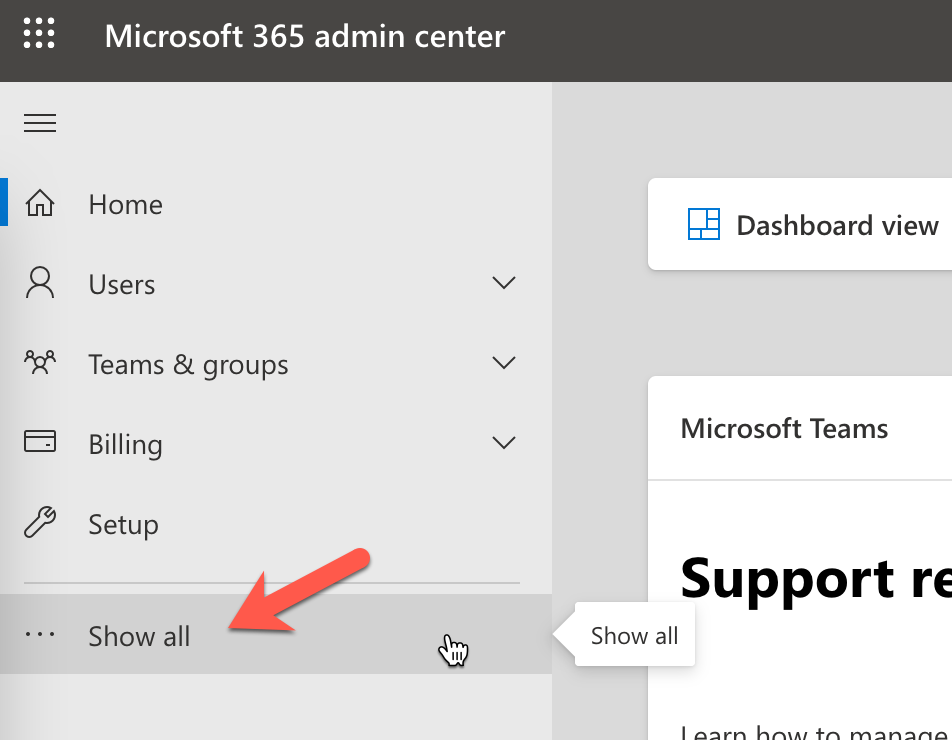
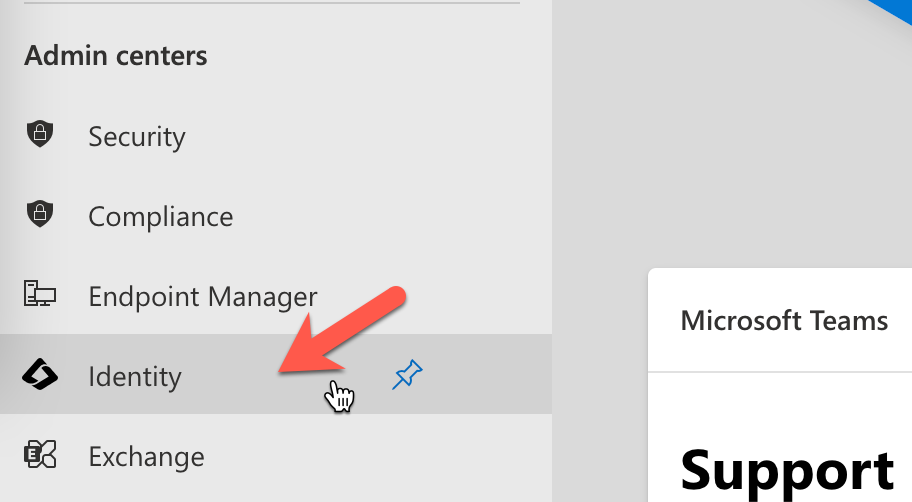
On the left-hand navigation, click on Show all and click on Identity
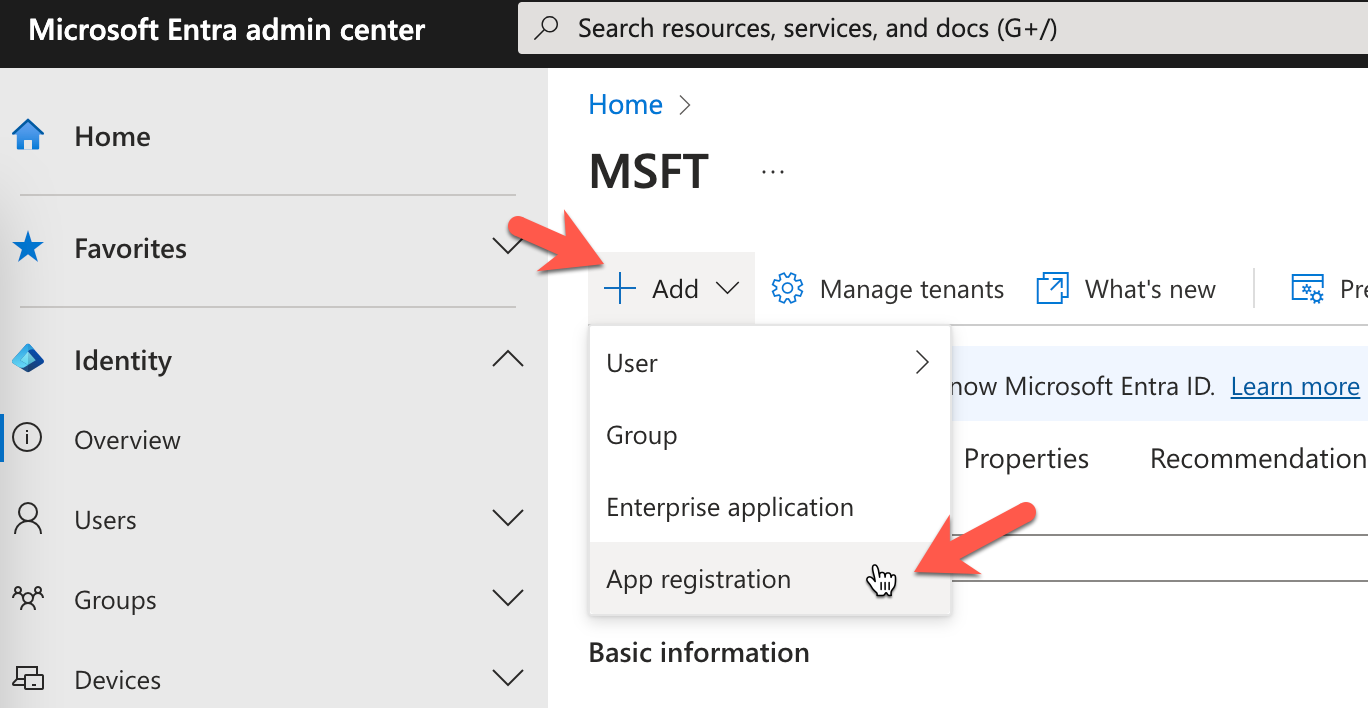
Click on Add and click on App registration
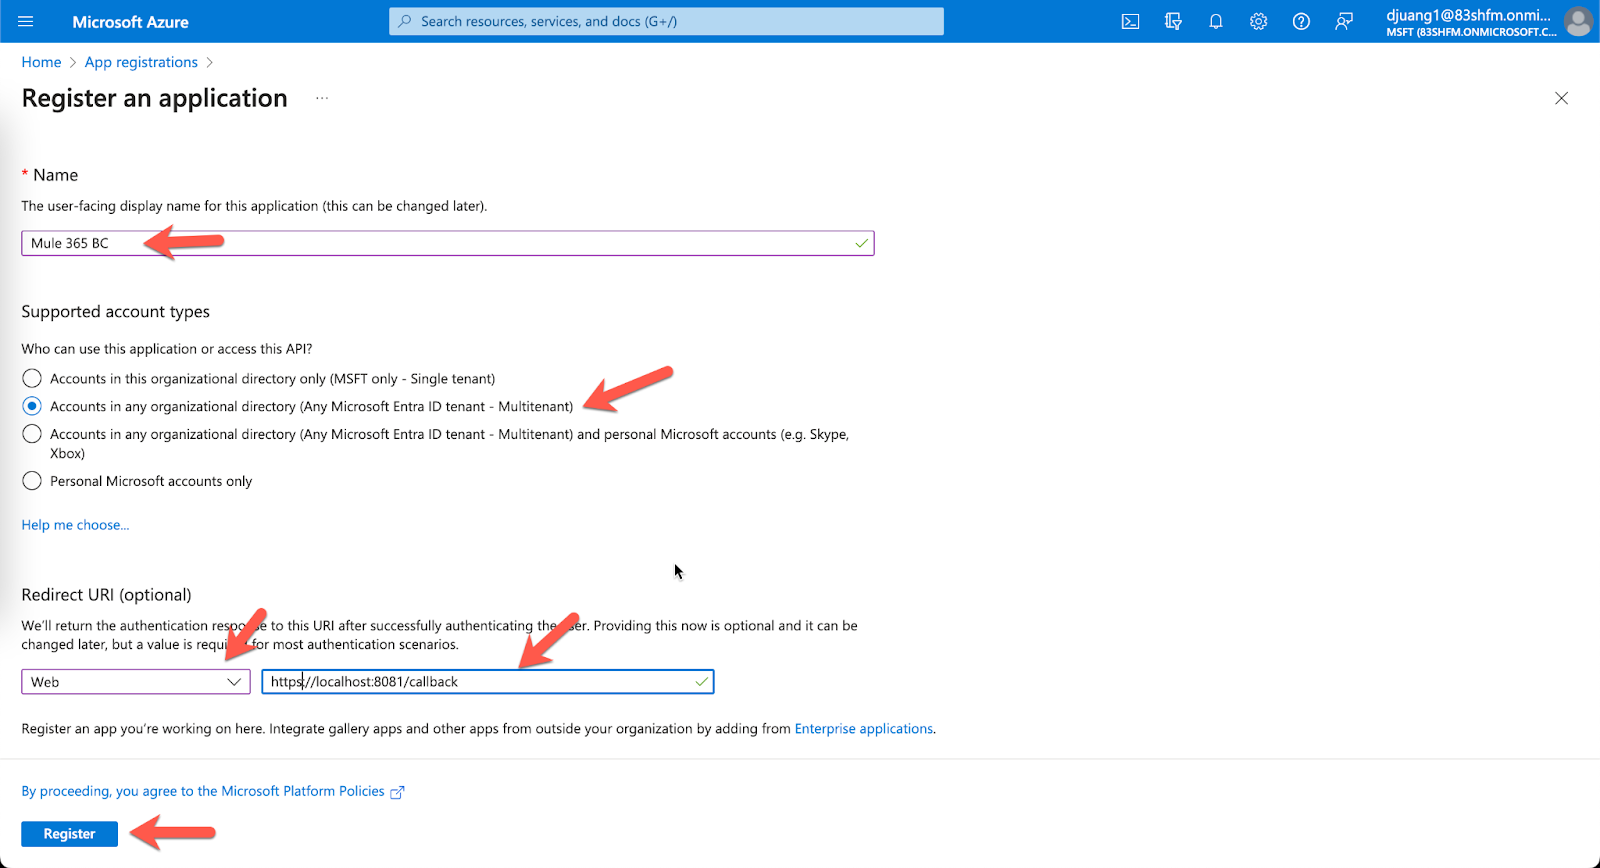
Give the application a name (e.g. Mule 365 BC). For the Supported account types section, check the Accounts in any organizational directory (Any Microsoft Entra ID tenant – Multitenant) check box. In the Redirect URI section, select Web from the drop-down and fill in the field with http://localhost:8081/callback. Lastly click on Register
In the next screen, copy down the Application (client) ID (e.g. 662e3c92-7816-42f1-a5e9-119d8bdb9439). We’ll need this when we configure the MuleSoft connector later.
Under the Manage section, click on API permissions. Click on Add a permission

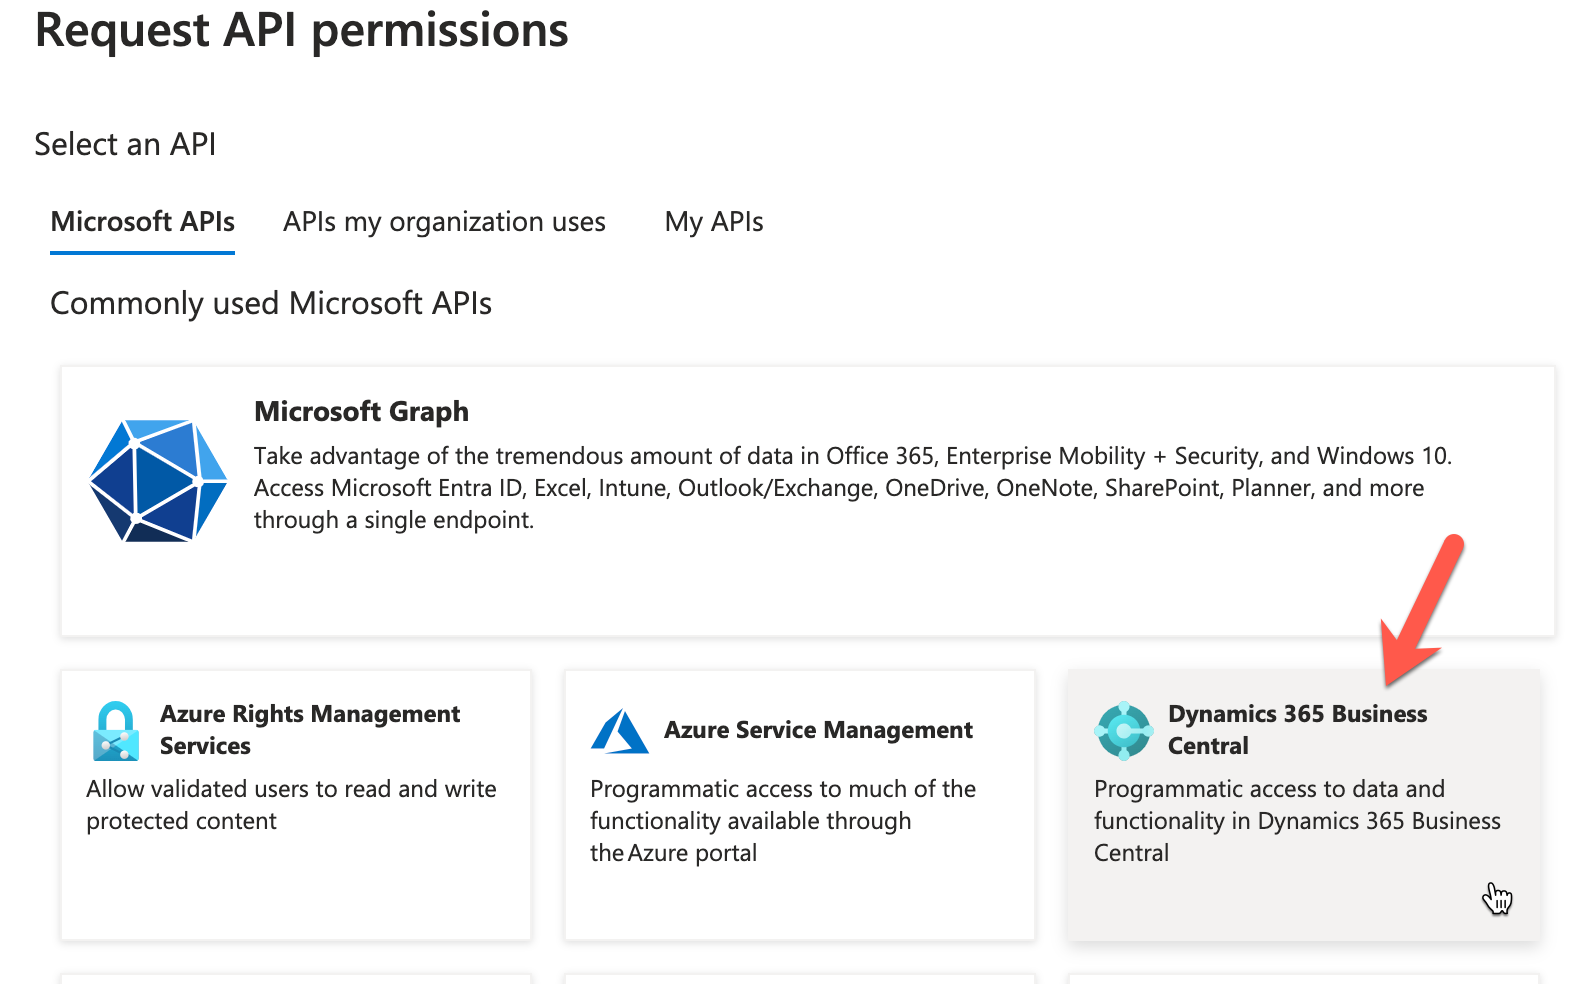
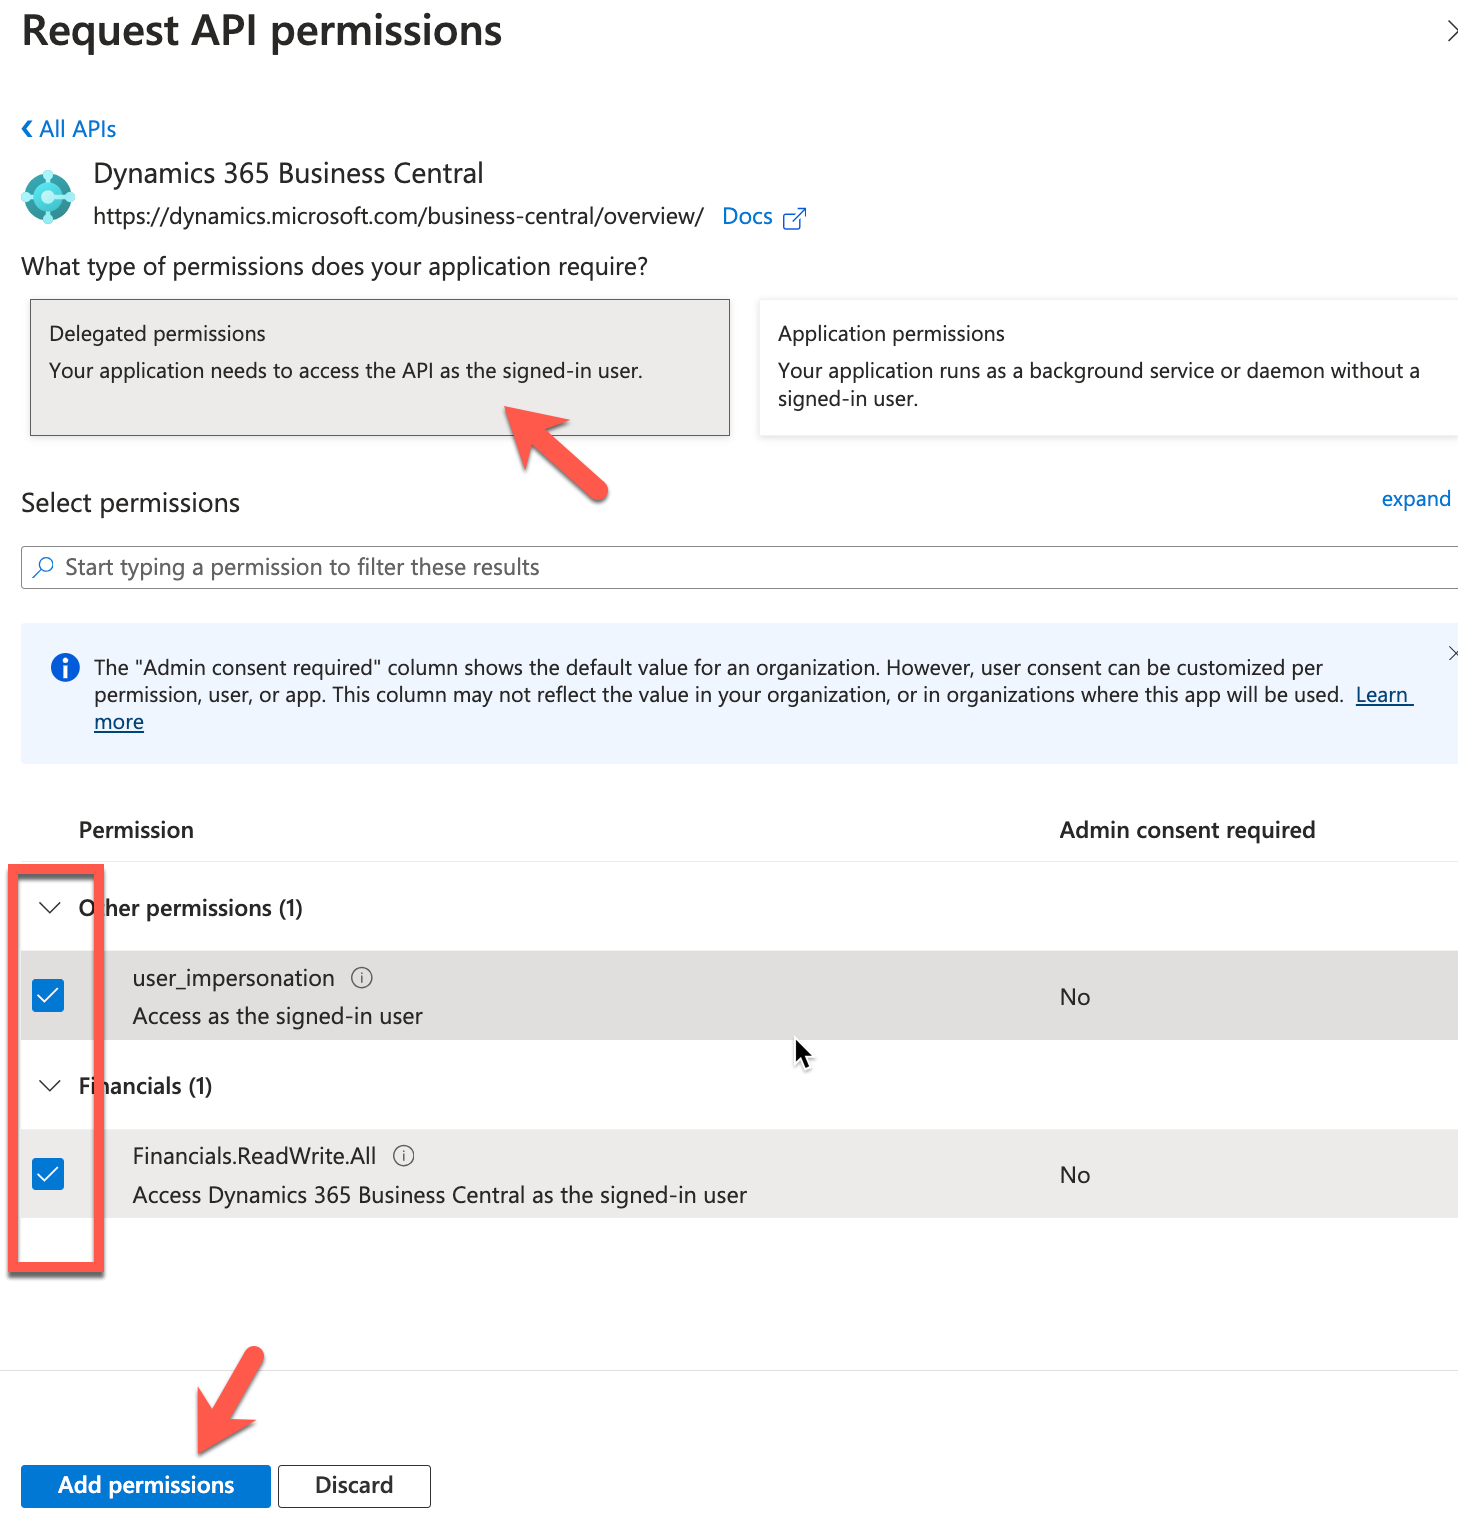
In the Request API permissions window, click on Dynamics 365 Business Central
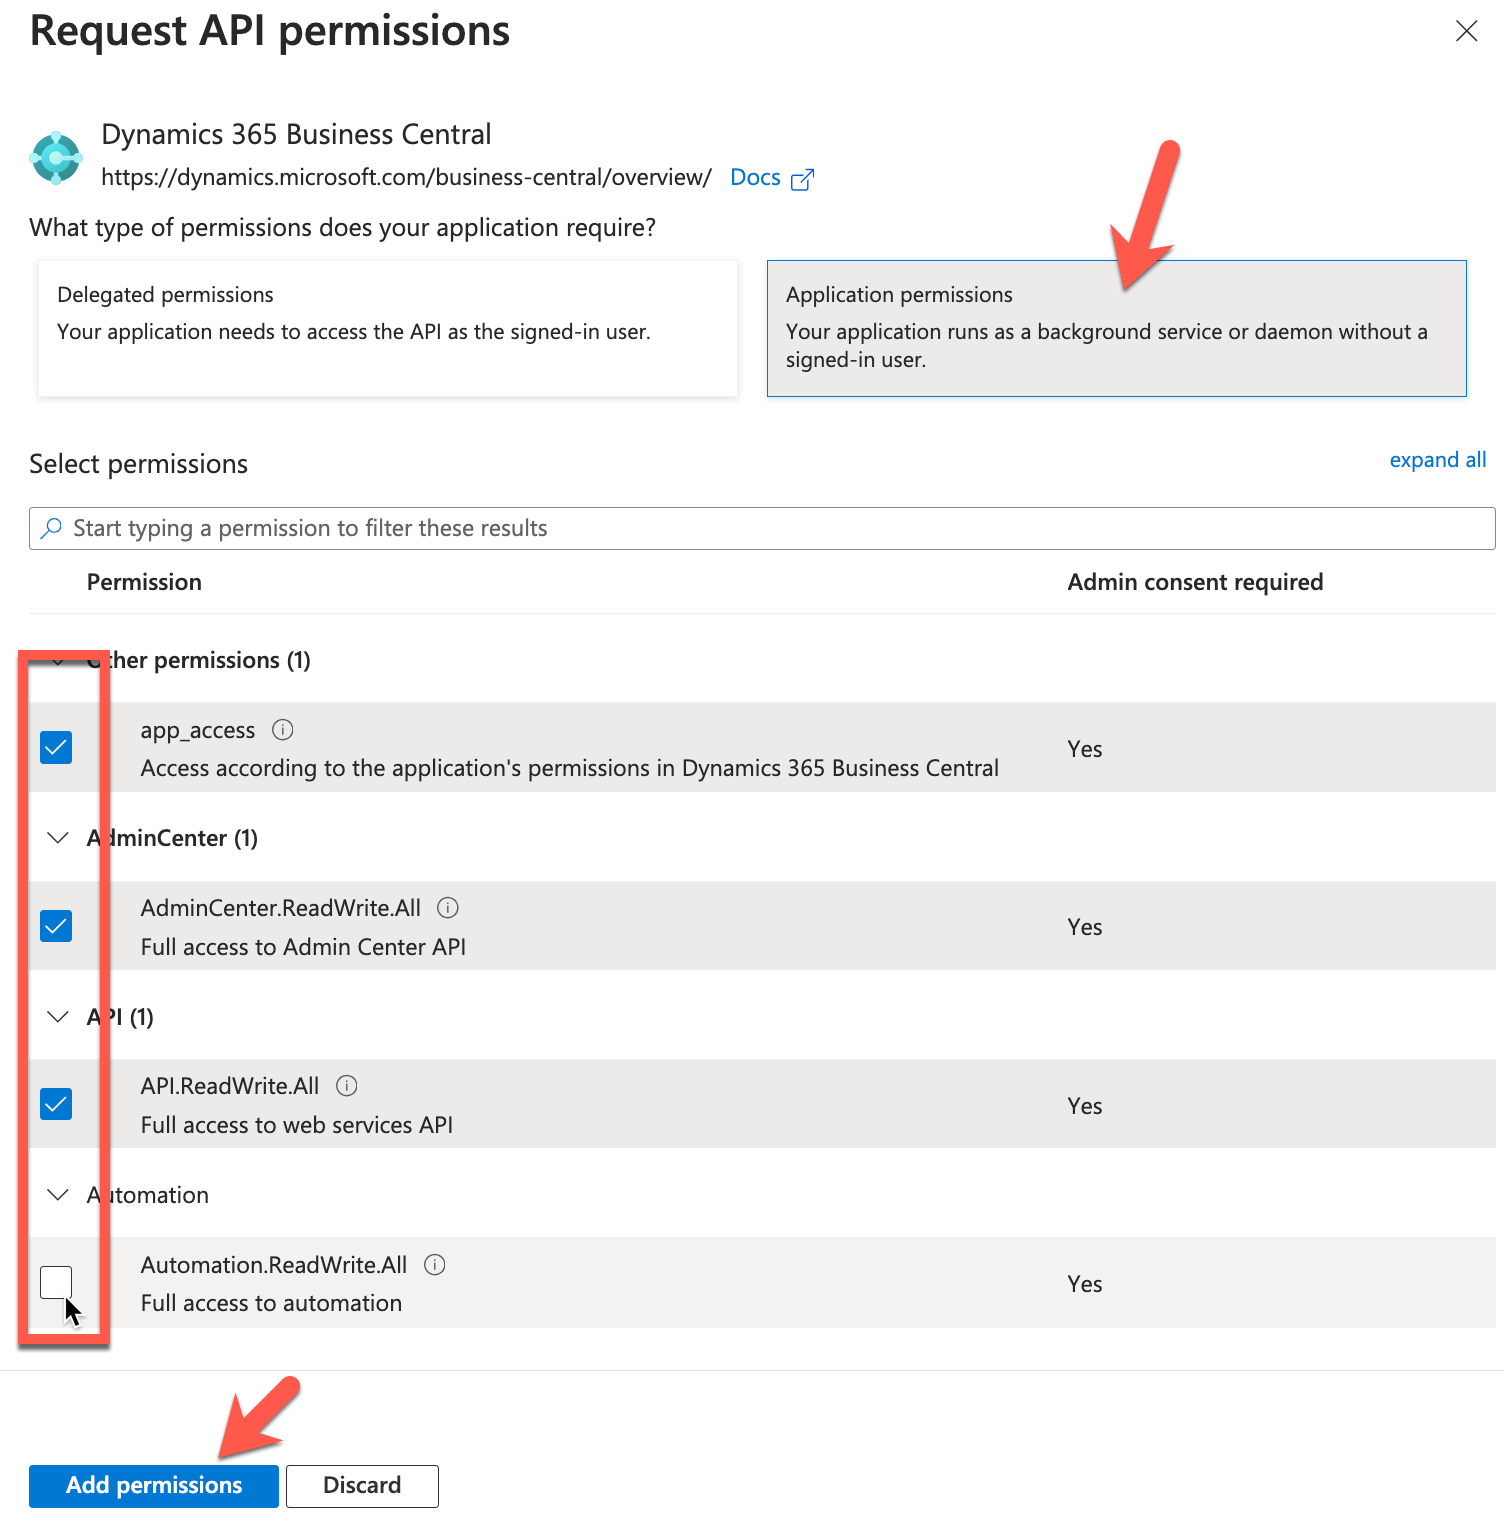
Click on Application permissions and check all the checkboxes before clicking on Add permissions.
Repeat the process but select Delegated permissions, select all the checkboxes, and then click on Add permissions.
Now that we’ve add all the APIs that the API can call, click on Grant admin consent for <Parent Tenant>

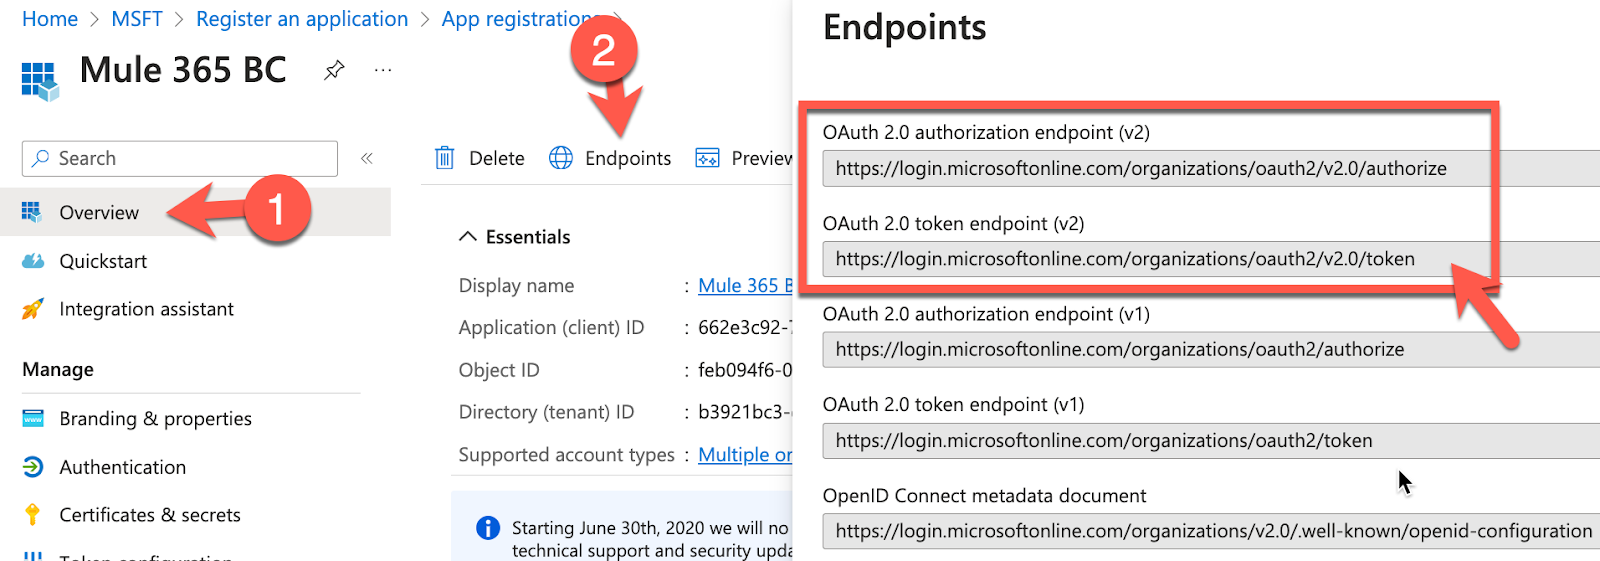
Click on Overview and then click on Endpoints. You’ll need to copy down the OAuth 2.0 token endpoint (v2) and OAuth 2.0 authorization endpoint (v2) URL which we’ll need when we configure the MuleSoft connector.
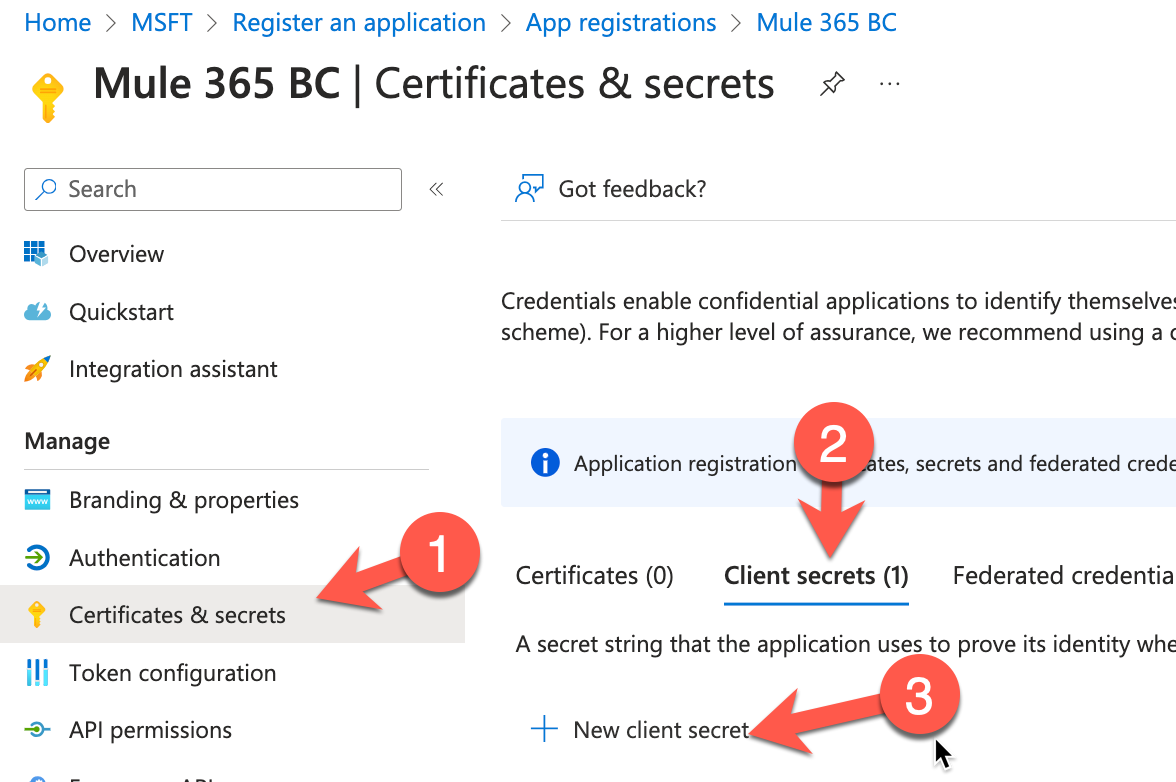
In the left-hand navigation, under the Manage section, click on Certificates & secrets. Click on Client Secrets and then click on New client secret
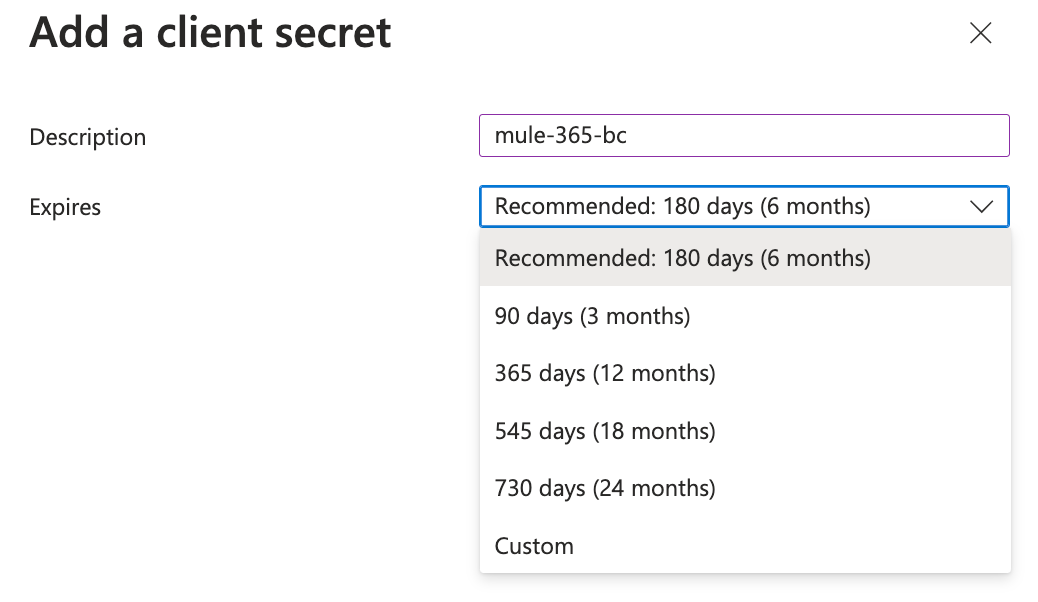
Give the client secret a Description, leave the Expires field with the default value, and click on Add
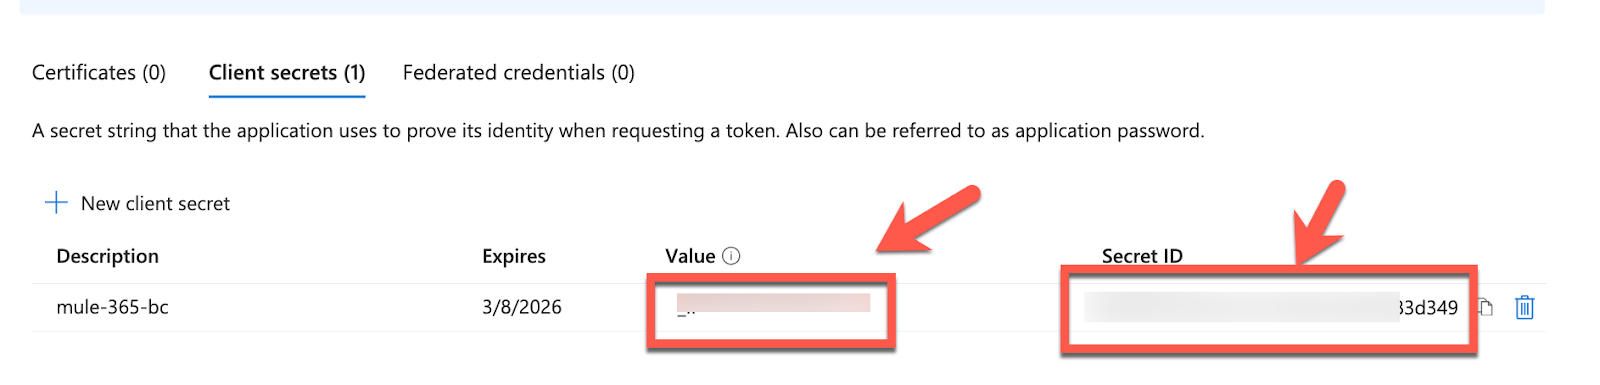
Copy down the Value and Secret ID. You won’t be able to see the value again once you leave the screen. The value is the client secret that you’ll need to configure the connector in MuleSoft.
Create Mule Application
For the purpose of the codelab, we’re going to create a very simple flow that gets the list of entities for a company and outputs that to the browser in JSON format.
Open Anypoint Studio and create a new Mule Project

In the New Mule Project window, give the project a name (e.g. business-central-example), select a Runtime, and then click on Finish
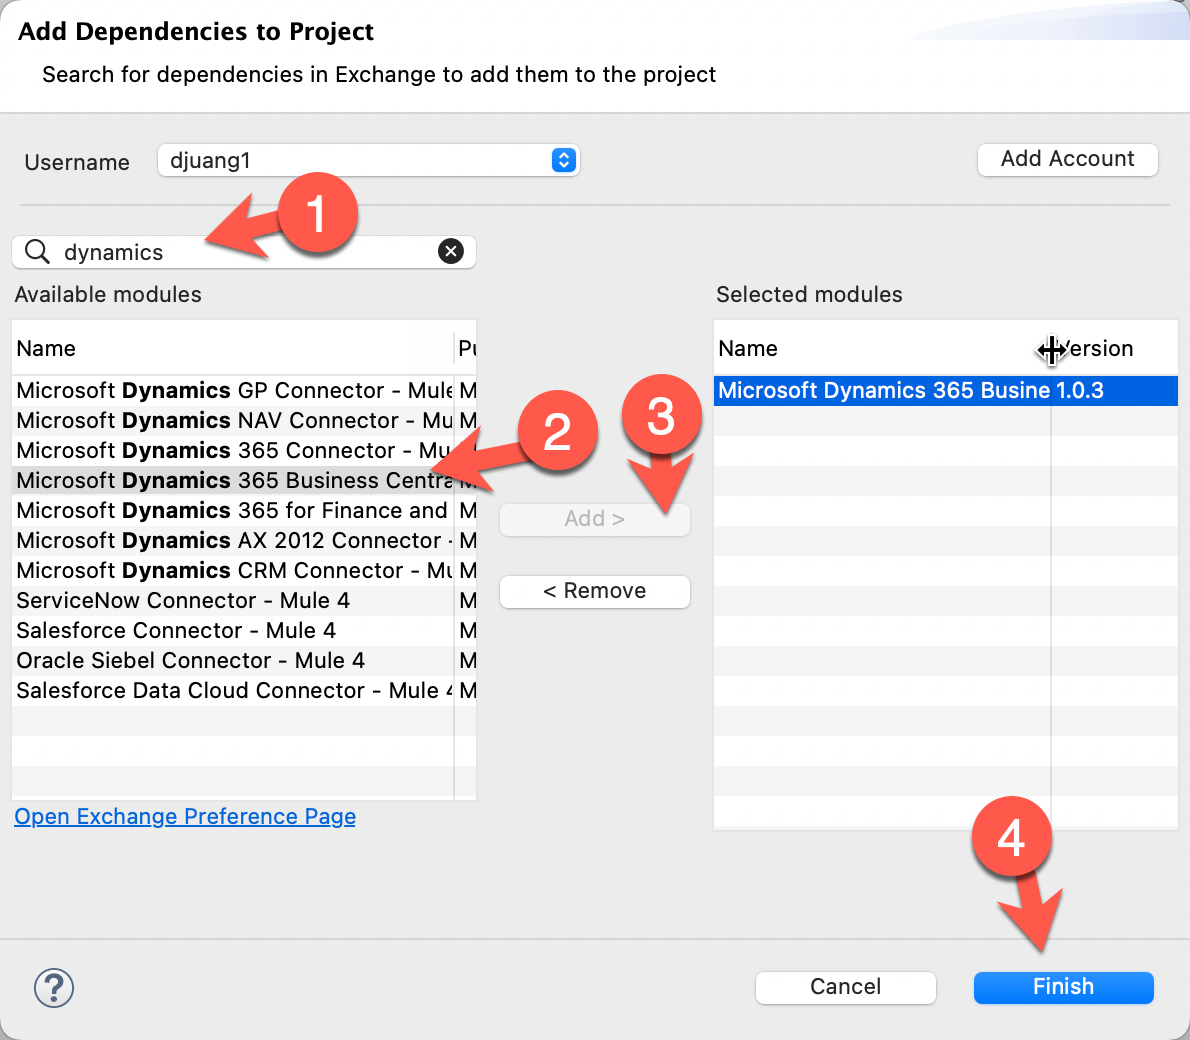
Next we want to add the Business Central connector to the project. In the Mule Palette, click on Search in Exchange. In the window that pops up, search for dynamics and select the Business Central or Finance and Operations connector. Click on Add and then click on Finish.
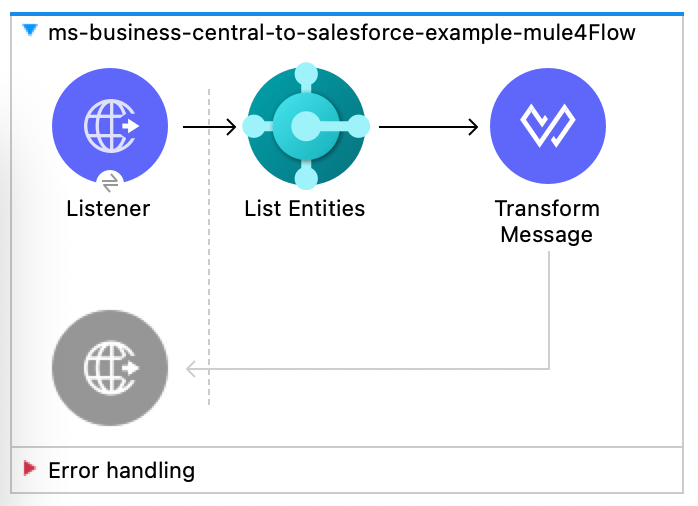
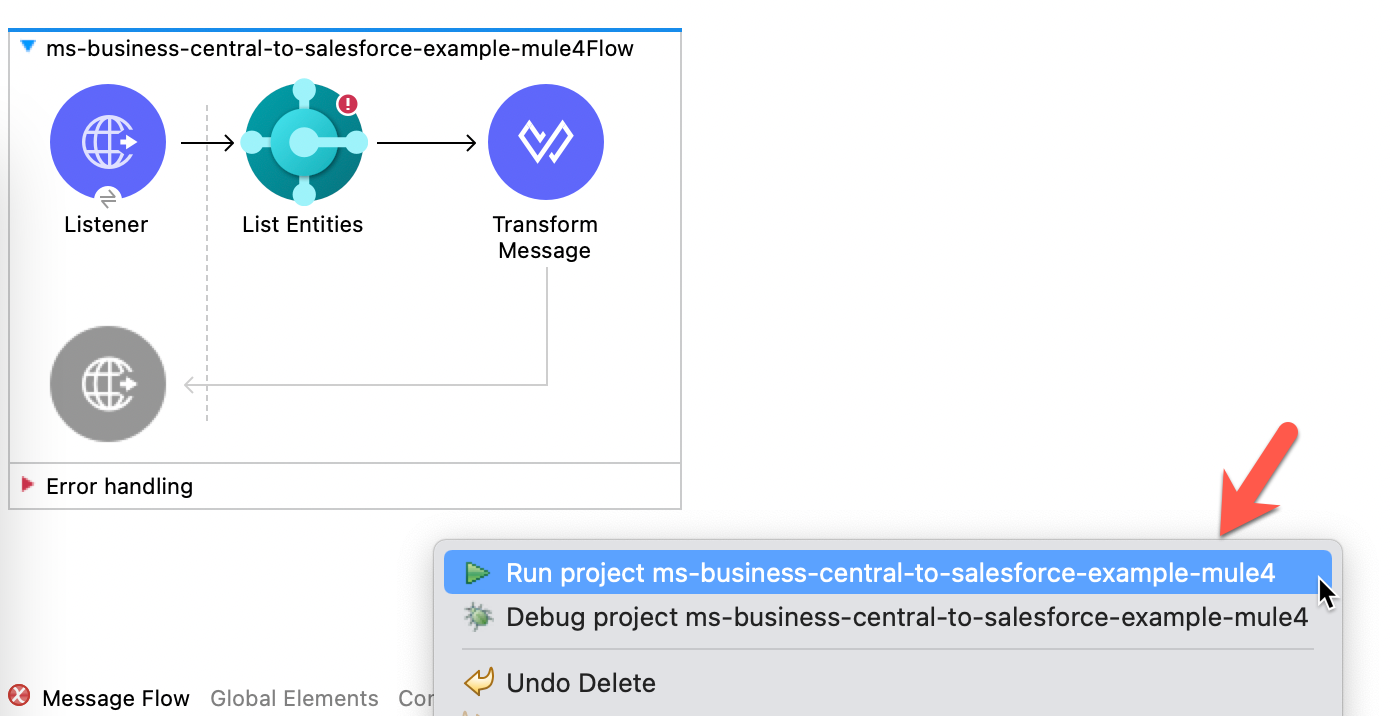
With the project created and the connector added to the project, let’s create the flow. Drag and drop the following components into a new Mule project so it looks like the following screenshot:
- HTTP > HTTP Listener
- Microsoft Dynamics 365 Business Central > List Entities
- Transform Message
HTTP Listener
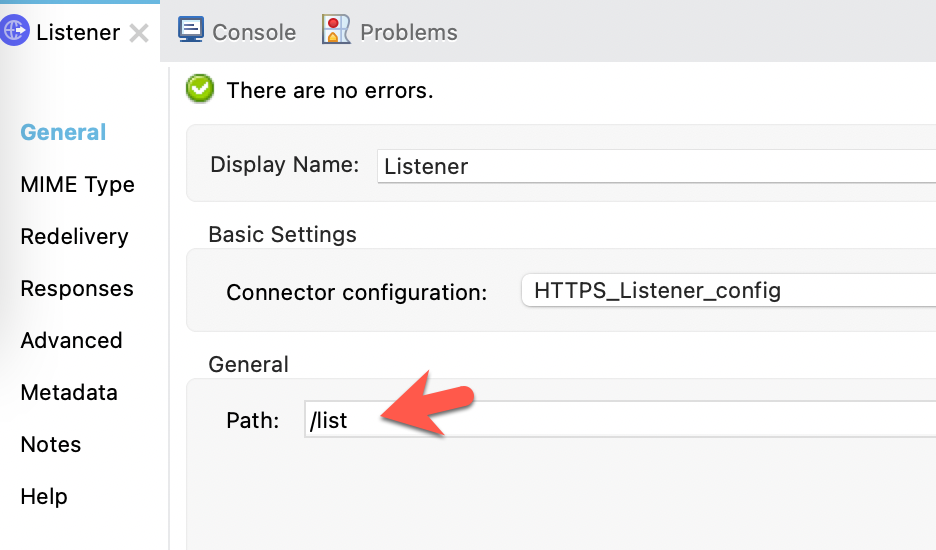
The configuration for the HTTP Listener operation will be pretty standard. For the config, leave the default protocol and port (e.g. http://localhost:8081)
For the path, set it to /list
Microsoft Dynamics 365 Business Central > List Entities
For the Microsoft Dynamics 365 Business Central Connector configuration, click on the green plus sign.
In the Global Element Properties window, change the dropdown for the Connection field to OAuth2 Connection Provider.

Configure the General tab according to the table below. Once configured, click on Test Connection… If configured correctly and the test is successful, click on OK
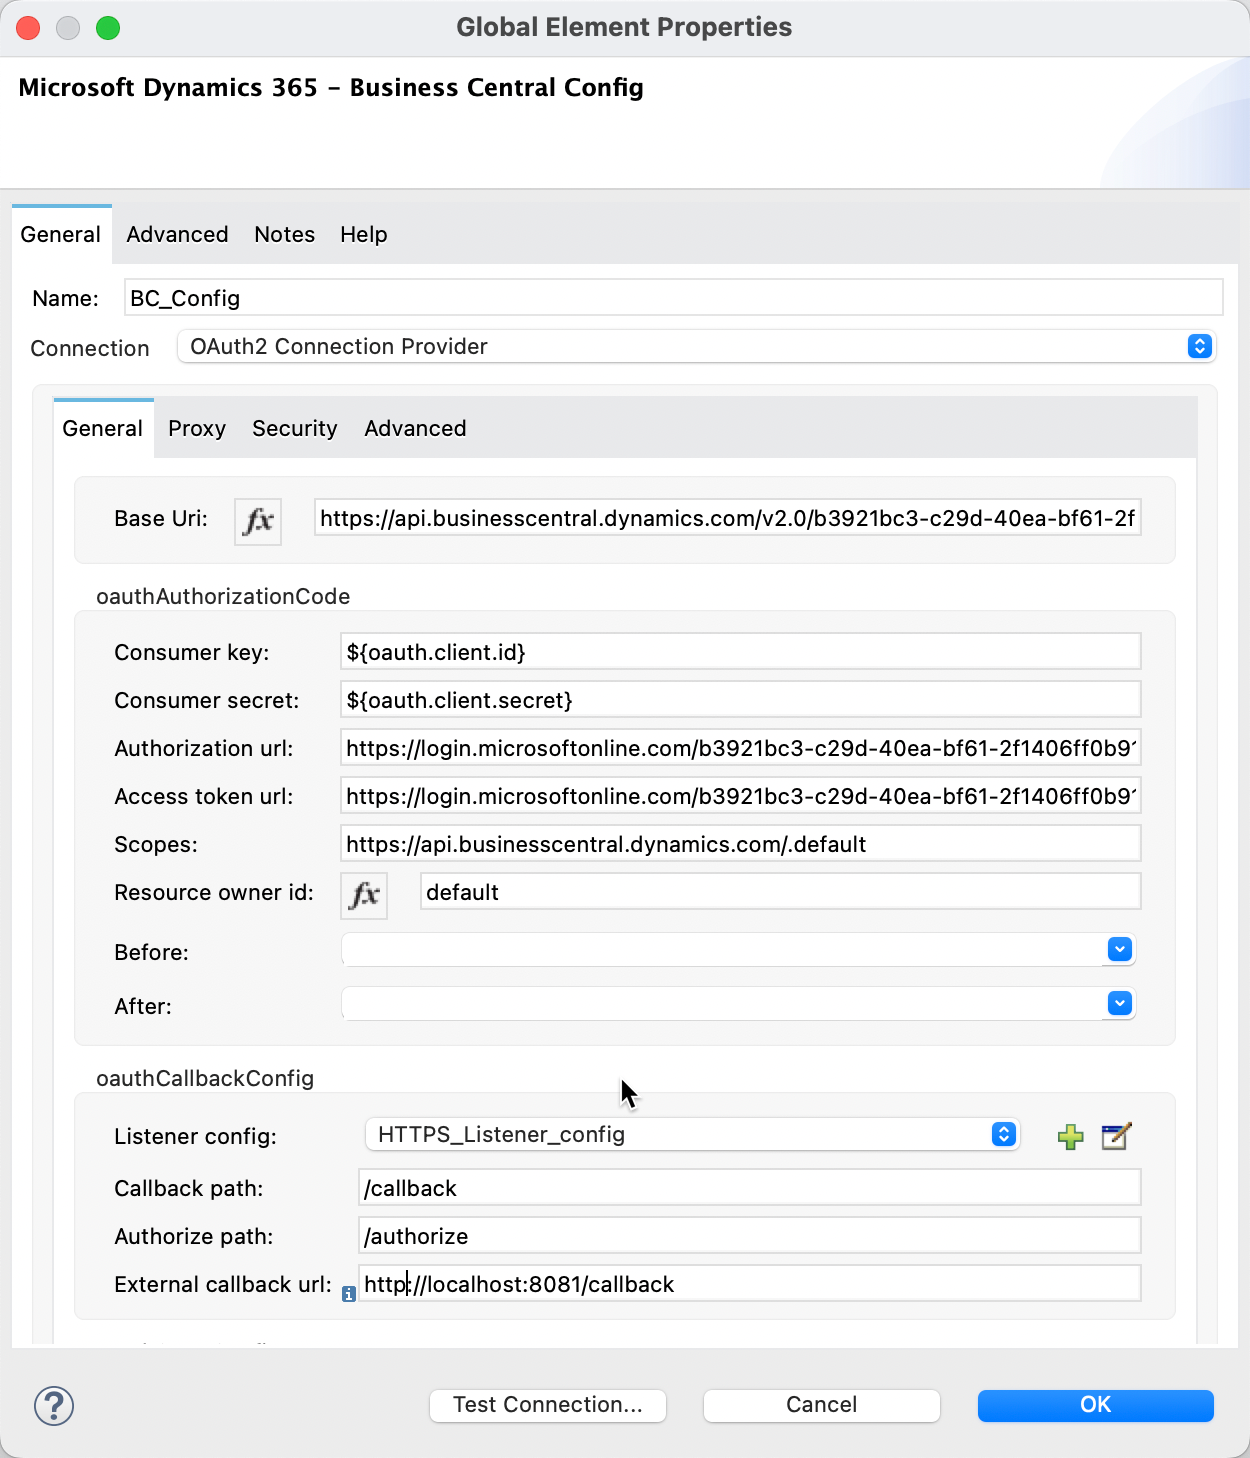
| Base Uri | https://api.businesscentral.dynamics.com/v2.0/<Tenant ID>/<Environment Name>/api/v2.0 To get the Tenant ID and Environment, switch back to Business Central and click on the ? icon and click on Help & Support. Scroll to the bottom and you’ll see the values: 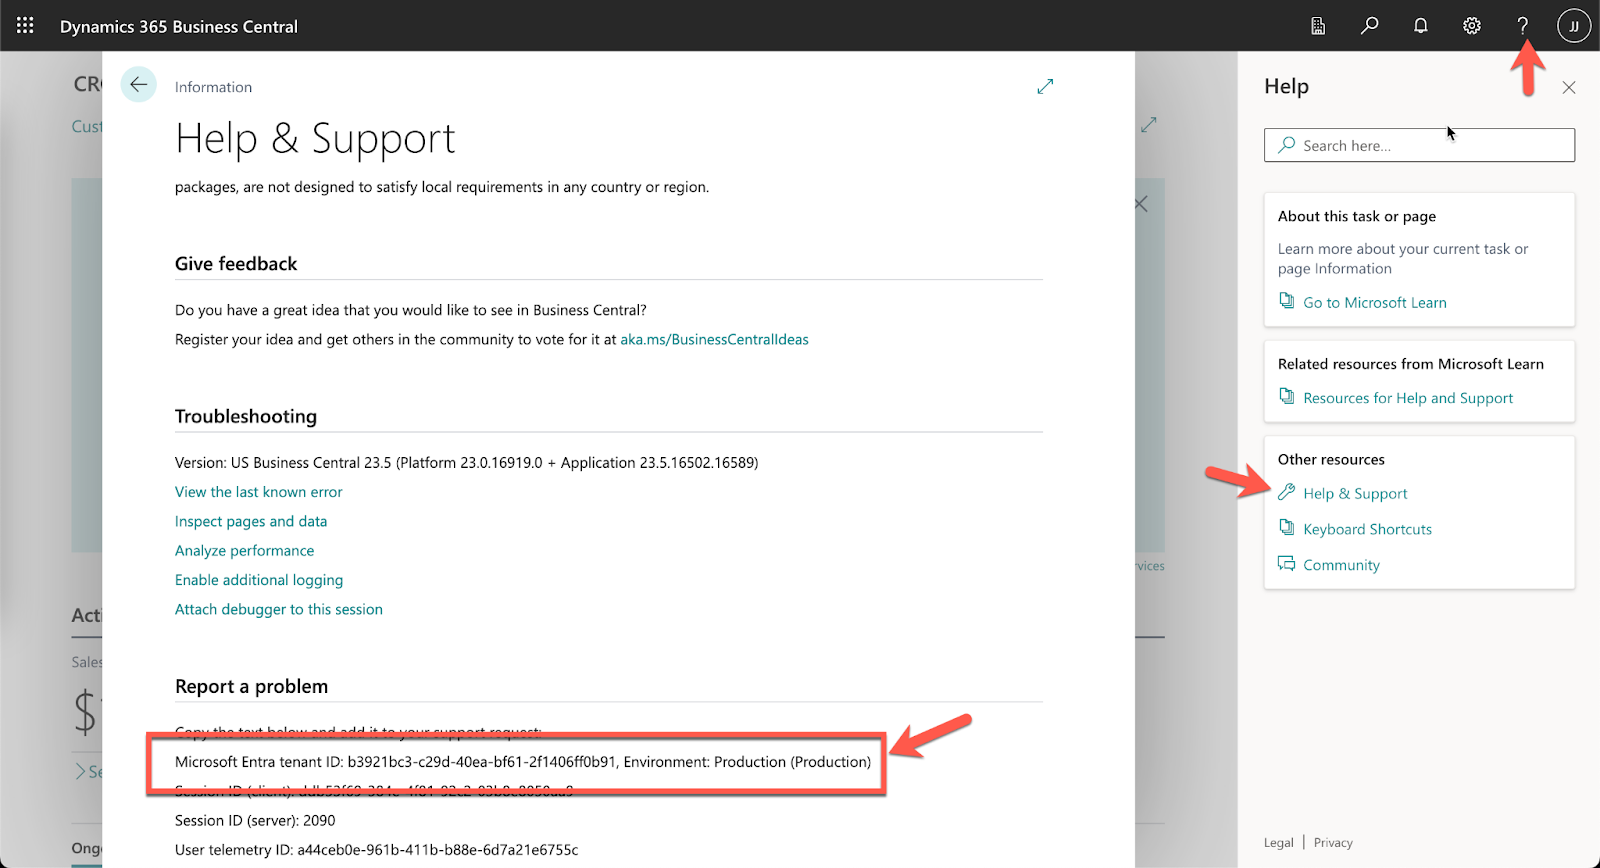 |
| Client ID | The Application (client) ID from the Setup Azure Active Directory App step (e.g. 662e3c92-7816-42f1-a5e9-119d8bdb9439) |
| Client Secret | This is the value from the Credentials & secrets section 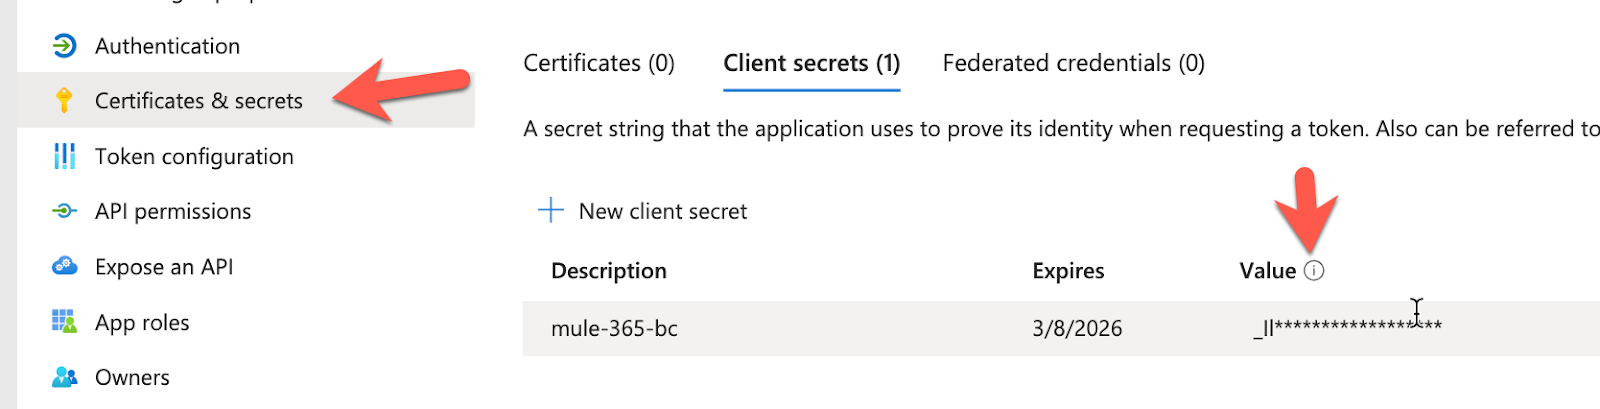 |
| Authorization url | https://login.microsoftonline.com/<Tenant Id>/oauth2/v2.0/authorize |
| Access token url | https://login.microsoftonline.com/<Tenant Id>/oauth2/v2.0/token |
| Scopes | https://api.businesscentral.dynamics.com/.default |
| Listener config | This should be the same listener as the one setup for the HTTP Listener |
| Callback path | /callback |
| Authorize path | /authorize |
| External callback url | http://localhost:8081/callback |
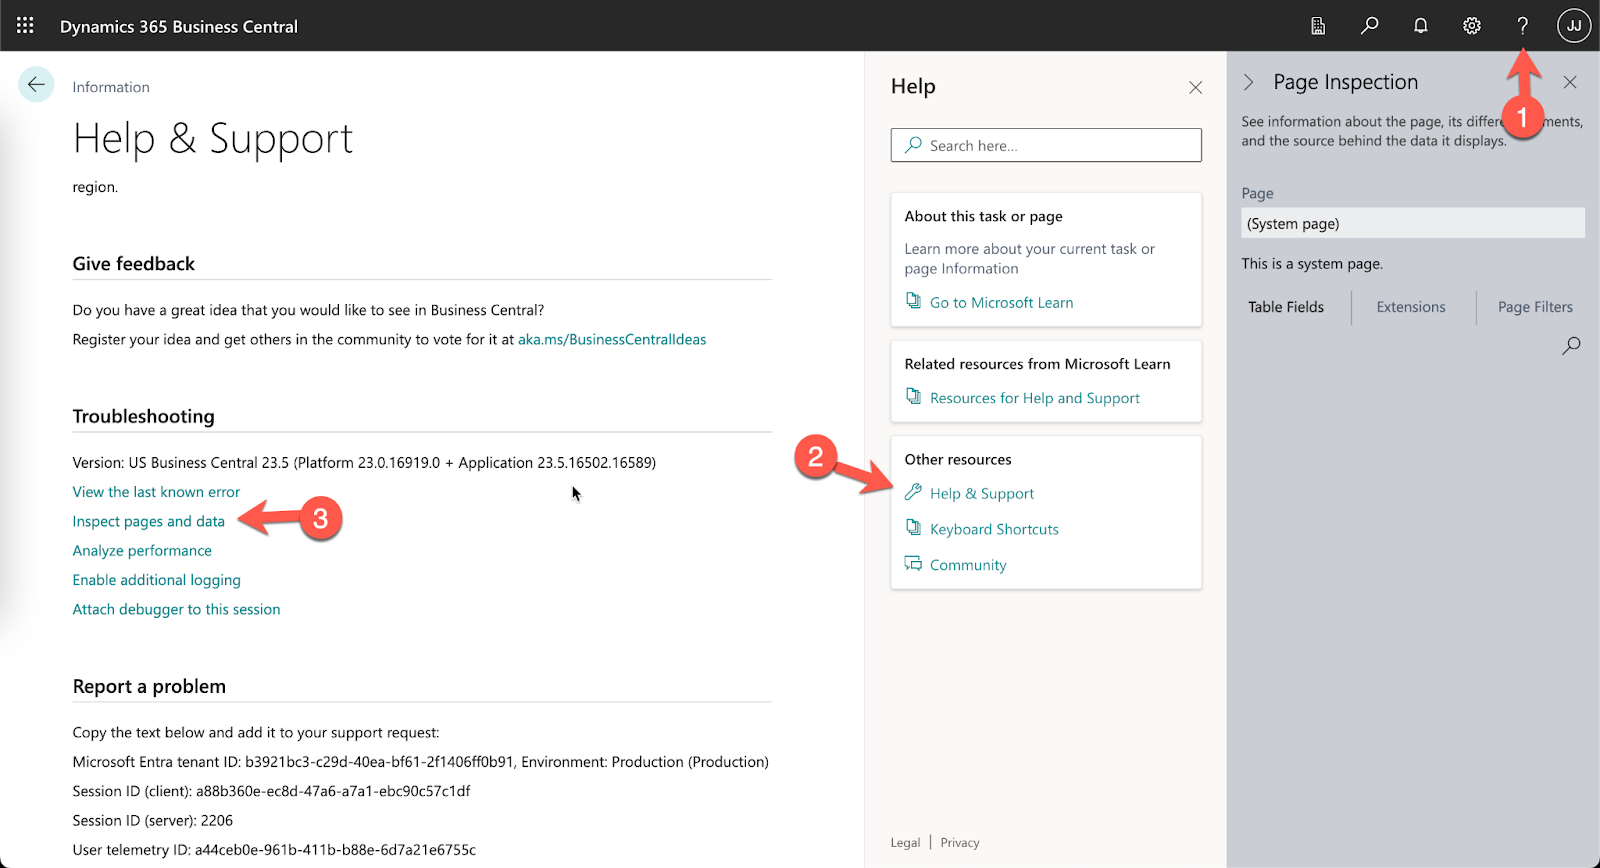
Back in the Mule properties tab, we need to get the Company ID. Switch back to Business Central and click on the ? icon in the top right.
Click on Help & Support and click on Inspect pages and data.
Go back to the home window and click on All Reports
Click on All > System Administration > Data > Reference Data > Companies
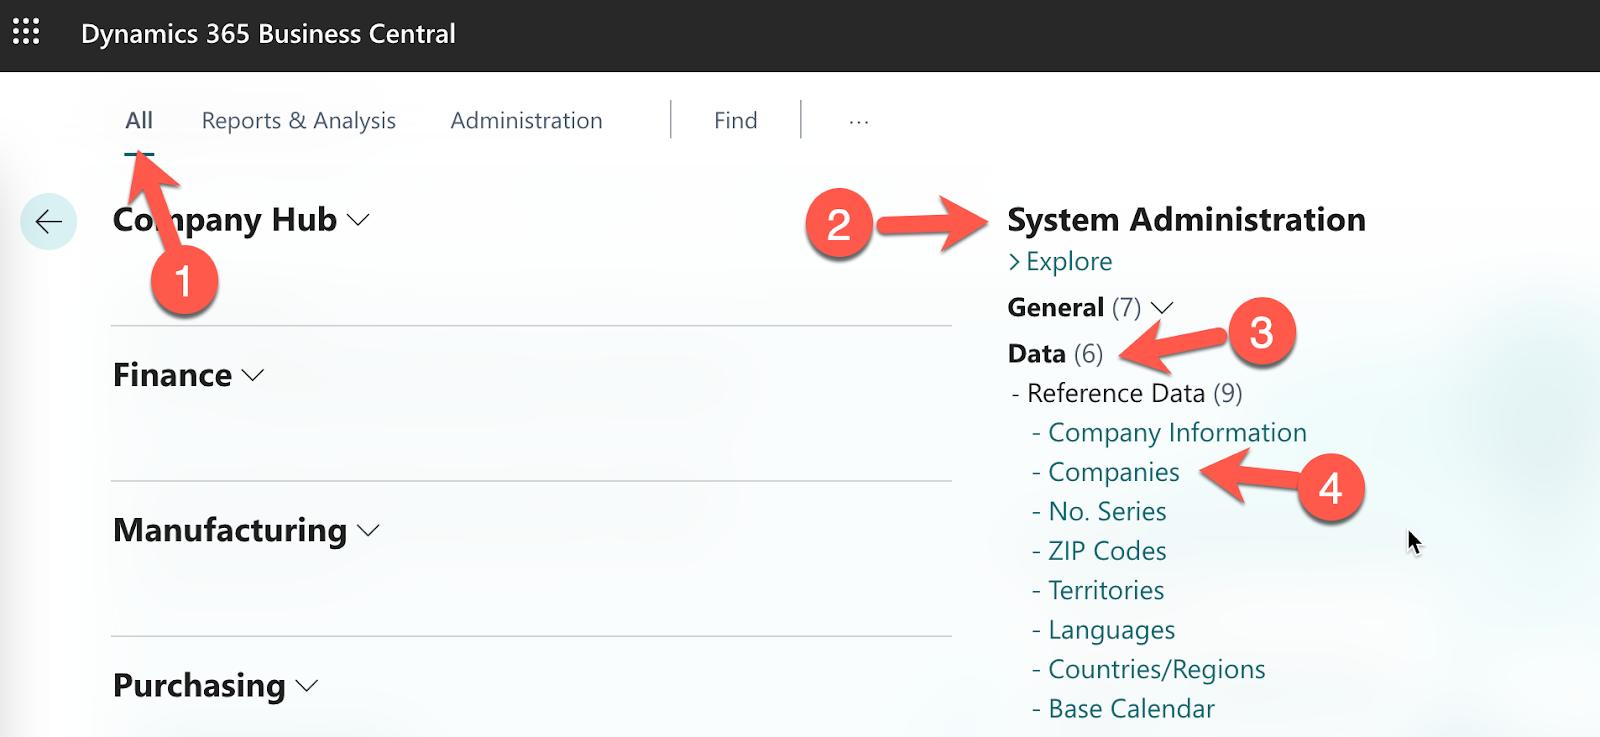
Select a company from the list and look at the ID in the Page Inspection section.
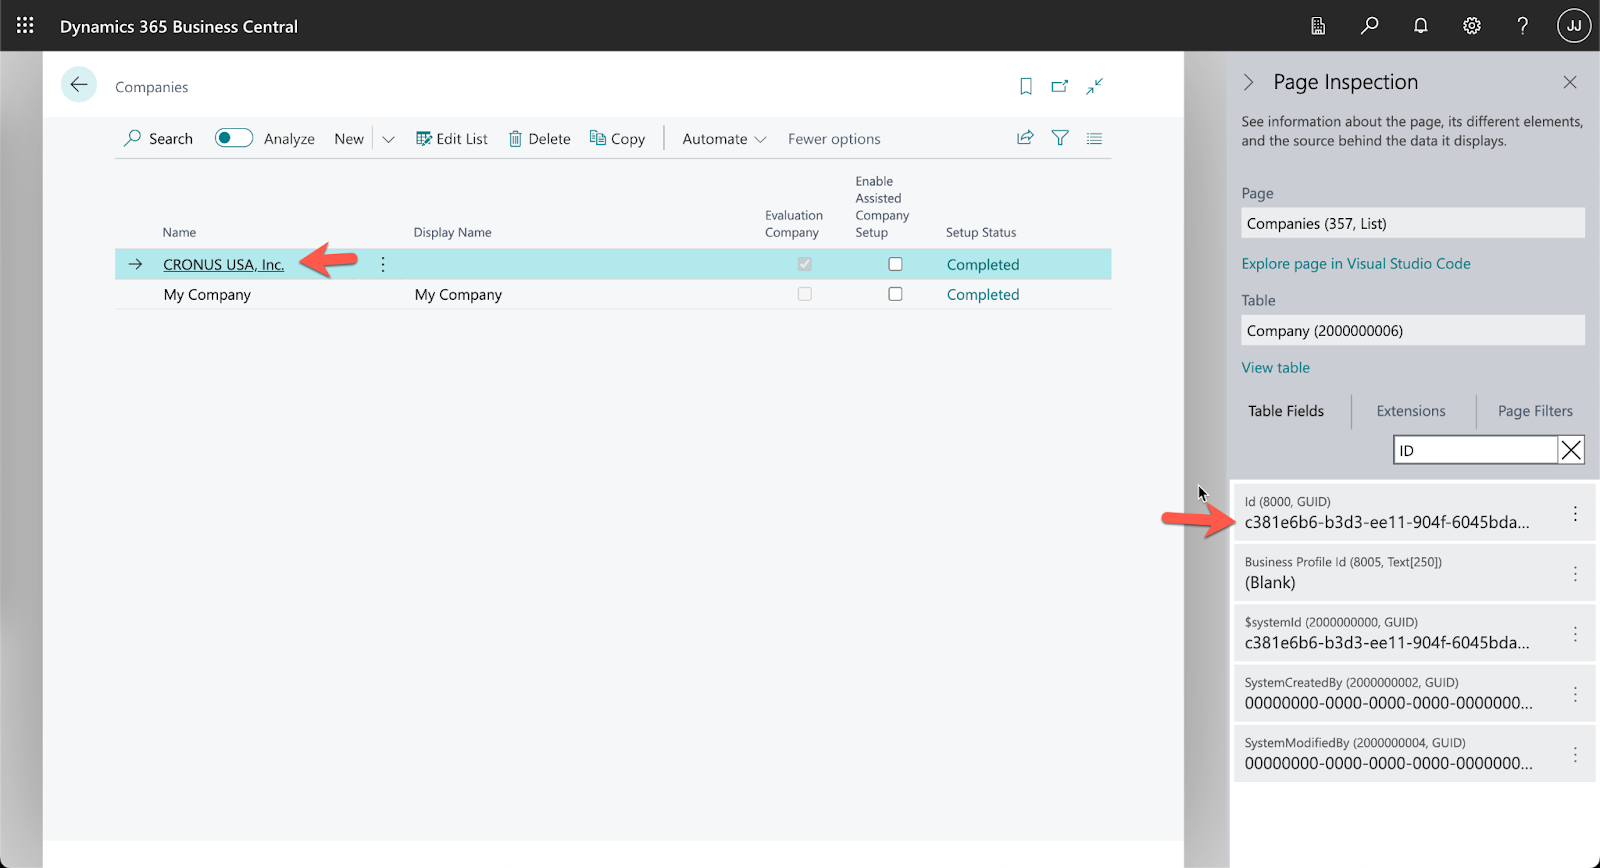
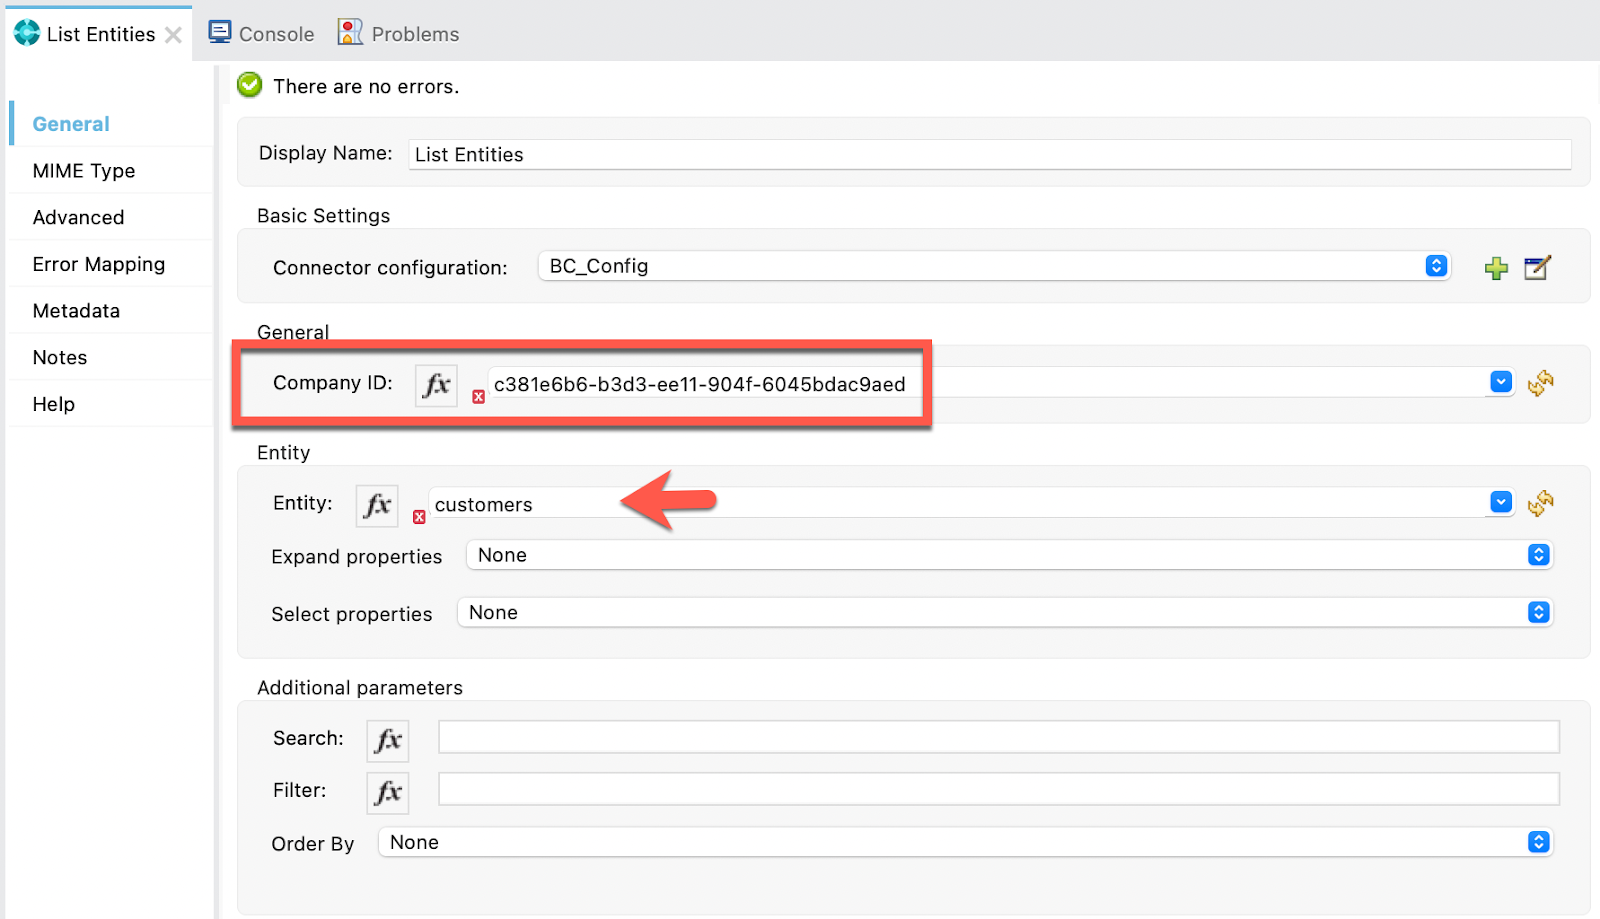
Switch back to Anypoint Studio and fill in the Company ID and fill in the Entity field with the value customers.
Now the Business Central connector is configured, let’s set up how we want the content to be displayed.
Transform Message
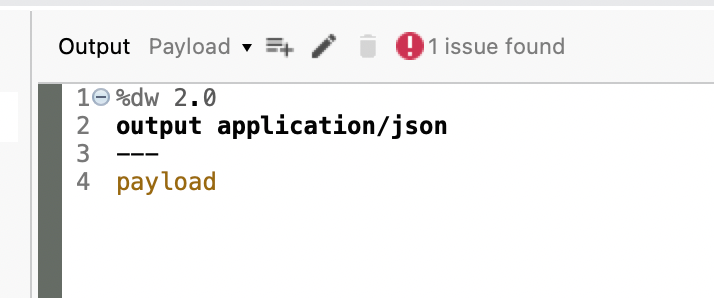
For the Transform Message, we’re just going to output the data in plain text format. The script should look like the following.
| %dw 2.0output application/json—payload |
Test Application
Let’s test the application and see it in action. Right-click on the canvas and select Run project <app name>
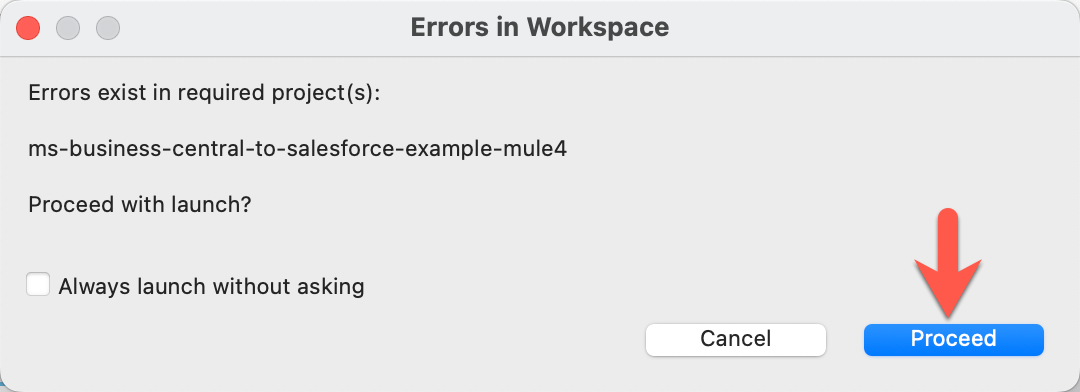
Because Microsoft requires OAuth as the only connection method, you may see an error when deploying the application. Just click on Proceed
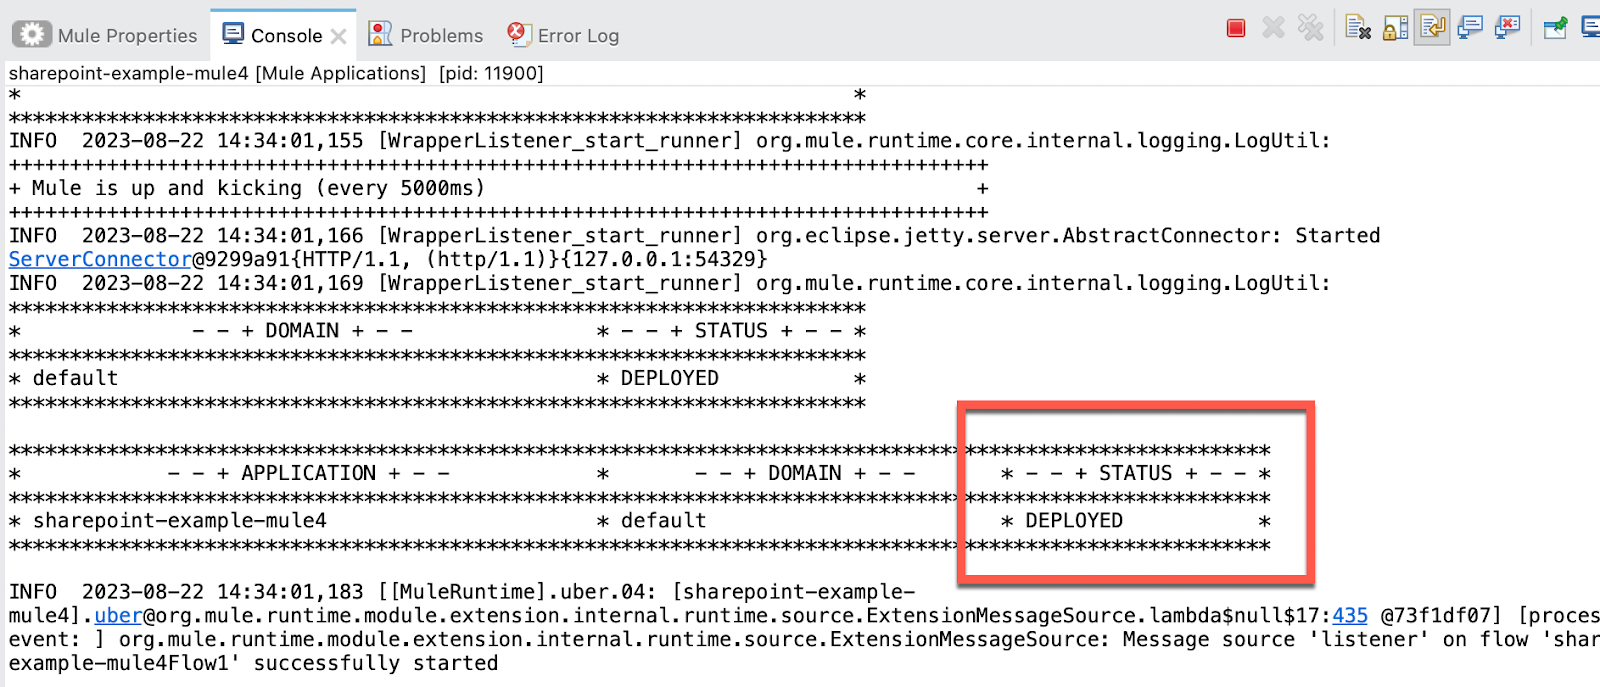
Once the app is successfully deployed, switch to a browser.
Navigate to the following URL
| http://localhost:8081/authorize |
You’ll be redirected to login.
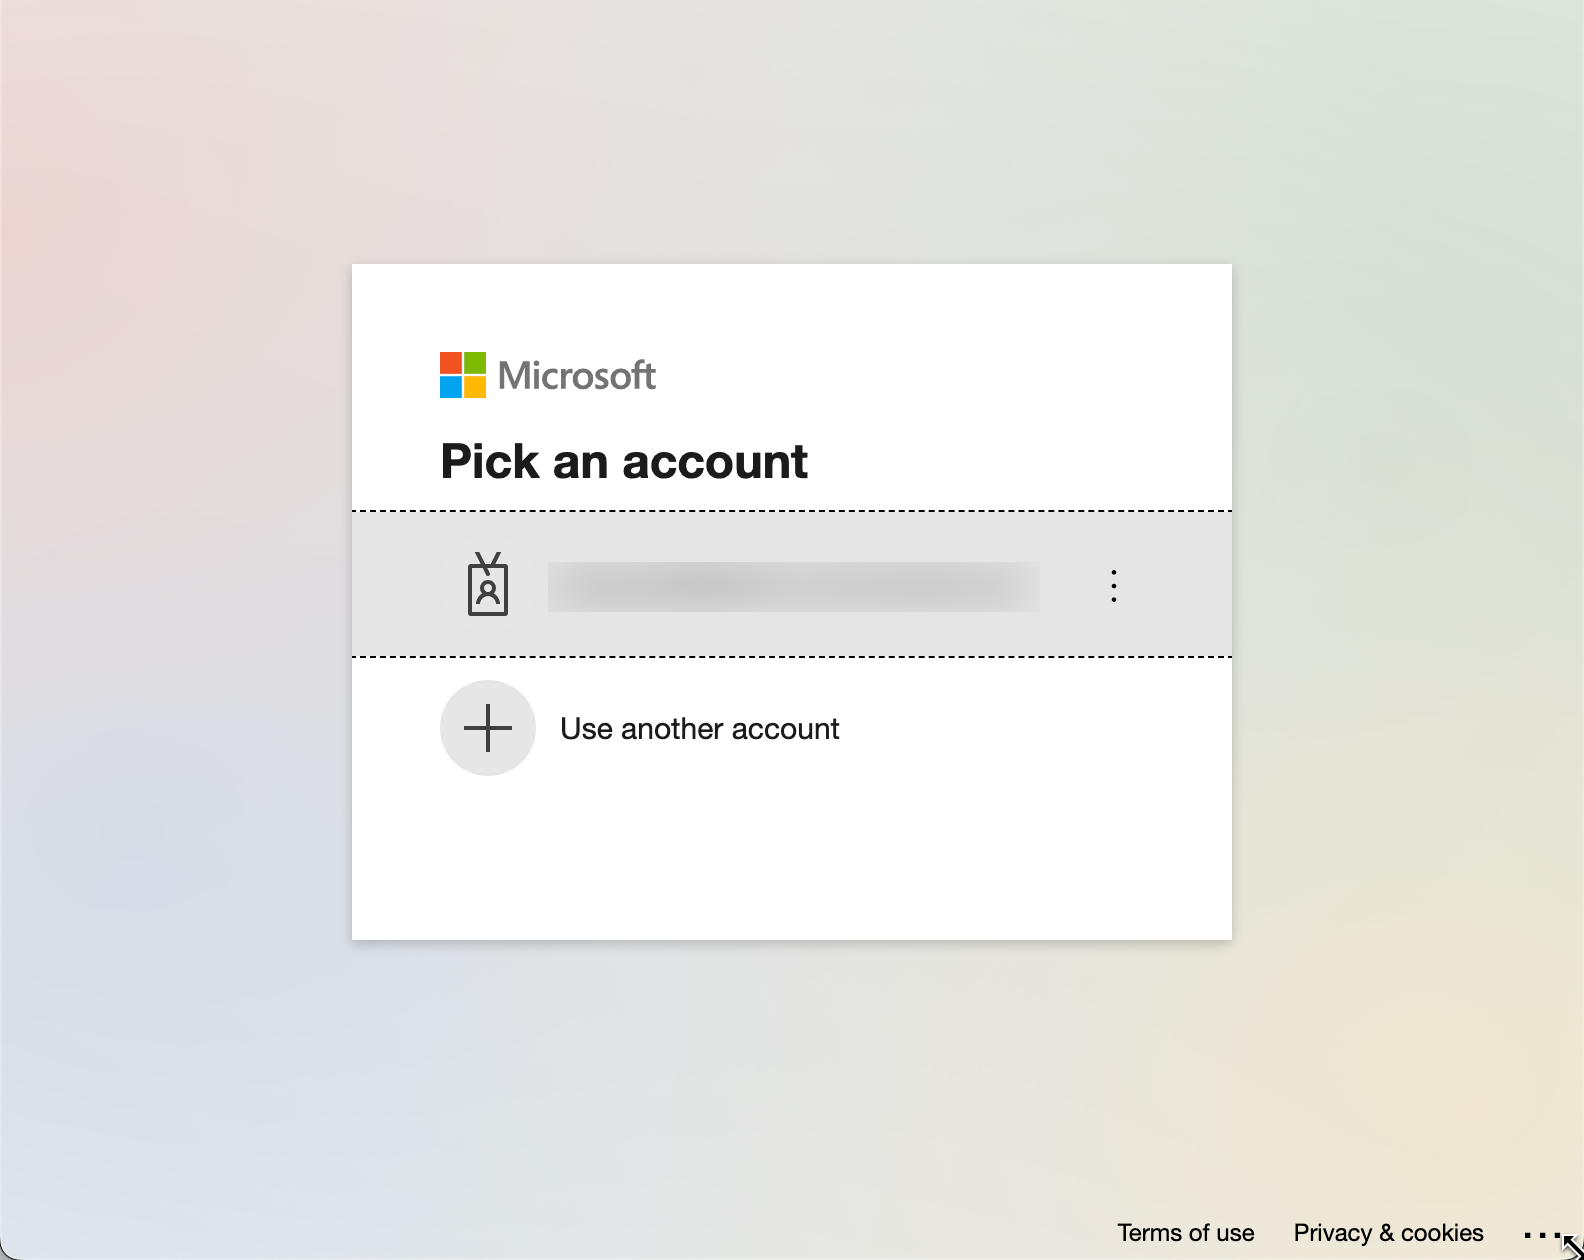
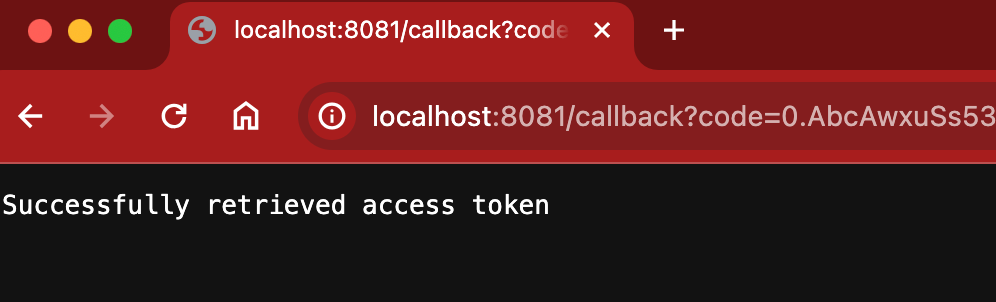
Login with your username, password, and one-time password code. If successful, you’ll be redirected back to the callback address. The OAuth token will be stored in to the Object Store.
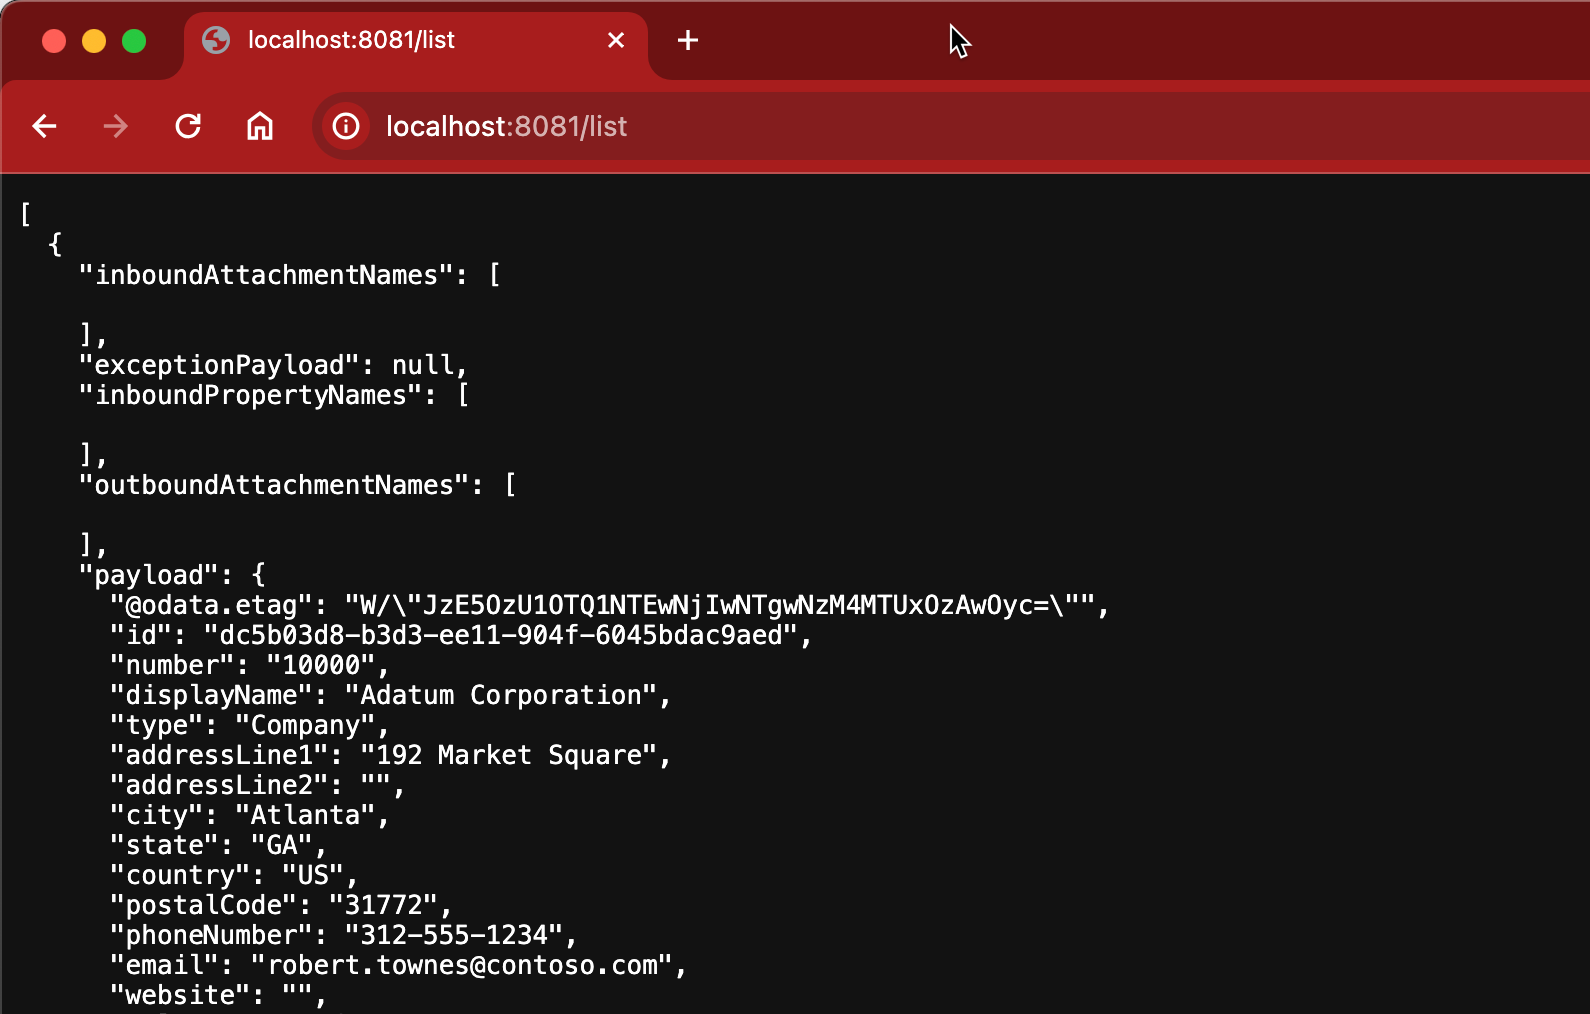
Navigate to the following URL
| http://localhost:8081/list |
Summary
Congrats! You successfully set up the Dynamics 365 Business Central connector with the OAuth2 Connection Provider. Understanding how to set up the connector configuration is often the biggest hurdle.
Leave a Reply