
Connecting to Outlook 365 using the MuleSoft connector is relatively straightforward, thanks to the connector’s intuitive design and robust capabilities. With this connector, you can seamlessly integrate your MuleSoft applications with Outlook 365 mailboxes, enabling real-time communication and message handling.
In this post, I’ll walk you through the following steps:
- Configure an Azure app with the correct Outlook 365 API permissions
- Create a Mule flow to send an email through Outlook 365
- List all the messages in a folder from an Outlook 365 user Inbox
I’ll assume you have access to Outlook 365, Azure, and Anypoint Studio 7.x. You can find a complete project here in my Github – https://github.com/djuang1/outlook365-example-mule4.
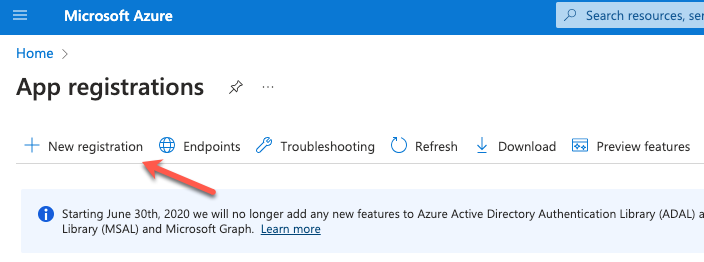
Configure Azure
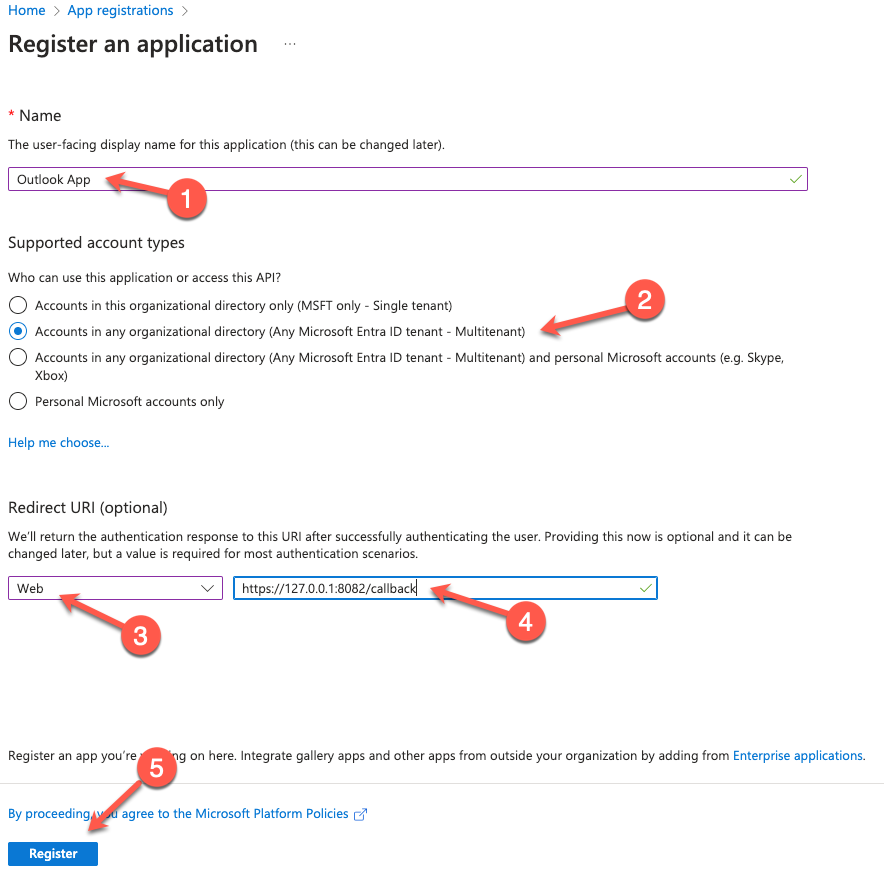
Give the application a name (e.g. Outlook Mule App), check Accounts in any organizational directory for Supported account types. Under Redirect URI, select Web from the dropdown and type in https://127.0.0.1:8082/callback. Click on Register
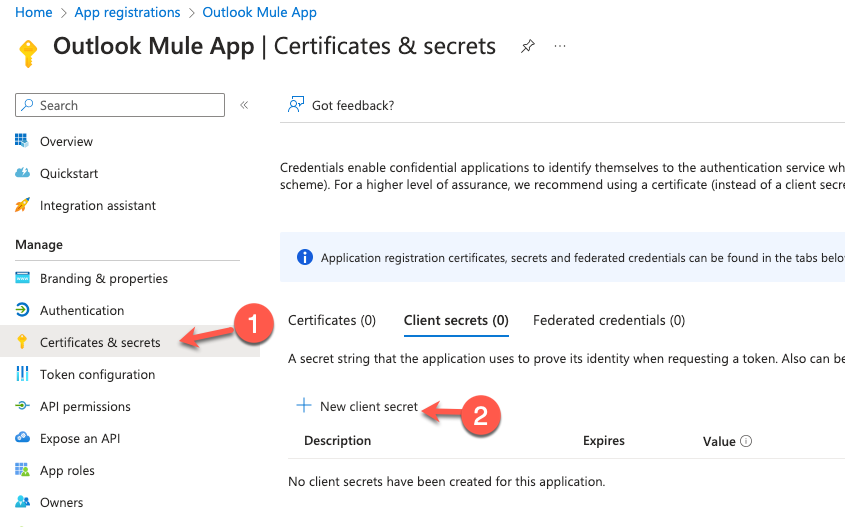
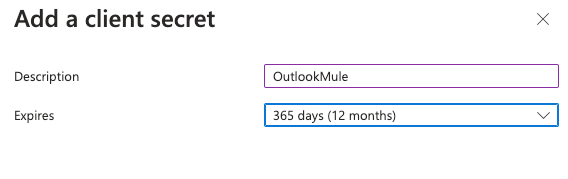
In the newly created app, click on Certificates & secrets and click on New client secret
Give the secret a name and set the expiration date.
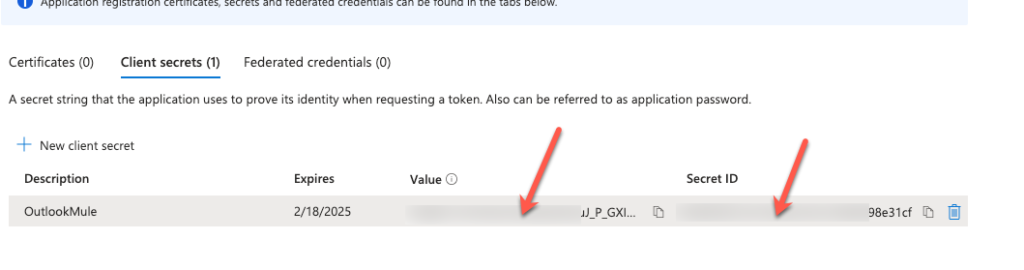
Copy down the Value and Secret ID, you’ll need these when you configure the Mule application. Be sure to write down the Value because you won’t be able to see it after you leave the screen.
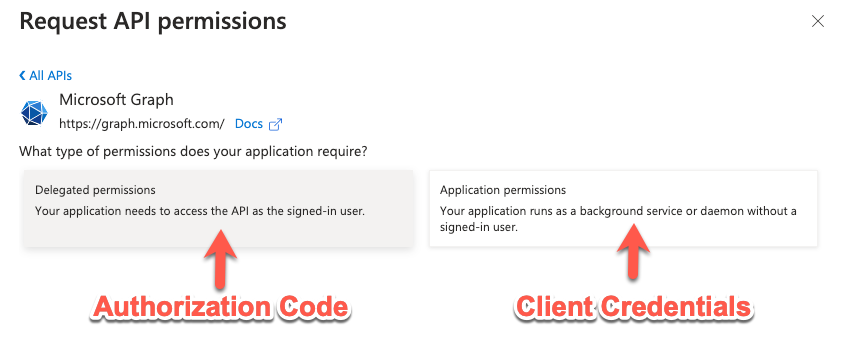
Next click on API permissions and click on Add a permission
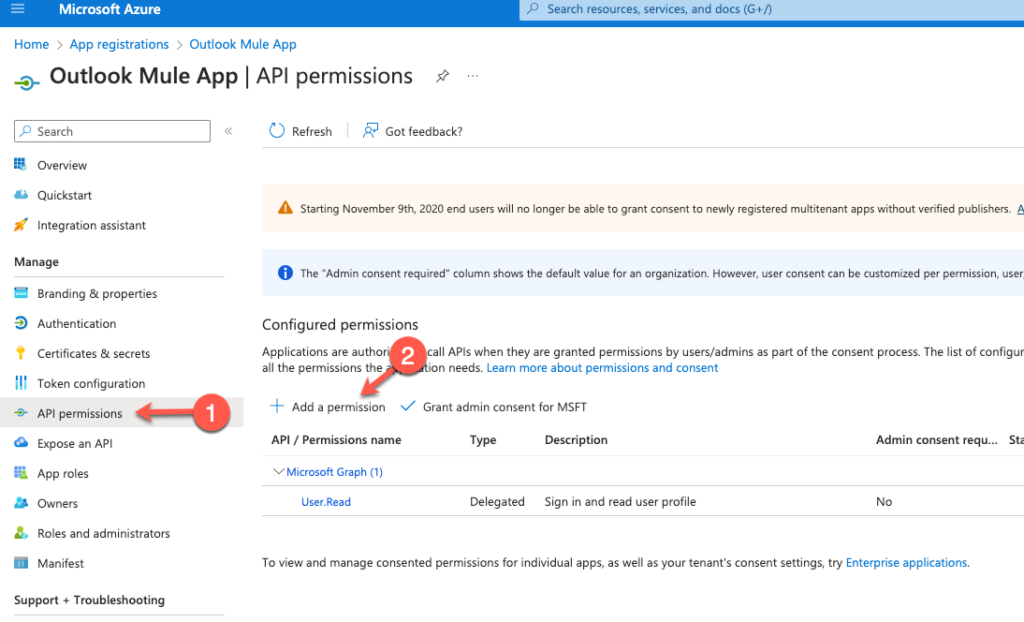
Click on Microsoft Graph
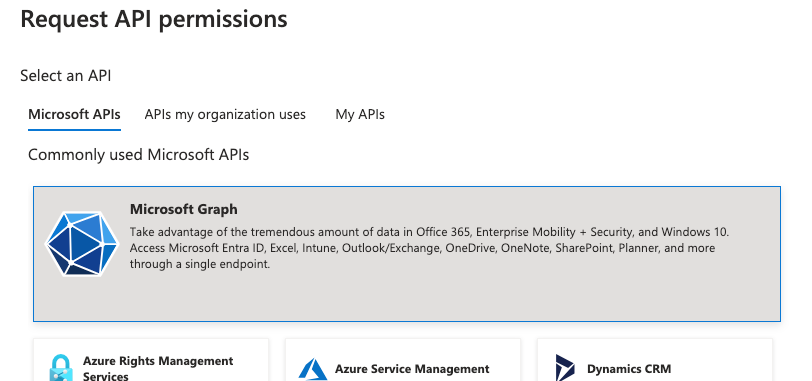
We’re going to configure the app for OAuth Client Credentials so click on Application permissions
In the search box, type in ‘mail‘ to filter the available API permissions. Under the Mail section, check all the boxes you’d like to grant the app and then click on Add permissions

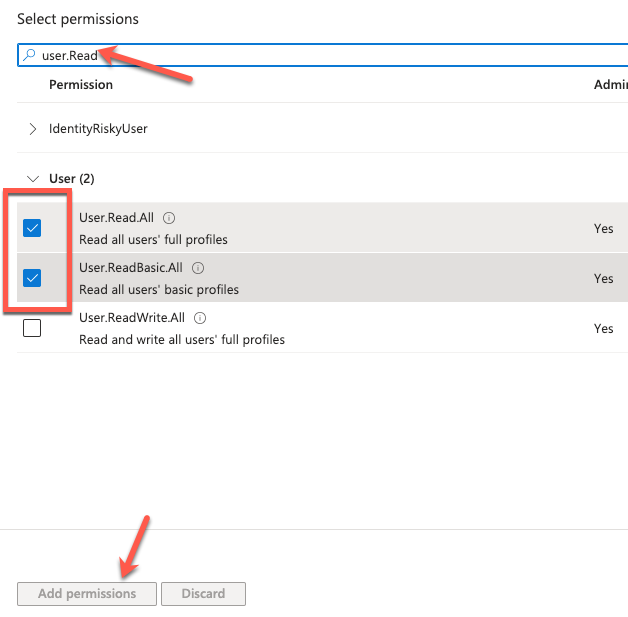
Clear the search filter and type in user.Read and then select User.Read.All and User.ReadBasic.All
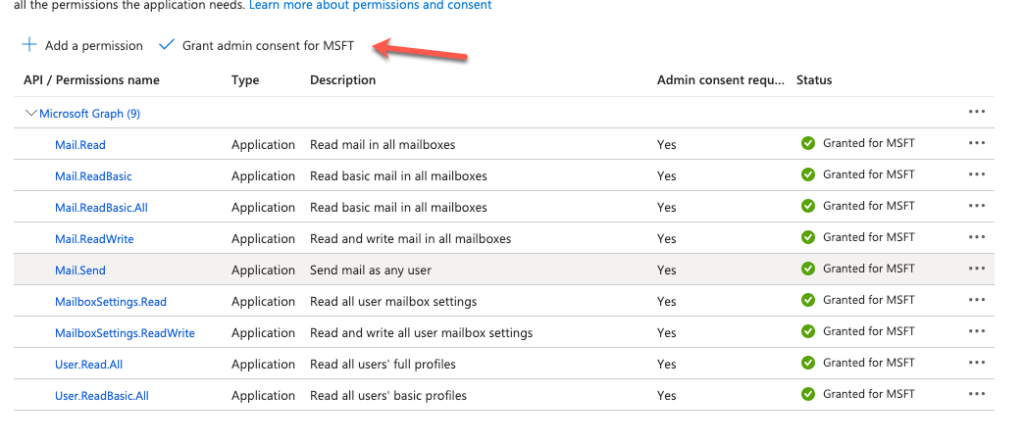
Click on Grant admin consent for MSFT
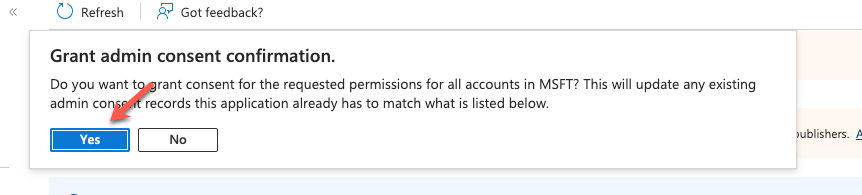
Click on Yes
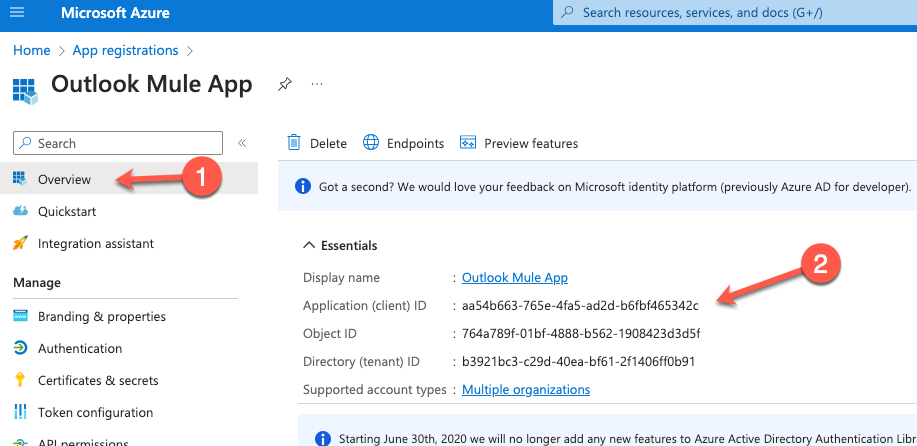
Not that the permissions have been set, we need to copy down two more properties in order to configure the Outlook Connector configuration. Click on Overview and copy down the Application (client) ID and the Directory (tenant) ID
You should have the following values before continuing on to the next section:
- Application ID
- Directory ID
- Client Secret
Create Mule Application
This post assumes you have experience building a Mule application in Anypoint Studio. Using the screenshots below, create a new Mule project, add the Outlook 365 Connector from Exchange, and build the following flows.

Additionally, add a configuration properties file into the src/main/resources folder
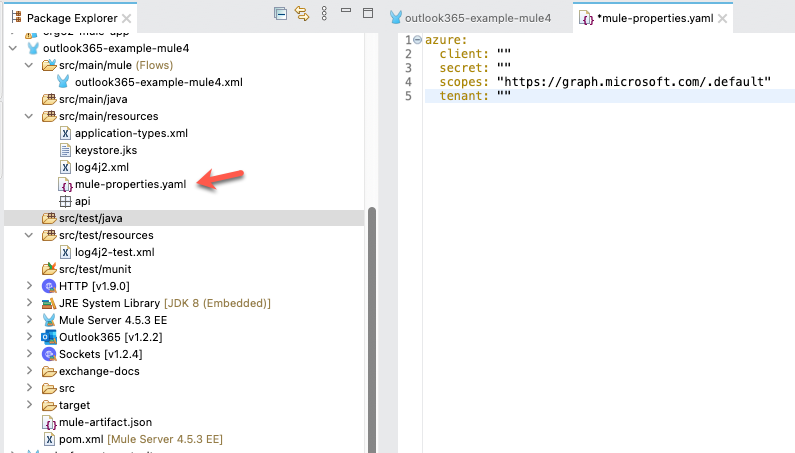
Add the following properties and fill them in from the first section.
azure:
  client: "<Application (client) ID>"
  secret: "<Secret>"
  scopes: "https://graph.microsoft.com/.default"
  tenant: "<Directory (tenant) ID>"
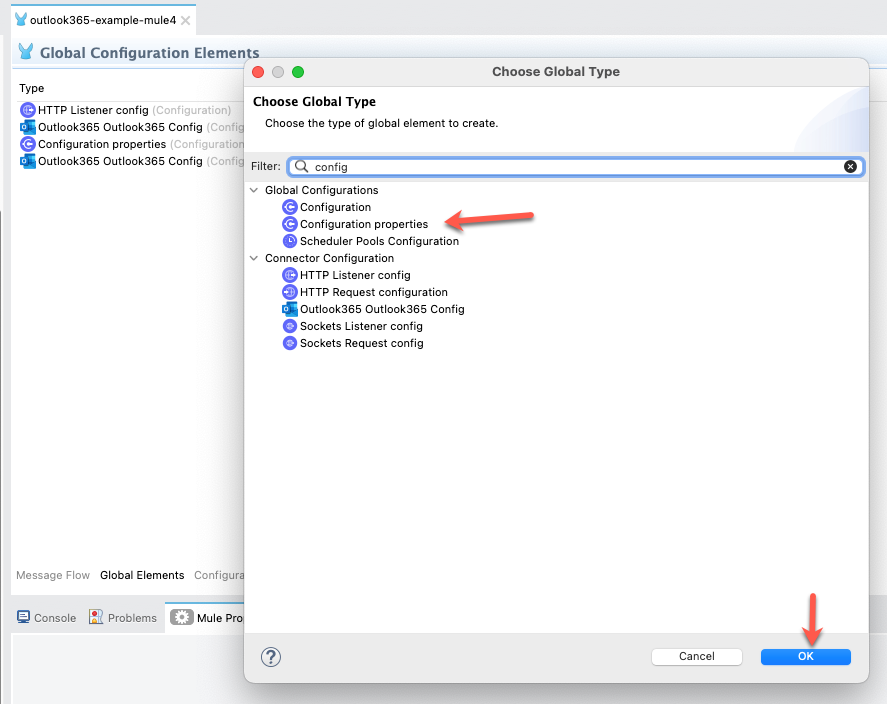
Be sure to add the Configuration properties global type to the project and point it to the file as well.
Send Mail
HTTP LISTENER
Let’s start with the HTTP Listener. I used the path /send and I changed the port to 8082 and set the protocol to HTTPS for the HTTP Listener configuration.
Transform Message
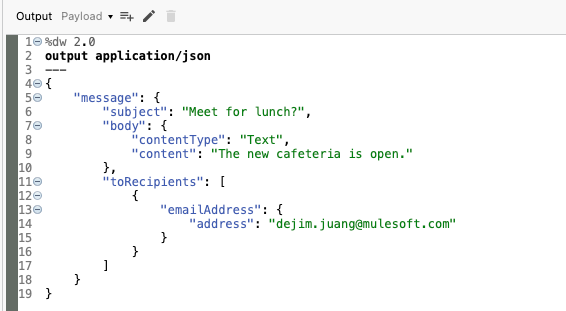
The format for the payload to be sent be the Outlook365 needs to follow a specific format. Here’s the DataWeave for that payload below. Be sure to change the address to an email address that will receive the message.
%dw 2.0
output application/json
---
{
	"message": {
    	"subject": "Meet for lunch?",
    	"body": {
			"contentType": "Text",
			"content": "The new cafeteria is open."
	    },
    	"toRecipients": [
    		{
    			"emailAddress": {
          			"address": "dejim.juang@mulesoft.com"
        		}
    		}
    	]
    }
}
Outlook365 – Send mail
Click the green plus sign to create a new Outlook365 configuration.
Change the Connection dropdown to OAuth v2.0 Client Credentials. Under the General tab, fill in the Client ID, Client Secret, Token URL, and Scopes using the properties from the properties file.
Click on Test Connection… to make sure the connection properties are correct and then click on OK.
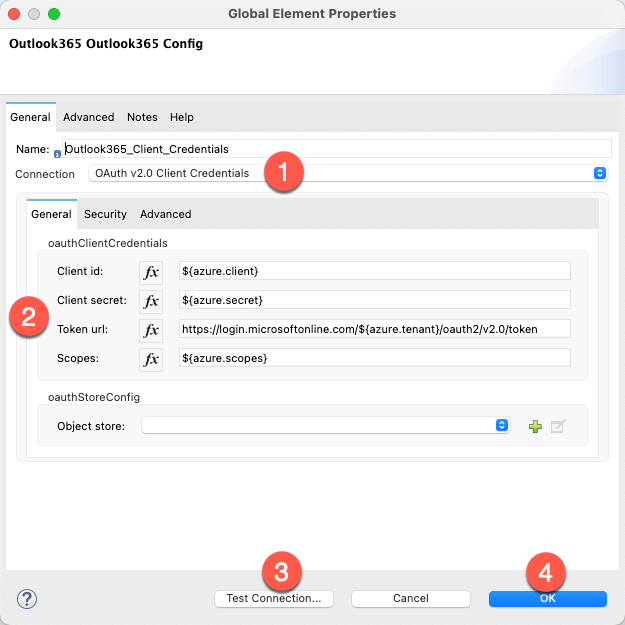
Back in the Mule Properties tab, click on the refresh icon on the User Id field and select your user ID. Leave all the other fields with their default values.
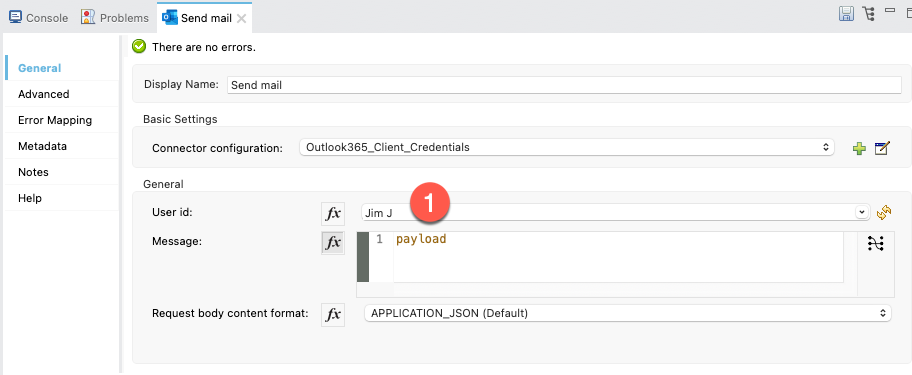
Transform Message
We’re just going to output a JSON message after the email is sent.

List Messages
HTTP LISTENER
I used the path /list and I used the HTTP configuration that we already setup above.
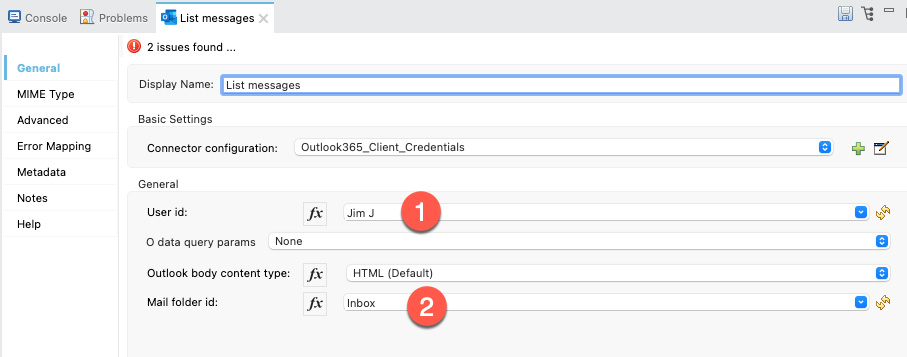
Outlook365 – List Message
We’ll use the Outlook365 configuration that we setup earlier.
Change the User ID dropdown to your user ID. The Mail folder id will be populated afterwards. Select Inbox
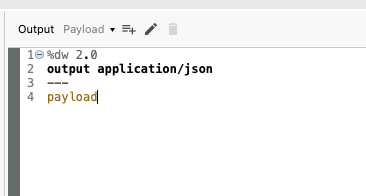
Transform Message
Similar to the flow above, we’re just going to take the response and output it as JSON back to the user.
Run Application
With the application configured, go ahead and run the application now. Once it’s deployed and started, switch to your browser and navigate to the following URL
https://localhost:8082/list
You should see the list of email message returned in JSON like the screenshot below.

Let’s test sending a message now. Change the URL to the following
https://localhost:8082/send
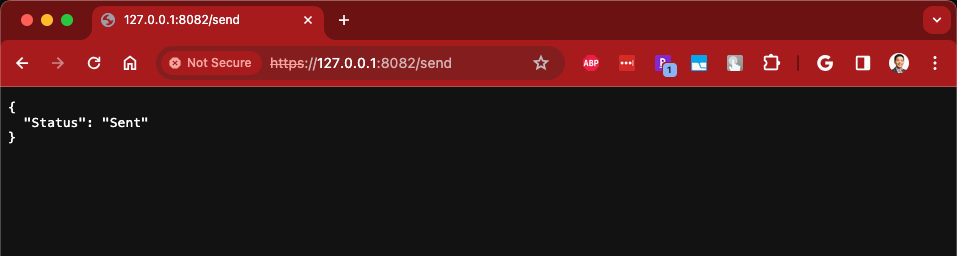
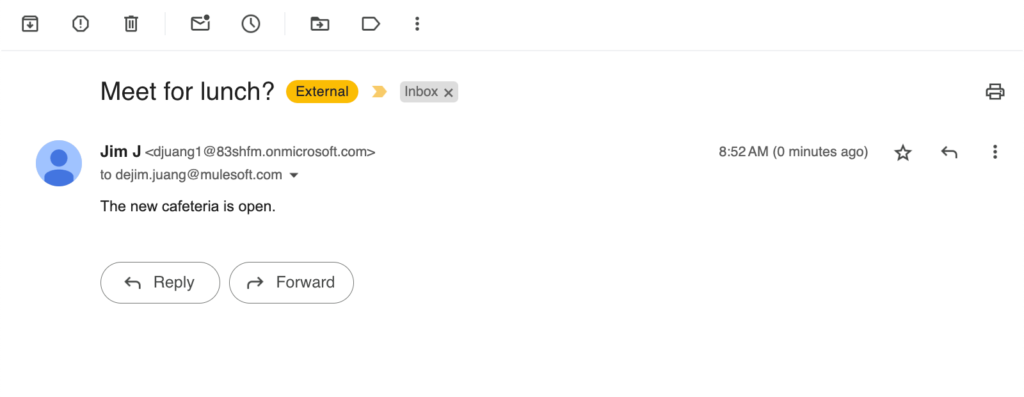
Switching to your email, you should have received a message if everything was configured correctly:
Summary
Overall, the MuleSoft Outlook 365 connector simplifies the process of connecting to Outlook 365 and enables efficient integration with mailboxes for real-time message handling, ensuring smooth communication and collaboration within your MuleSoft-powered ecosystem.
Leave a Reply