
Someone pointed out to me the other day that Azure has an updated version of Azure Data Lake Store which I’d written a post about several years ago. The post leveraged the REST API because we didn’t have a connector at the time.
Since then, MuleSoft has released a connector and Gen 2 was released. If you search for Gen 2, in the Azure portal, you won’t find it under that name surprisingly. The service is called “Storage Accounts” now which is a bit confusing.
In this post, I’ll show you how to use MuleSoft to connect to Gen 2, or Storage Accounts, using the Azure Data Lake Store connector in Anypoint Studio. So let’s get started.
Requirements
- Anypoint Studio
- Azure Data Lake Connector
- Azure
Setup Azure Storage Account
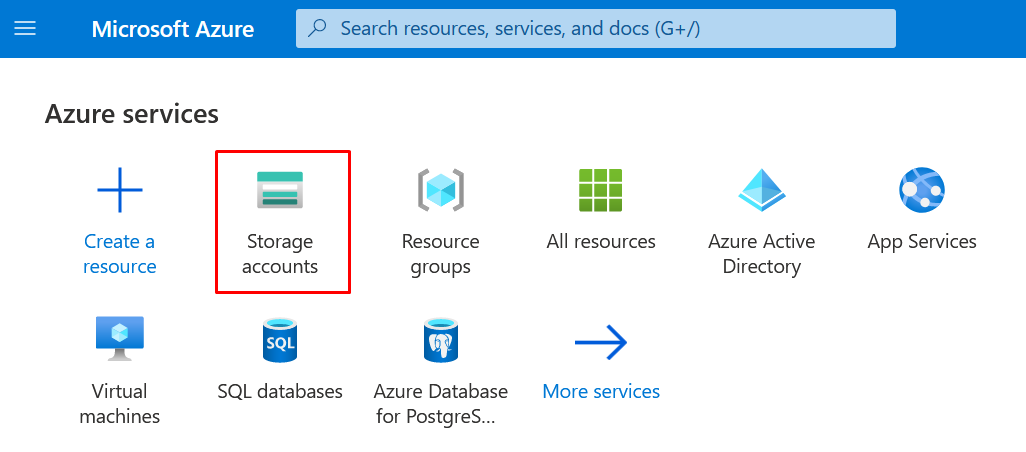
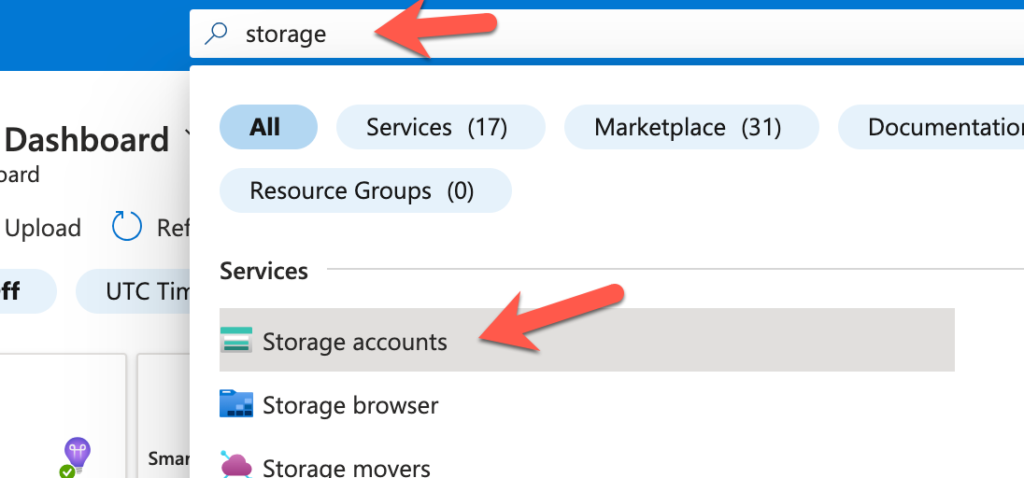
The first thing we need to do is setup a Storage Account. Log in to Azure and in the top search bar, search for “Storage”. From the results, click on “Storage accounts”
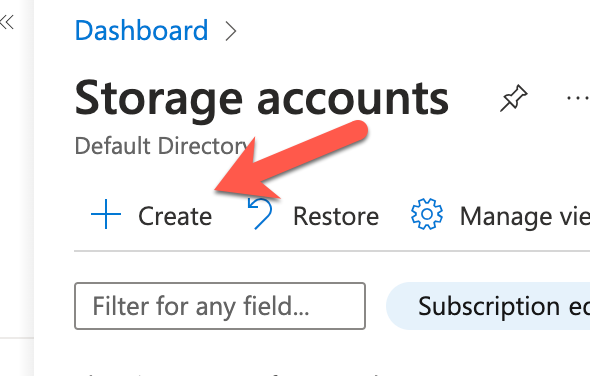
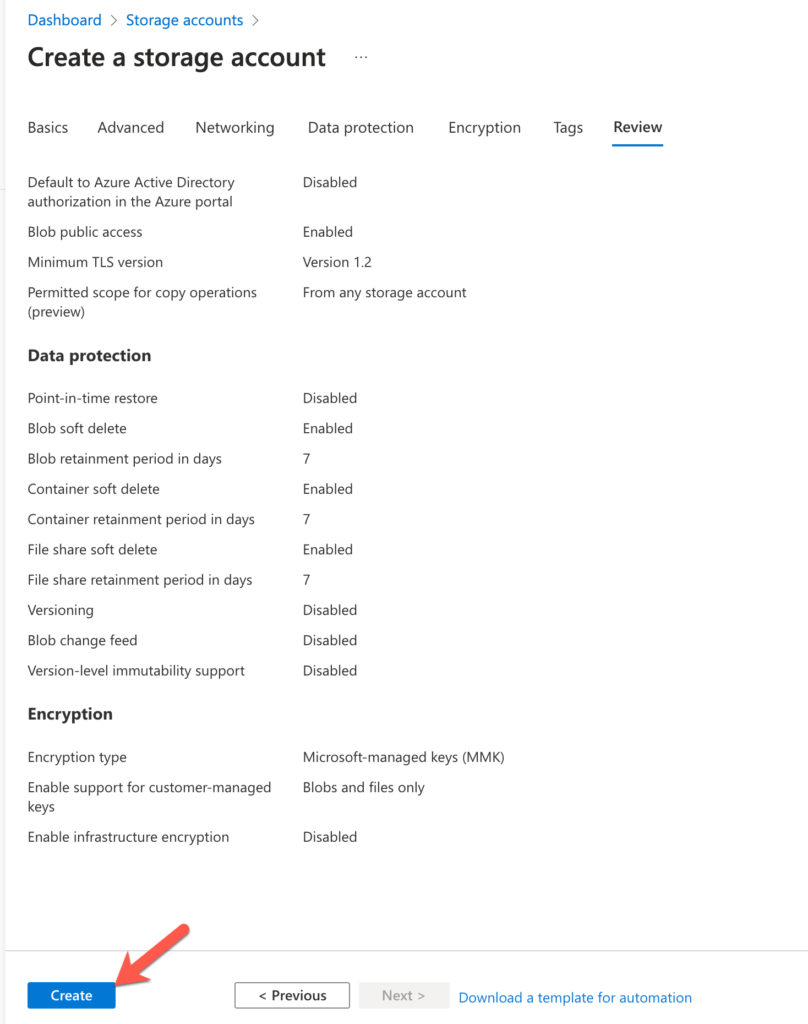
Click on “Create”
In the Basics section, give the Storage account a name in the Storage account name field and then click on Next : Advanced
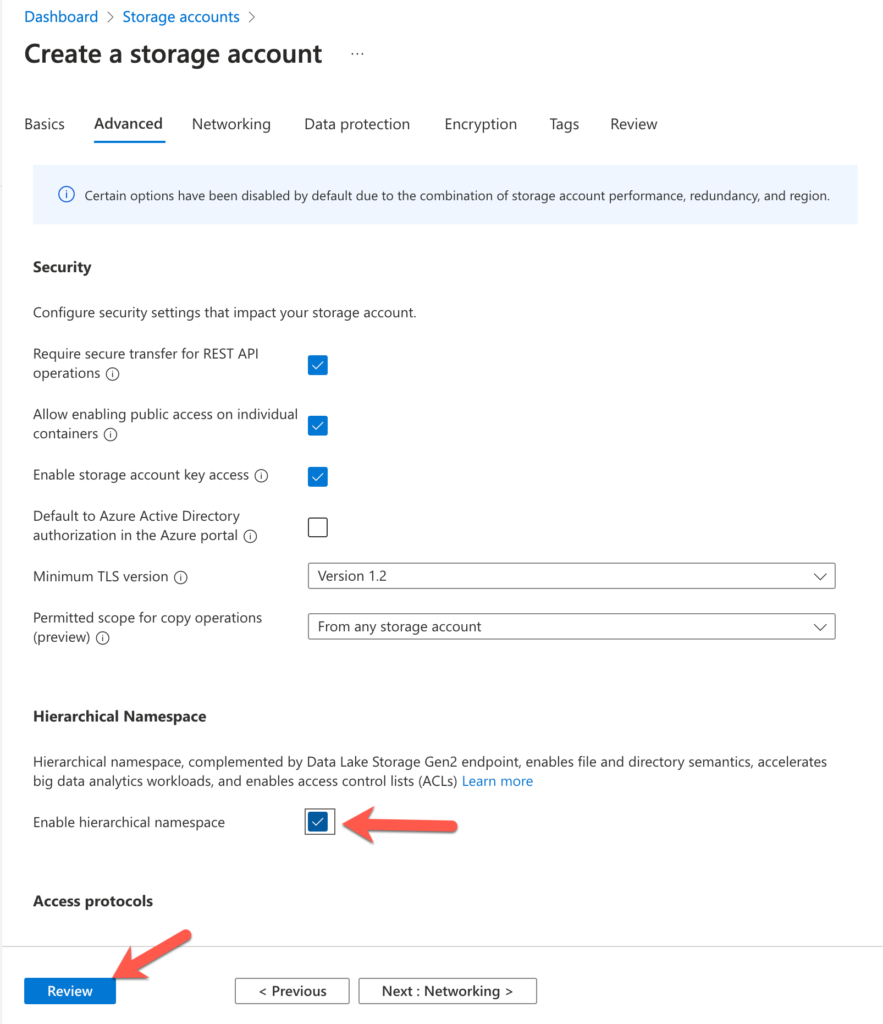
In the Advanced section, check the Enable hierarchical namespace checkbox to enable Gen 2 and then click on Review
Lastly, click on Create
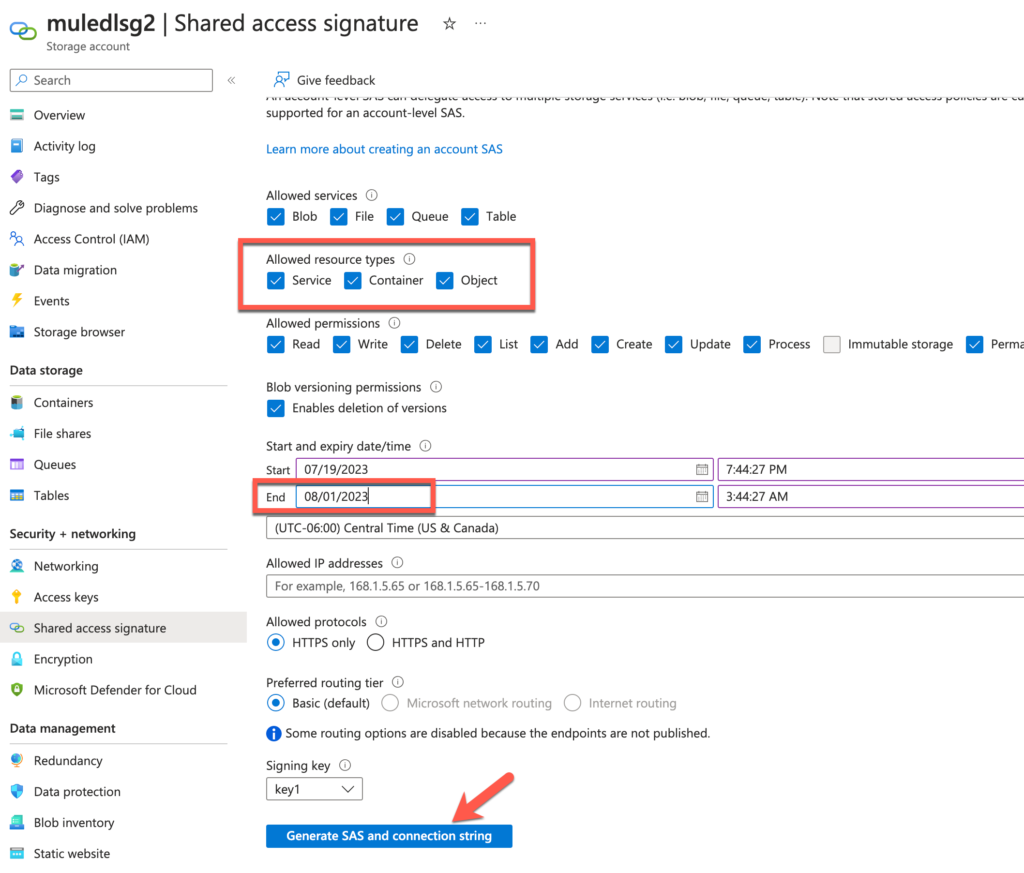
Before we move on to the next step, click on Shared access signature under Security + networking.
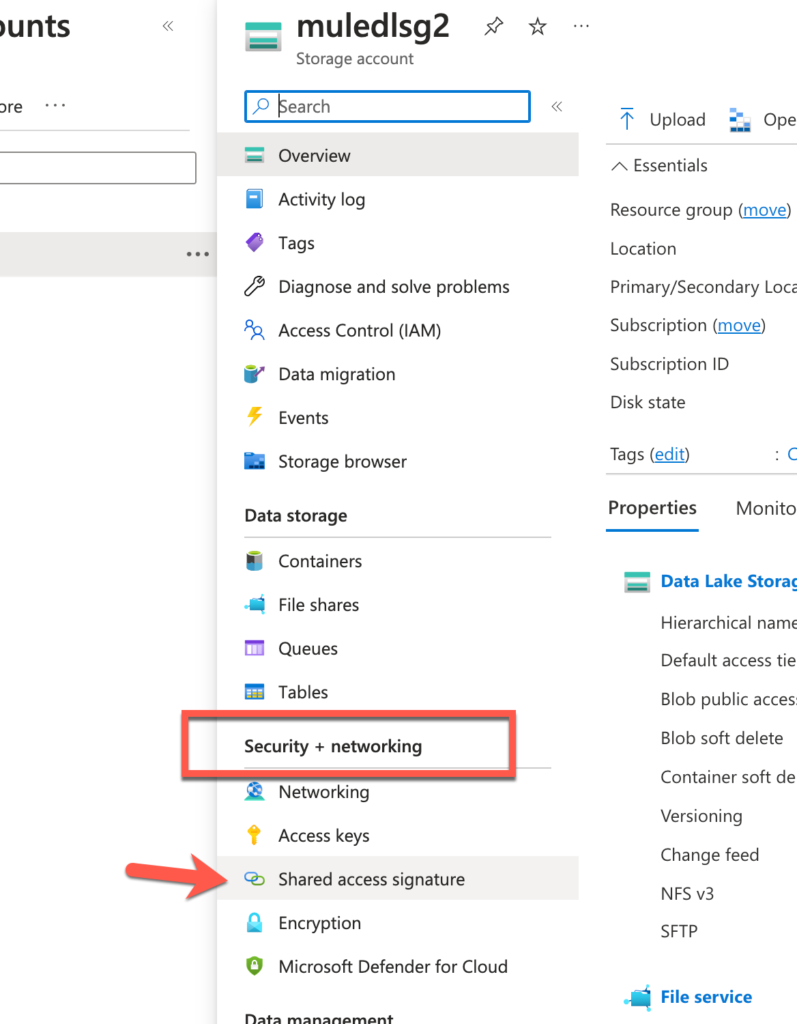
Leave this screen open because we’ll need to generate the token when we setup the connection with the Connector later.
Create Mule Project and flow
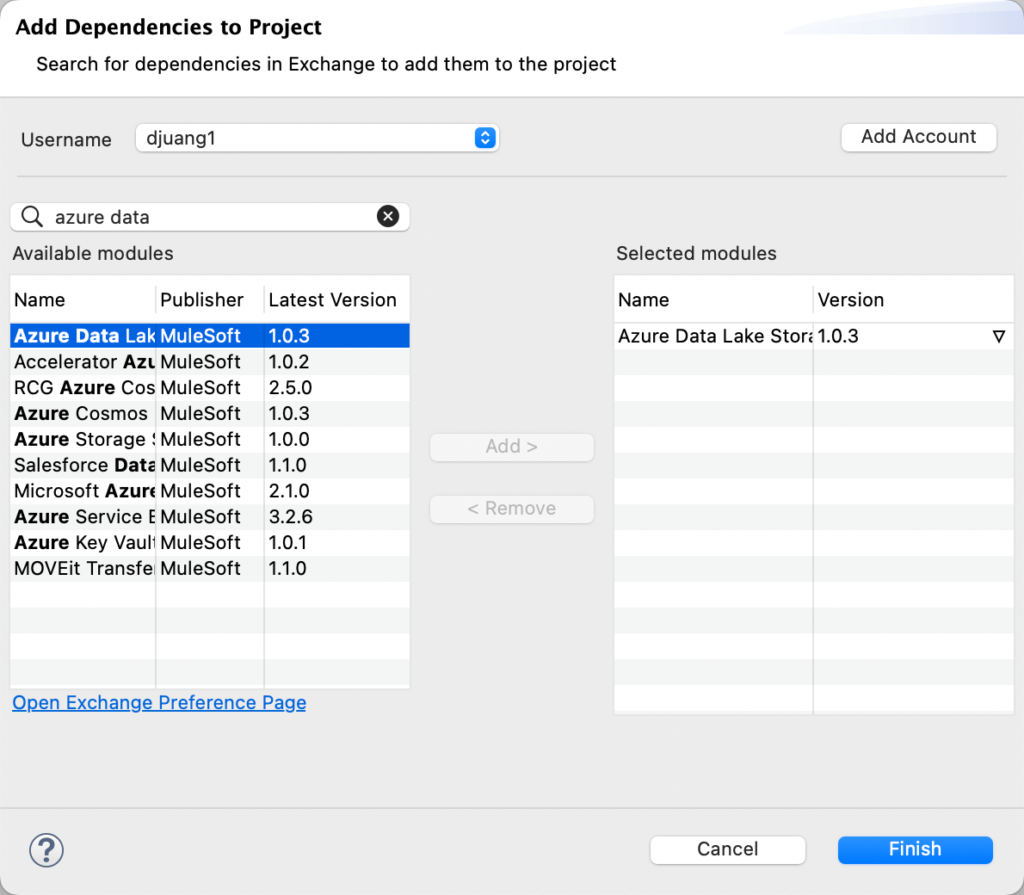
For the purpose of this post, I’m going to assume that you’re familiar with building Mule applications using Anypoint Studio. After you created a new Mule project, you added the Azure Data Lake Connector (1.0.3) through the Search in Exchange dialog window.
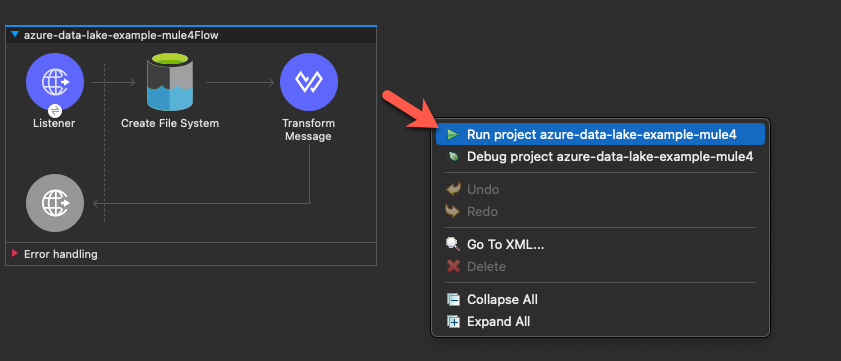
Once you added the connector, you should be able to create the a flow by dragging and dropping components from the palette to the canvas so it looks like the screenshot below.
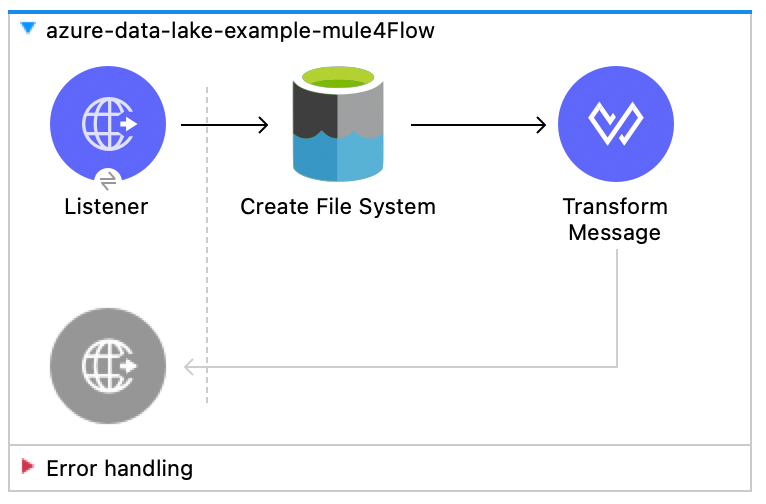
The flow will expose an HTTP endpoint that creates a new folder in Azure Data Lake. We’re going to use the Create File System operation to achieve this. Once the folder is created, it’ll return any response data back to the user in JSON format.
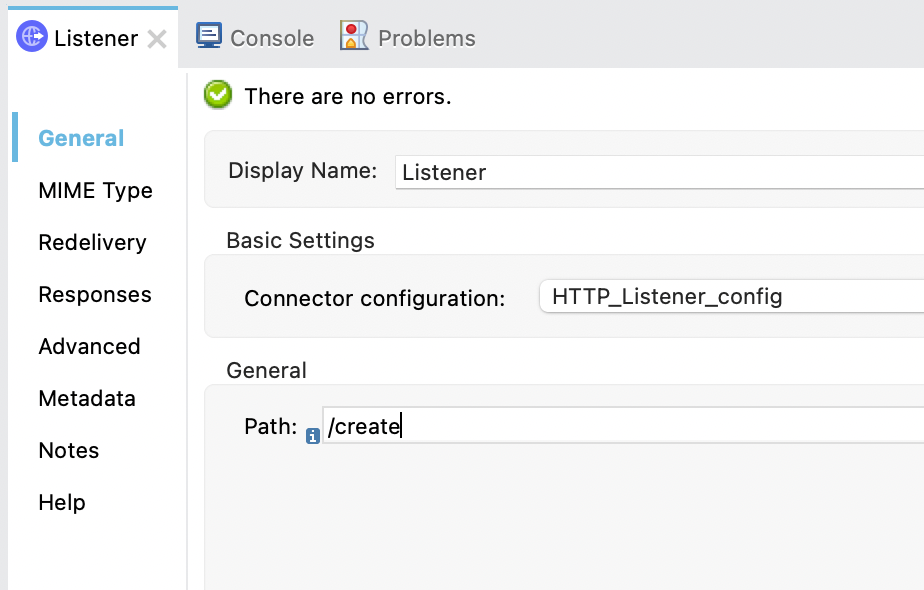
Configure HTTP Listener
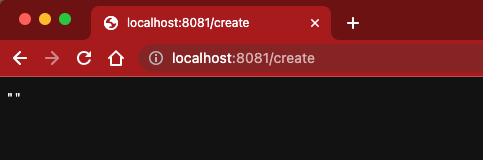
For the HTTP Listener operation, you should use the default settings (e.g. HTTP and port 8081) and the Path field should be set with the value /create so it looks like the following.
Configure Azure Data lake storage Connector
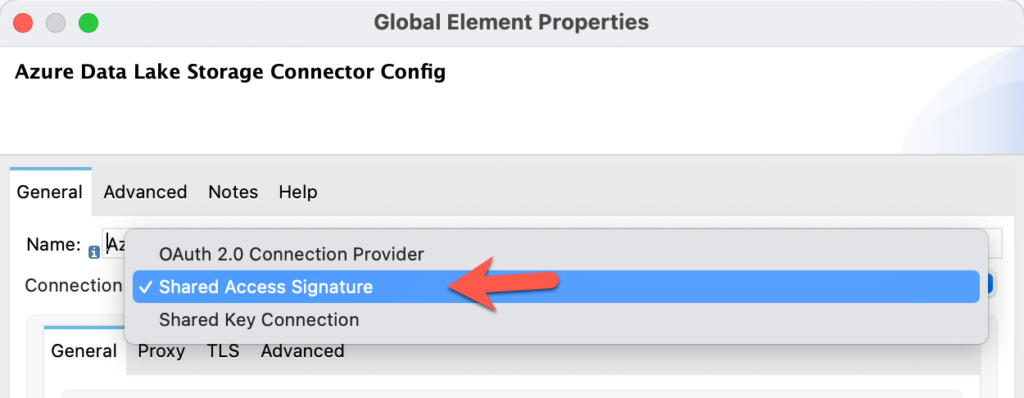
Let’s walk through the connector configuration for the Azure Data Lake Connector. Once you open the dialog window, change the dropdown for the Connection field to Shared Access Signature
Switch back to Azure for the next step. We need to generate the SAS token before we proceed.
A new section will be displayed with the SAS token. Copy that token by clicking on the copy icon on the right.
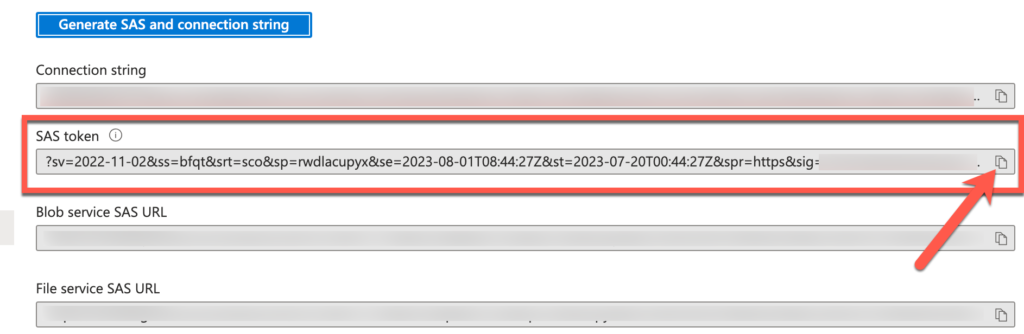
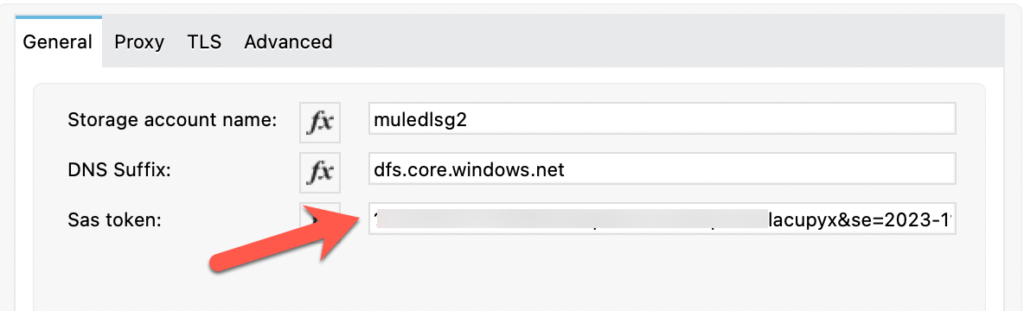
Switch back to Anypoint Studio and paste that token in to the SAS token field. Also fill in the Storage account name with the name of the storage account that you created in Azure earlier and use dfs.core.windows.net for the DNS Suffix field.
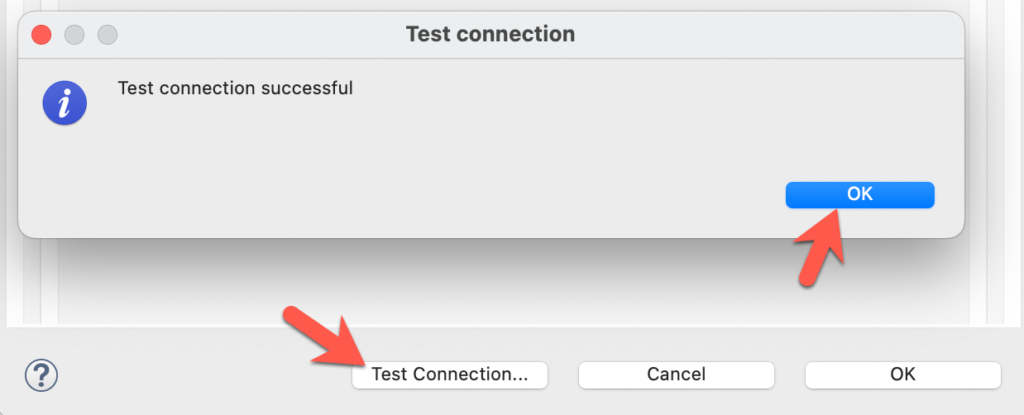
Click on Test Connection to make sure everything is setup correctly.
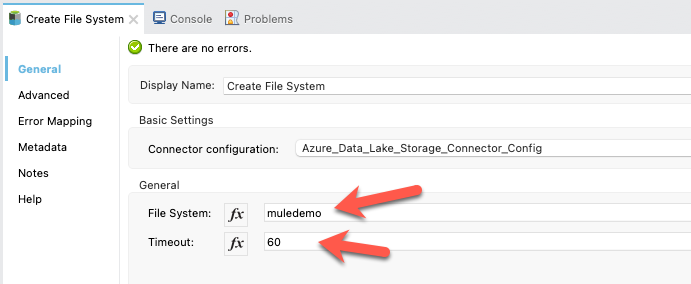
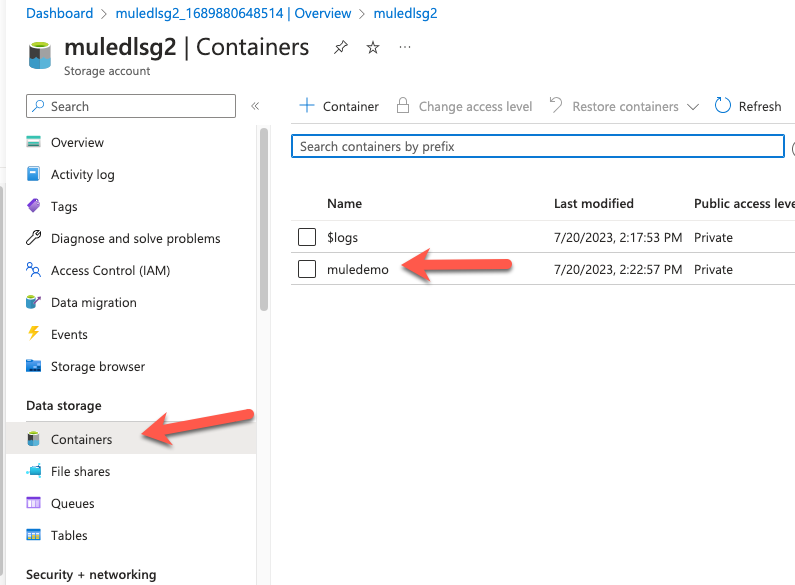
Close the dialog window and go back to the Mule properties tab for the connector. Fill in the File System with a folder name (e.g. muledemo) and Timeout field with the value 60.
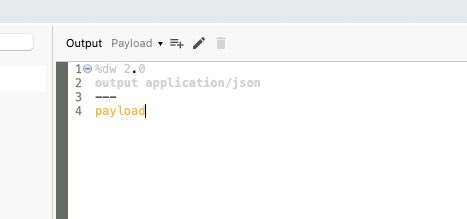
Configure Transform message
We just want to return anything the Azure Data Lake Connector returns in JSON so the DataWeave script should look like the following:
Run and Test Application
Back on the canvas, right click and select Run project <project name>
Once the app is deployed, switch to your browser and open the URL http://localhost:8081/create
Then switch back to Azure and click on Containers under Data storage and you’ll see the newly created folder.
Summary
Compared with my first post, this method of connectivity with the Azure Data Lake connector is significantly easier. Hopefully this post gets you up and running quickly on connecting to Azure Data Lake. If you run into any issues, leave a comment below. Here are some additional resources to help you.
Leave a Reply