
BigQuery is a RESTful web service that enables interactive analysis of massively large datasets working along with Google Storage. If you’re building new integrations to drive data in and out of BigQuery, the general recommendation is to leverage the native API. MuleSoft recently released a Google BigQuery Connector that wraps these APIs and provides an easy way to push and pull data. This article will walk you through the process of connecting to BigQuery using the MuleSoft BigQuery connector.
This post assumes you already have experience with the MuleSoft Anypoint Studio 7.x and access to Google Cloud Platform and BigQuery.
Create a Google Service Account
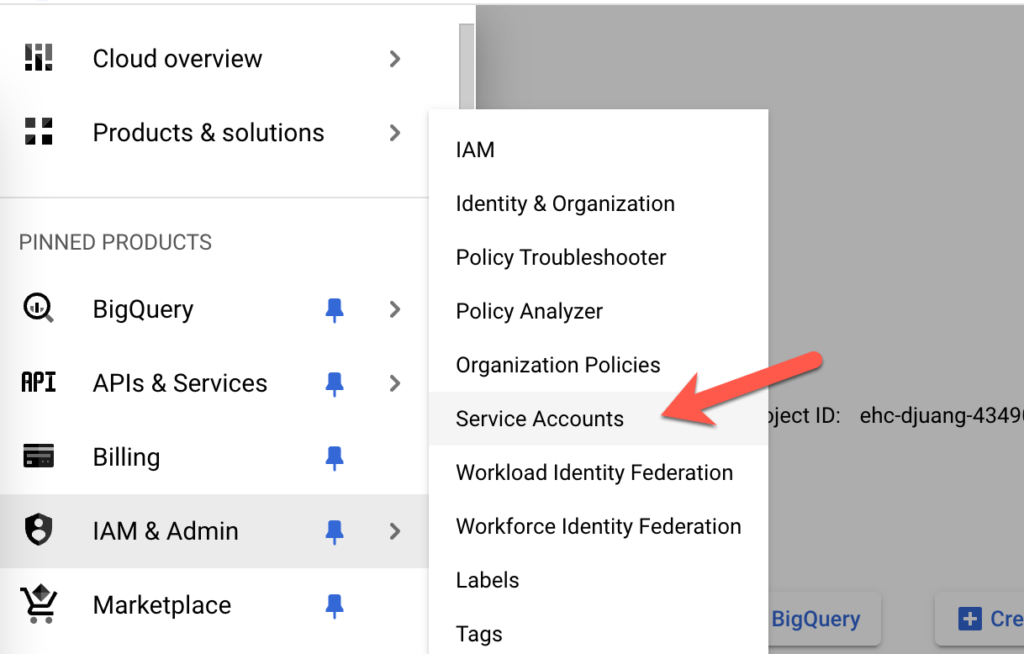
Before we can connect to BigQuery, we need to setup a Service Account. In your Google Cloud account, navigate to Service Accounts under IAM & Admin.
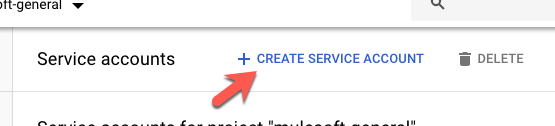
Click on Create Service Account at the top.
Fill in all the fields to describe the service account and click on Create and Continue

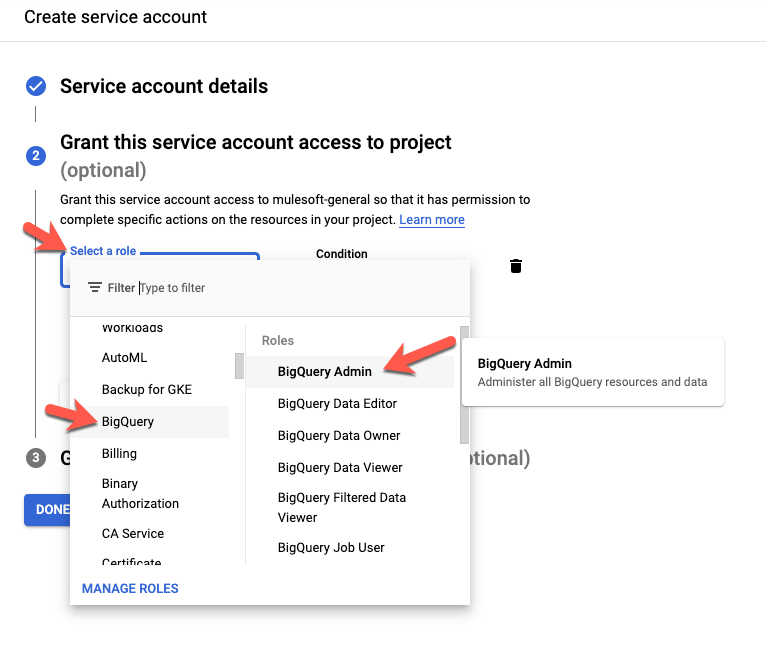
In step 2, grant this service account access to BigQuery. Click on Select a role, select BigQuery, and click on BigQuery Admin and then click on Continue.
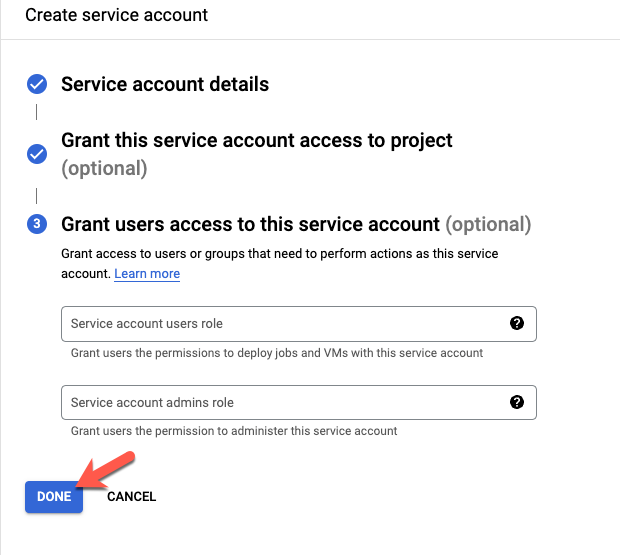
Step 3 is optional, click on Done to continue.
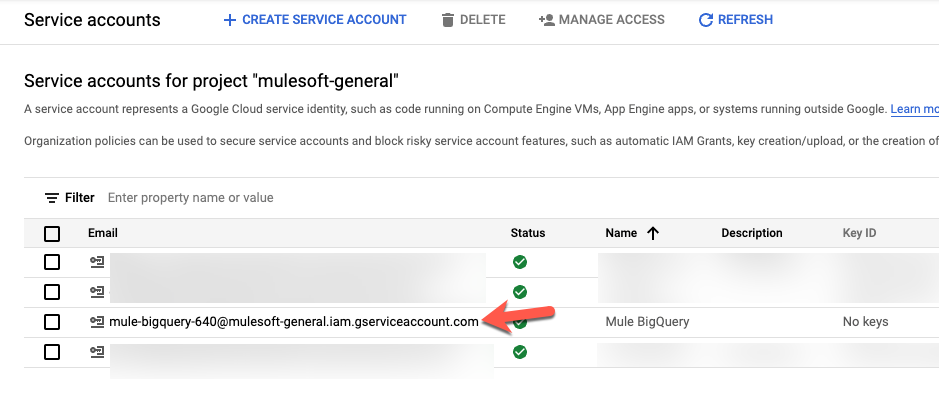
You’ll be redirected to the list of Service accounts. Find and click on the Email for the service account that was just created.
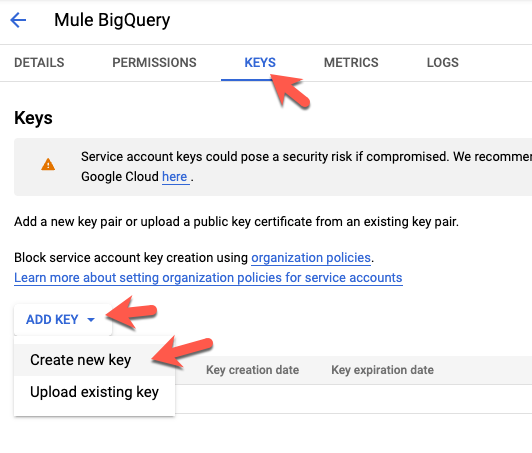
Click on the Key tab and select Add Key and select Create new key
Keep the recommended selection and click on Create
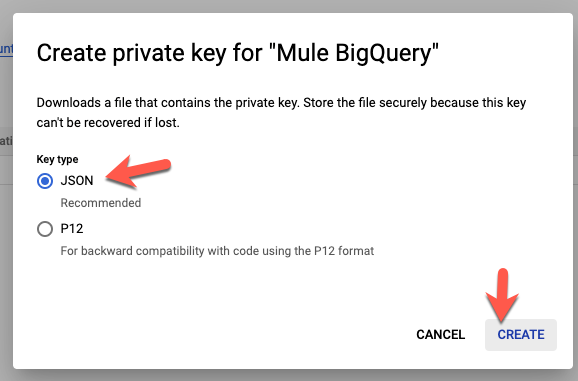
A JSON file will be created and downloaded. Open that file in your text editor and move onto the next step. We’ll need the properties from that file to configure the MuleSoft BigQuery Connector.
Setup Mule Application
You can download a complete version of the project we’re going to configure today here from Github.
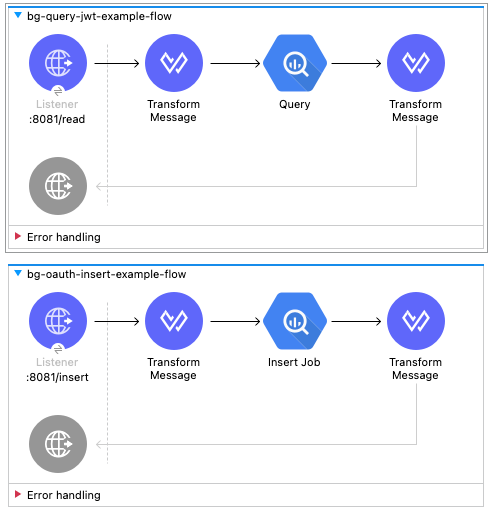
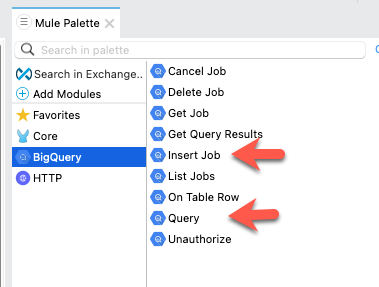
I’m going to assume you’re familiar with building flows in Anypoint Studio. Once you add the Google BigQuery connector to your palette, go ahead and use the Query and Insert Job operations and build the flows above.
I used the path /read for the Query operation and /insert for the Insert Job operation and I left the default port (8081) and protocol (HTTP) for the HTTP Listener operation.
BigQuery Configuration
With the JSON file that we downloaded when we setup the Service Account, we can setup the BigQuery Configuration.
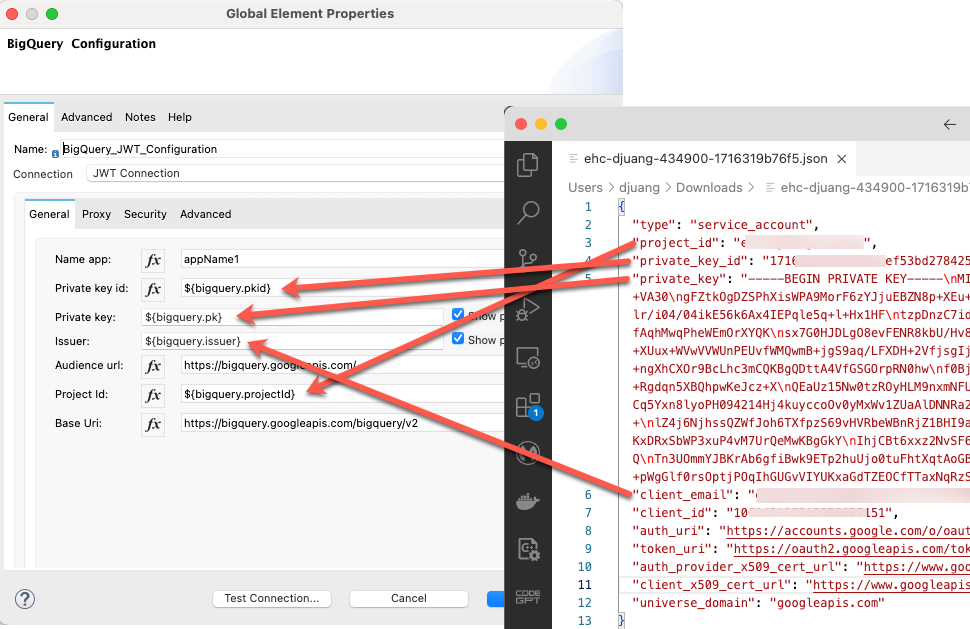
After changing the Connection type to JWT Connection, fill in the following fields with the values from the JSON file.
Private key id: = private_key_id
Private key: = private_key
Issuer: = client_email
Project Id: = project_id
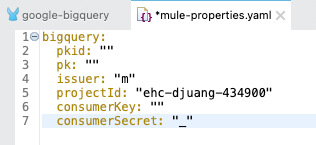
You can also use the Configuration properties file mule-properties.yaml under src/main/resources and populate the values there.
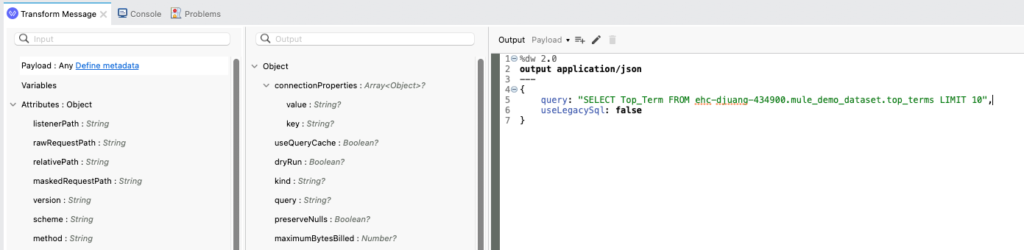
Query – Transform Message
In order to run a query against BigQuery, you need to setup the payload to follow the Google REST API Request format.
%dw 2.0
output application/json
---
{
	query: "SELECT Top_Term FROM ehc-djuang-434900.mule_demo_dataset.top_terms LIMIT 10",
	useLegacySql: false
}
Insert Job – Transform Message
Inserting data into BigQuery using the Insert Job operation requires some additional steps on the Google Cloud Platform side. Instead of running a SQL INSERT script, you’re creating a job on the BigQuery side to load data from a CSV file in a Google Cloud Storage Bucket.
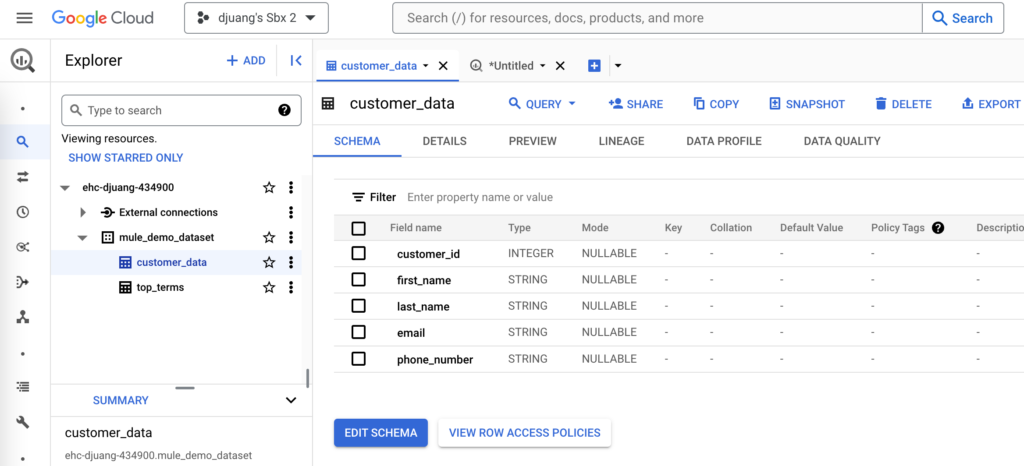
As you’re aware, MuleSoft gives you the flexibility to set this up in multiple ways. You can use Mule to generate a *.csv file and upload that into the Bucket first but for the purpose of this post, I’ve create a table in BigQuery called customer_data and I’m uploading a pre-populated *.csv into a Bucket.
You can use the script here:
CREATE TABLE IF NOT EXISTS `ehc-djuang-434900.mule_demo_dataset.customer_data` (
  customer_id INT64,
  first_name STRING,
  last_name STRING,
  email STRING,
  phone_number STRING
);
For the *.csv file, I’m using the following set of data:
1,John,Doe,johndoe@example.com,123-456-7890
2,Jane,Smith,janesmith@example.com,456-789-0123
3,Alice,Johnson,alicejohnson@example.com,789-012-3456
4,Bob,Brown,bobbrown@example.com,012-345-6789
5,Eve,Williams,evewilliams@example.com,345-678-9012
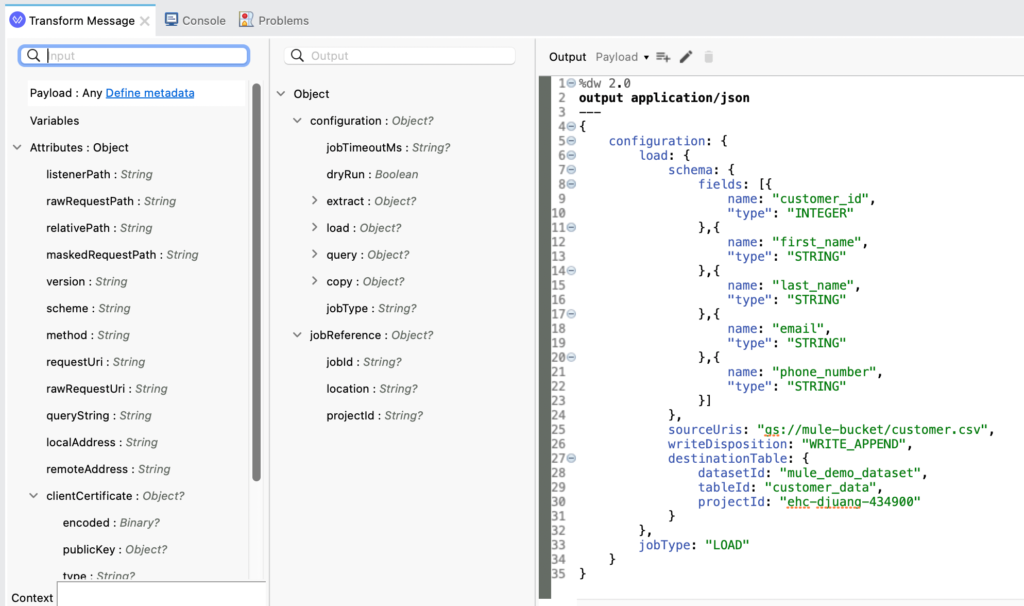
For the Request message that you pass to the Insert Job operation, it needs to follow the following format:
%dw 2.0
output application/json
---
{
	configuration: {
		load: {
			schema: {
				fields: [{
					name: "customer_id",
					"type": "INTEGER"
				},{
					name: "first_name",
					"type": "STRING"
				},{
					name: "last_name",
					"type": "STRING"
				},{
					name: "email",
					"type": "STRING"
				},{
					name: "phone_number",
					"type": "STRING"
				}]
			},
			sourceUris: "gs://mule-bucket/customer.csv",
			writeDisposition: "WRITE_APPEND",
			destinationTable: {
				datasetId: "mule_demo_dataset",
				tableId: "customer_data",
				projectId: "ehc-djuang-434900"
			}
		},
		jobType: "LOAD"
	}
}
Let’s breakdown the different parts of this request:
- The schema needs to contain the column names and type of data that will be loaded into the table.
- The sourceUris needs to point to the Bucket where the *.csv file is located.
- And the destinationTable needs to contain the Dataset ID, the name of the table, and the Project Id.
- Lastly the jobType needs to be LOAD.
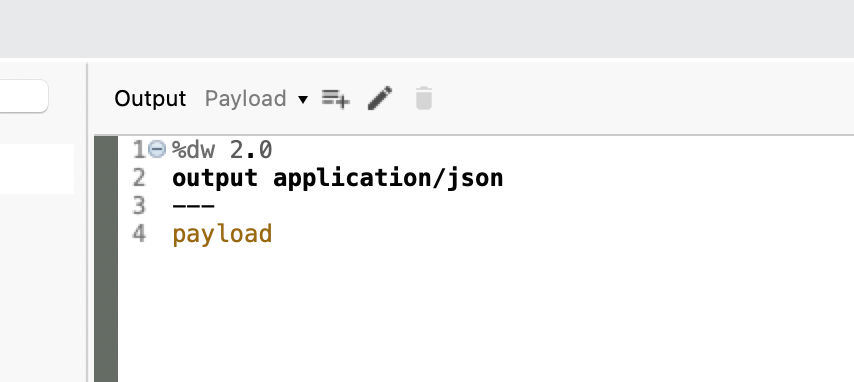
Output – Transform Message
For the output on both flows, I just set the response to be formatted in JSON.
Run Mule Application
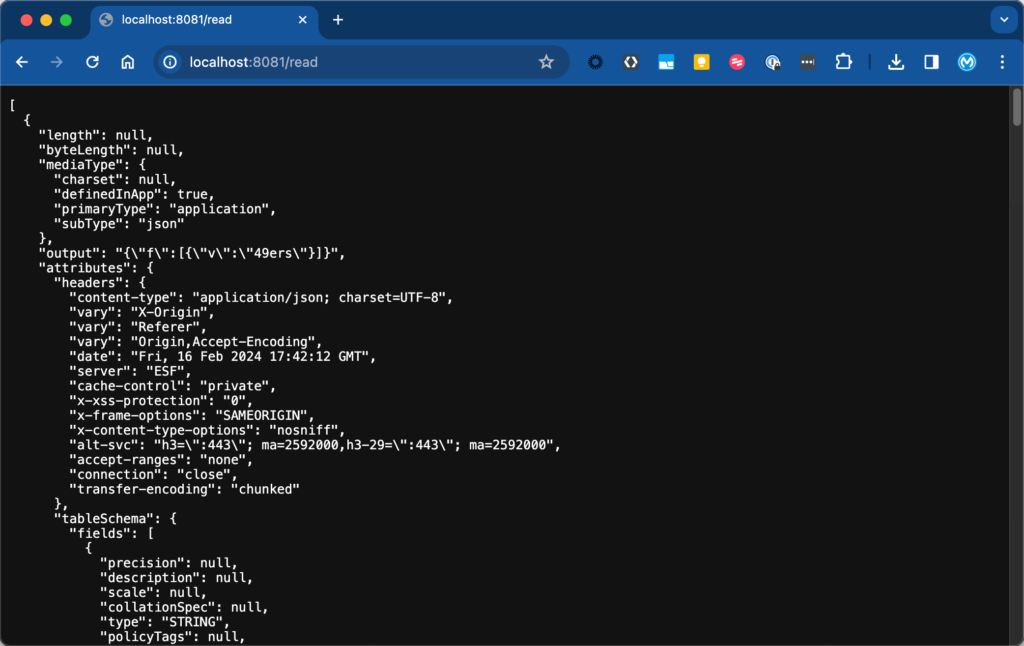
After running the project, switch to your browser and open up the following URL: http://localhost:8081/read
You should see the following output from BigQuery
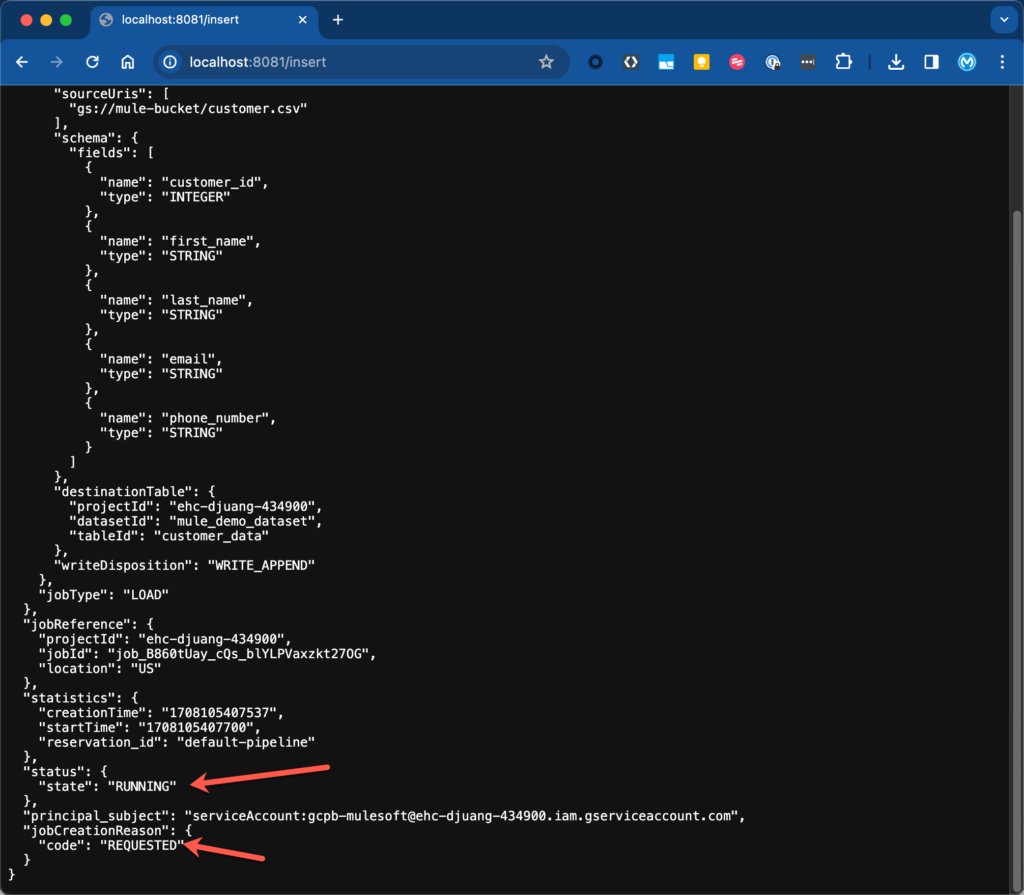
Change the URL now and go to the following: http://localhost:8081/insert
You should see the following output. Scroll down and make sure the state is RUNNING and code is REQUESTED
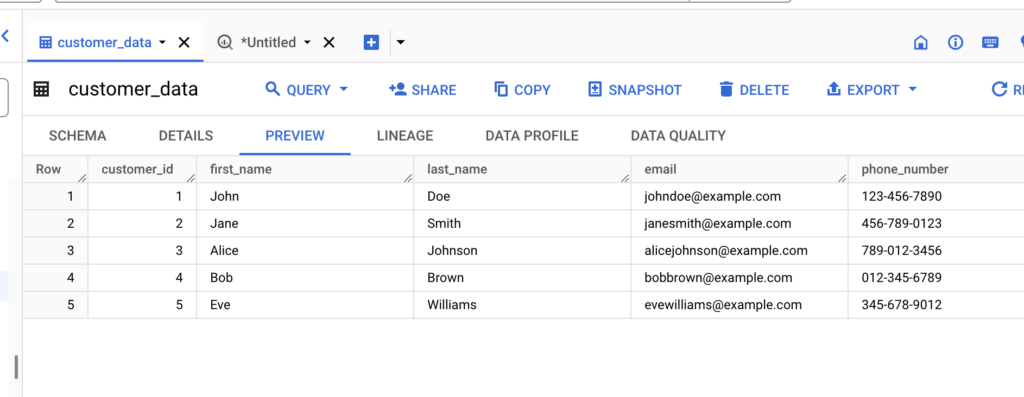
Switching over to BigQuery, you should see the data loaded into the table:
Summary
As you can see, leveraging MuleSoft and the Google BigQuery connector makes your developer’s job easier by reducing the amount of code needed to integrate. This approach allows you to quickly interact and expose or push data into BigQuery from various data sources. Using MuleSoft’s other connectors for various systems such as Salesforce, SAP, ServiceNow, etc… can help you collect and analyze data from these systems in BigQuery to find meaningful insights.
Leave a Reply