Overview
Snowflake is an analytic data warehouse provided as Software-as-a-Service (SaaS). Snowflake provides a data warehouse that is faster, easier to use, and more flexible than traditional data warehouse offerings.

As enterprises begin moving their data into Snowflake, they need ways to connect and integrate large volumes of data from their systems quickly and efficiently.
Instead of using traditional insert/update SQL commands you can use MuleSoft to drive data into Snowflake with new integration patterns using capabilities not found in traditional data warehouses.
What you’ll build
In this post, you’re going to learn how to create a Mule application that will load 10 millions records into a Snowflake table in under 20 seconds. Instead of using the traditional INSERT, we’ll be leveraging the COPY INTO command to quickly load large amounts of data into a table.
Create Snowflake Table
Before we start creating the Mule application, we need to set up a database and table in Snowflake to hold the data.. If you don’t have access to Snowflake internally, you can sign up for a free 30 day account.
Create Database
Login to Snowflake and navigate to the Databases section. Click on Create…

Give your database a name (e.g. MULESOFT) and click on Finish

Create Table
In the new database, click on Create a Table

Type in PRICE for the name of the table in the Table Name* field. Next click on Add to add two columns.

Change the names of the columns to ID and PRICE and click on Finish
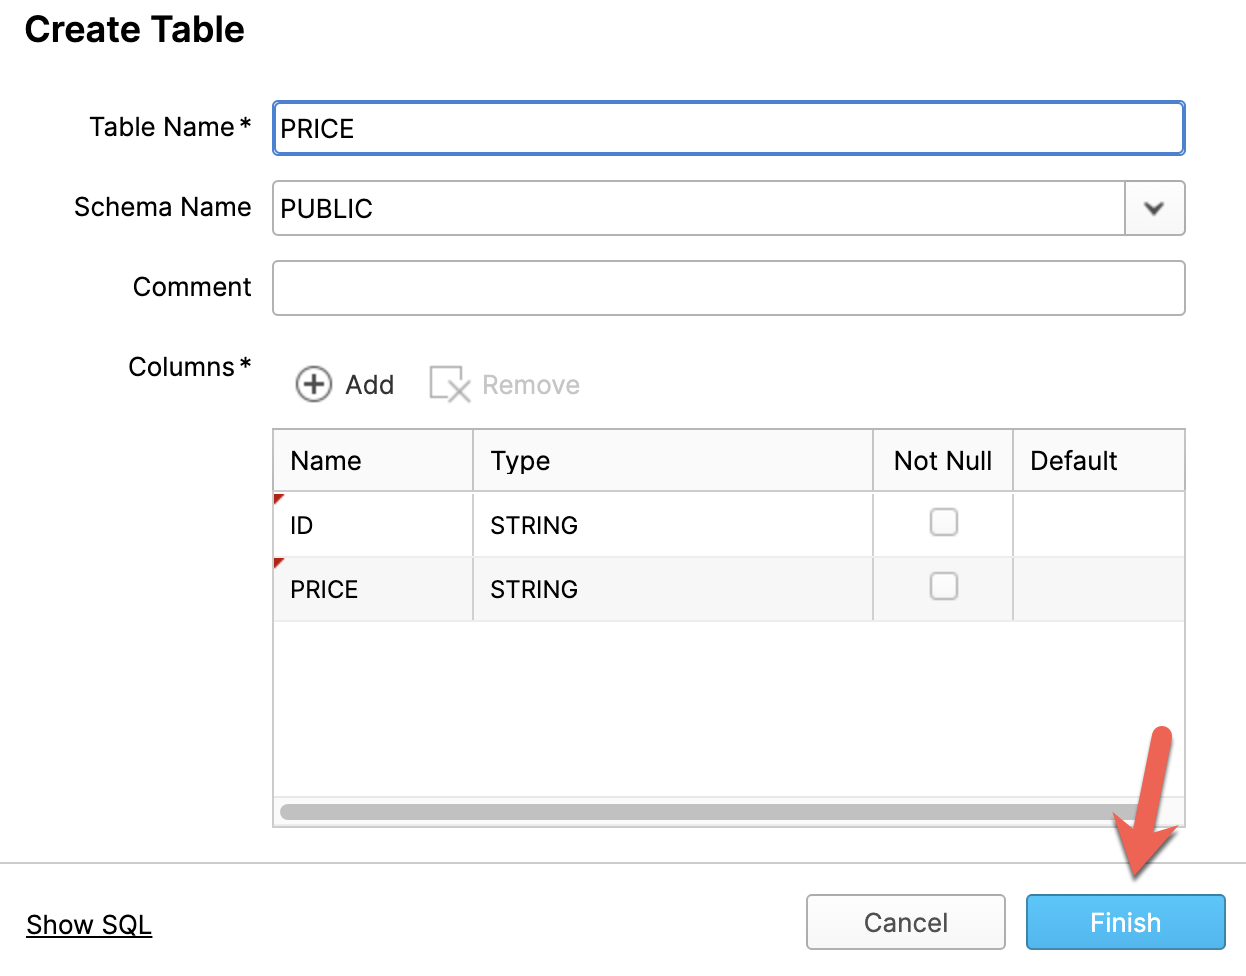
You can also run the following SQL script in the Worksheets section.
| CREATE TABLE “MULESOFT”.”PUBLIC”.”PRICE” (“ID” STRING, “PRICE” STRING); |
Upload CSV files to AWS S3
Next we need to upload the data that we want to use to AWS S3. You can use the files provided below which have 10 million records or you can use our own files. Be sure that the columns in the files correspond to the table that you created in the first section.
The table below is an example of the data from the CSV file that we plan to load.
1|711.56
2|121.65
3|7498.12
4|2866.83
5|794.47
.
.
Download CSV Files
You can click and download the CSV files with the following buttons:
Upload CSV Files to AWS S3
Once you have the files downloaded, switch to AWS S3. You can use any tool you have or just use the AWS Console to upload the files to one of your buckets.

Setup HTTP Connector
Now that you have a database and table setup in Snowflake, and you have the files uploaded to S3, you can switch to Anypoint Studio to create the Mule application.
Create a new project
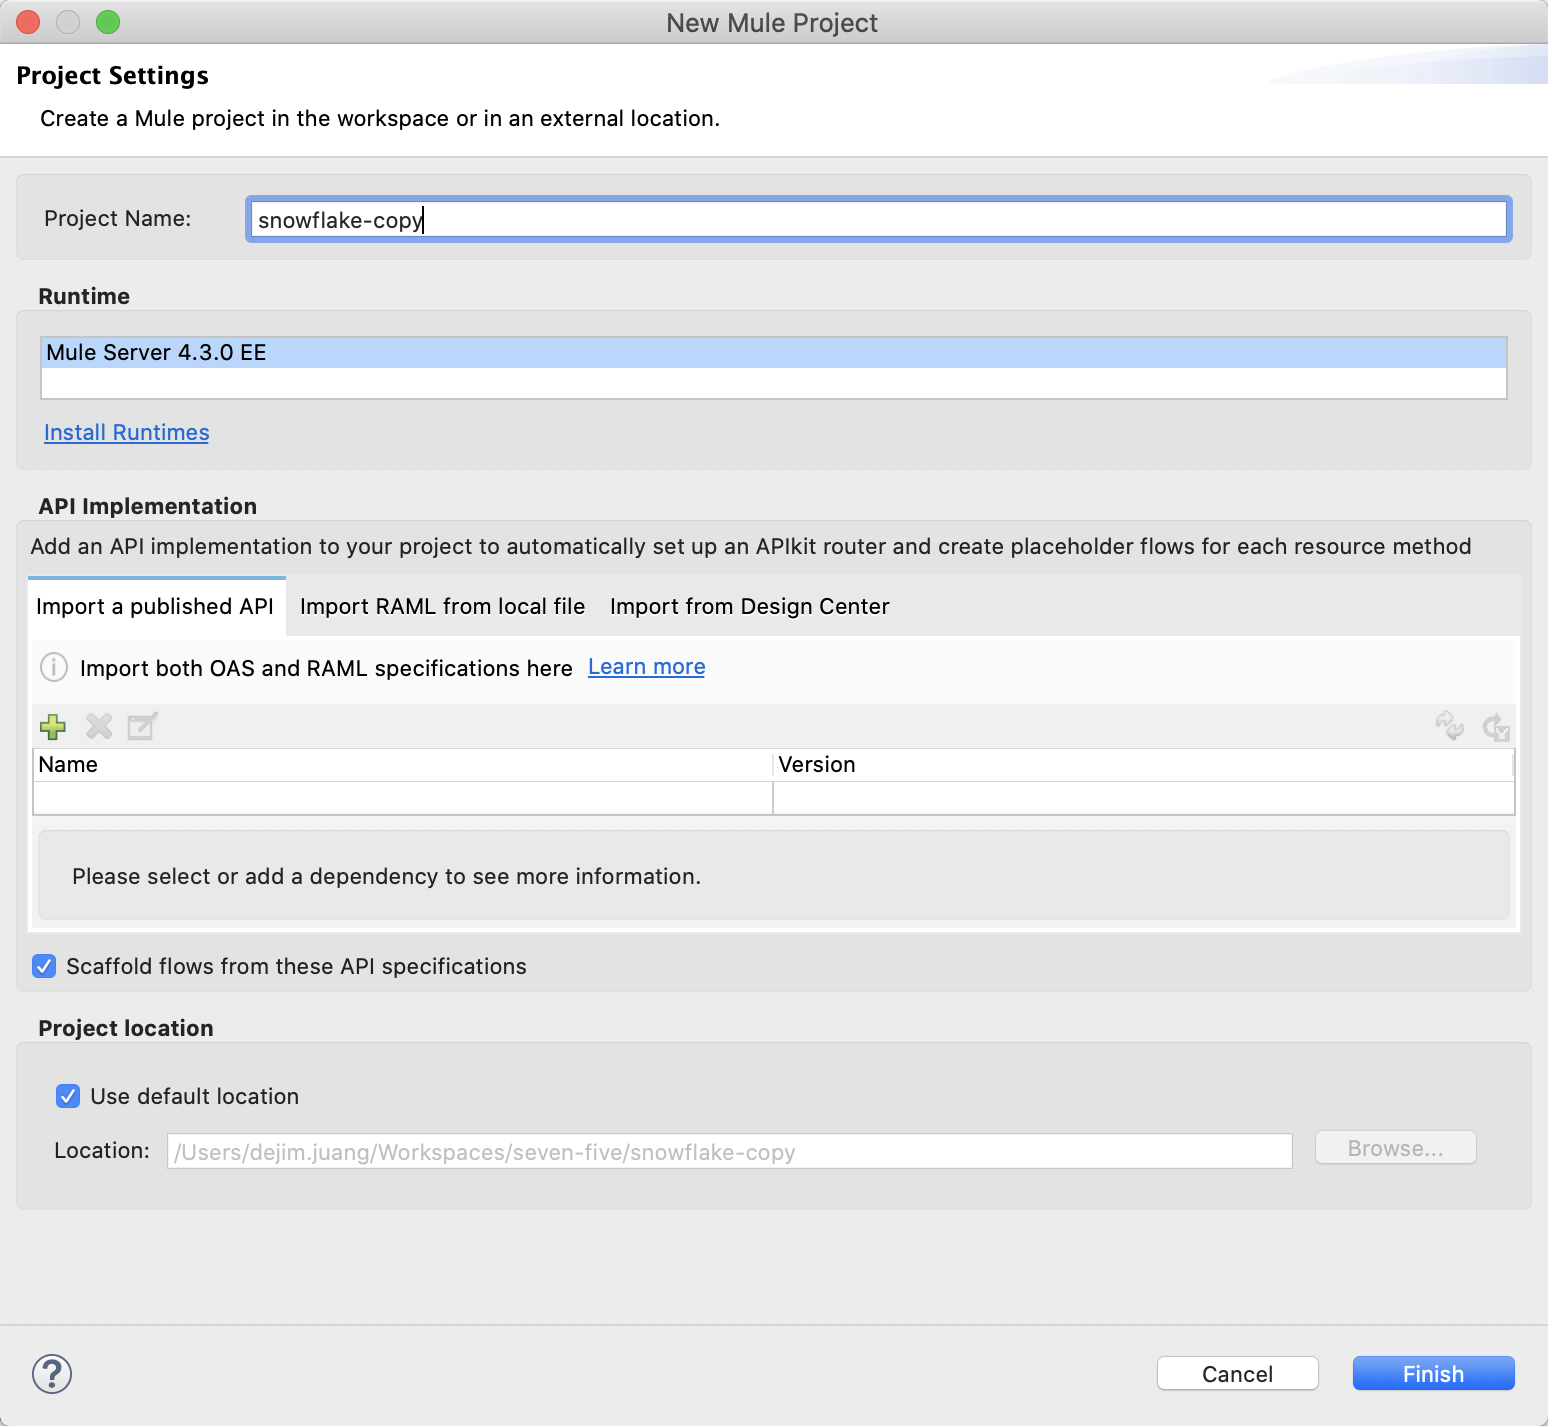
Click on File > New > Mule Project to create a new project.

In the New Mule Project window, give the project a name (e.g. snowflake-copy), select a Runtime, and then click on Finish
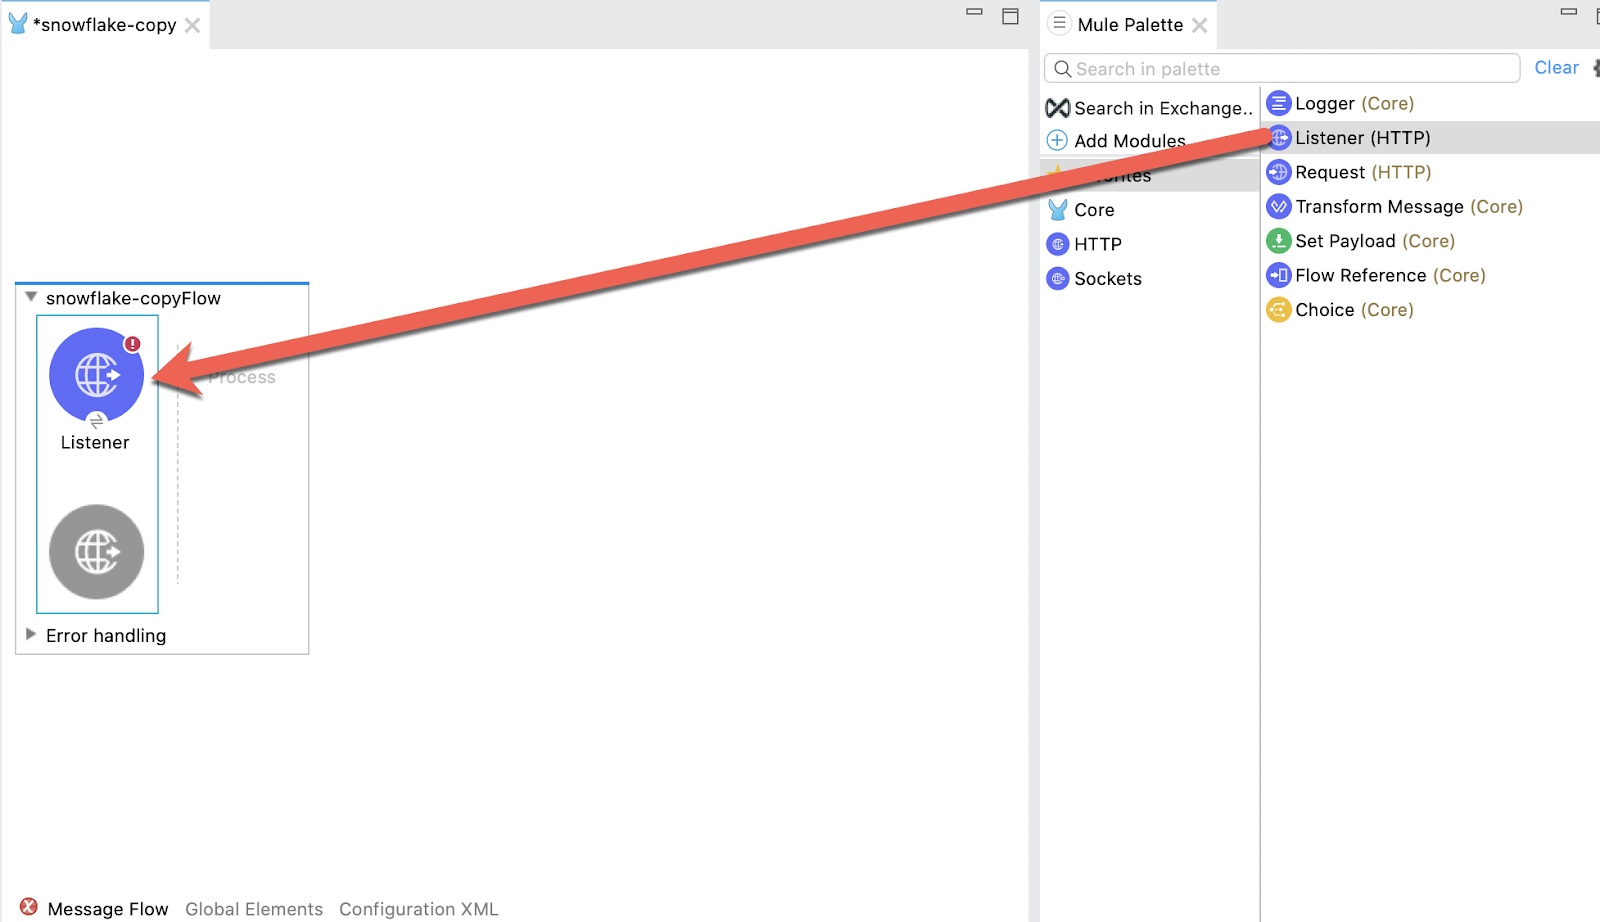
Once the new project is created, you’ll be presented with a blank canvas. In the Mule Palette on the right, click on HTTP and then drag and drop the Listener into the canvas.
Add HTTP Listener Configuration
If the Mule Properties tab doesn’t open, click the Listener icon and click on the green plus sign to create a new Connector configuration.

Under the General tab, and in the Connection section, take note of the port. By default this will be 8081. Go ahead and click on OK to accept the defaults and proceed.

Set Listener Path
Back in the Listener Mule properties tab, fill in the Path field with the value /copy.

Setup Database Connector
Next, we need to connect to Snowflake using the Database Connector. In the Mule Palette, click on Add Modules

Drag and drop the Database module to where it says Drag and drop here to add to project

If it prompts you to select a module version, select the latest version and click on Add

Add Database Configuration
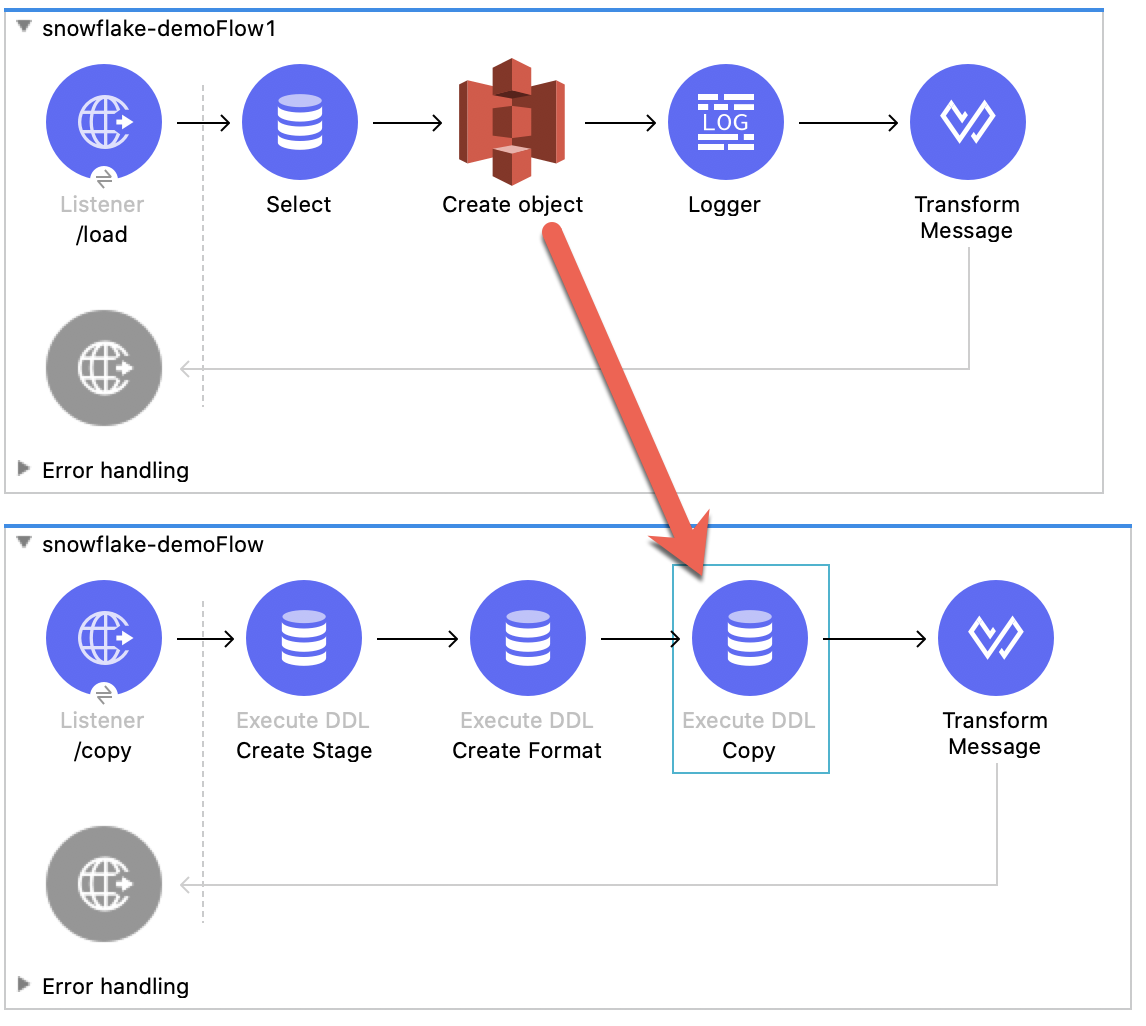
From the Mule Palette, select the Database module and drag and drop in 3 Execute DDL operations.

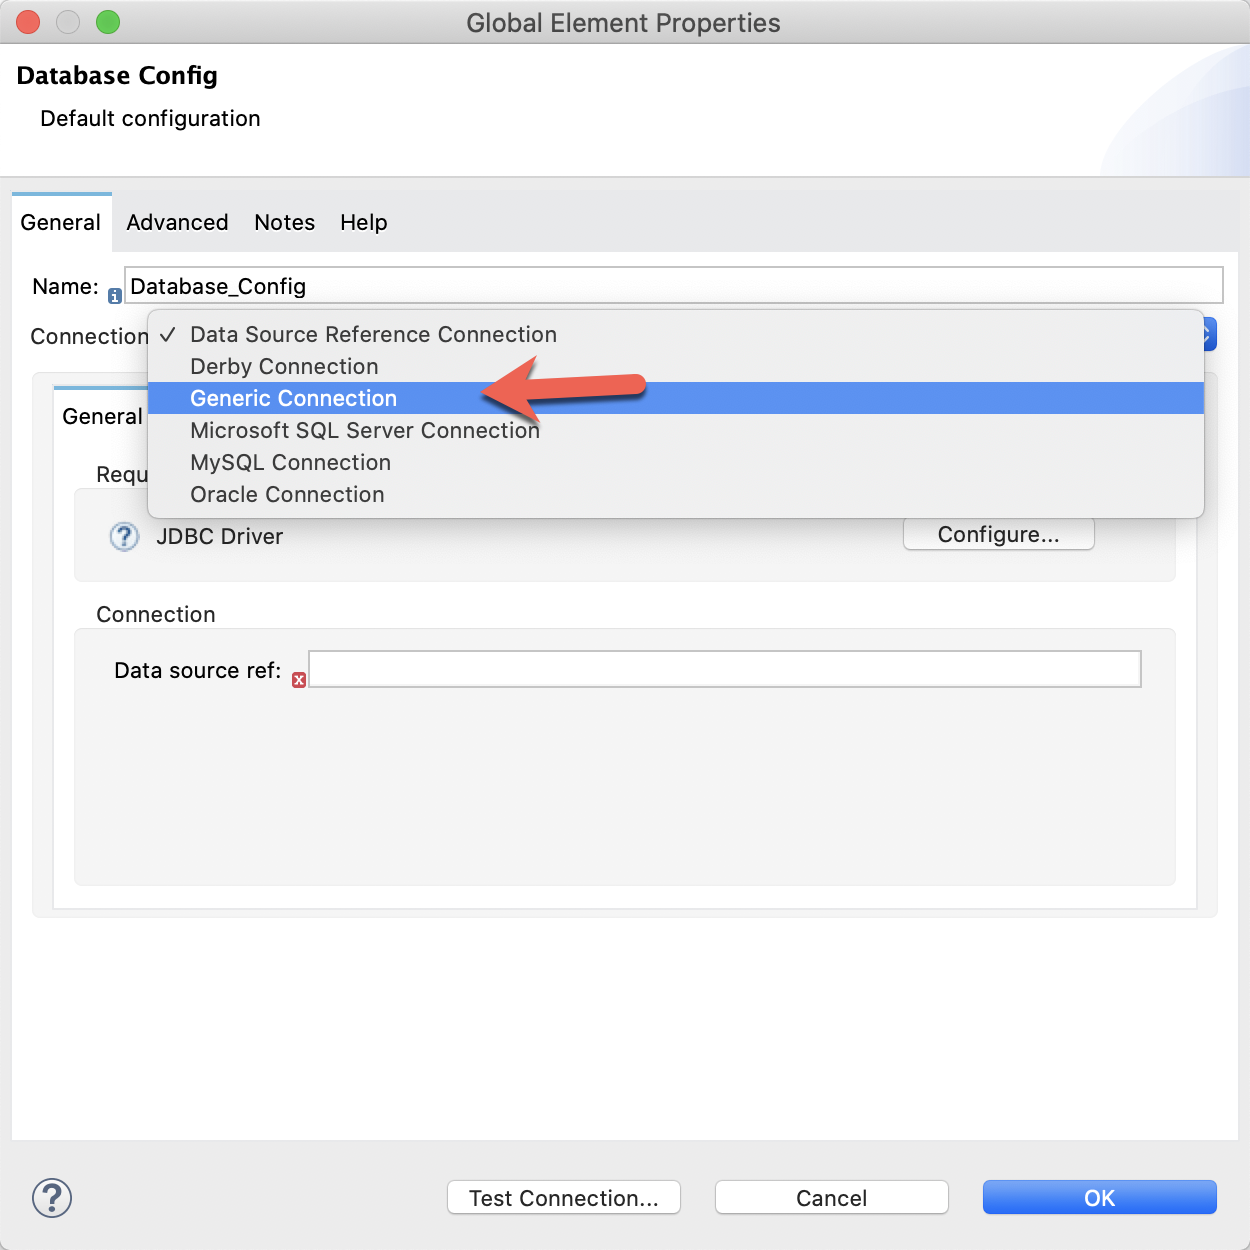
Click and select the first Execute DDL processor to open the Mule Properties tab. Click on the green plus sign next to the Connector configuration field in the Basic Settings section.

In the Database Config window, change the Connection dropdown to Generic Connection
In the Required Libraries section, click on Configure

Click on Add Maven dependency
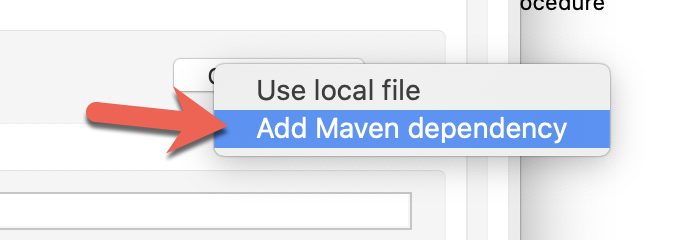
Copy and paste the following Maven dependency snippet into the box on the right of the window and click on Finish
<dependency>
    <groupId>net.snowflake</groupId>
    <artifactId>snowflake-jdbc</artifactId>
    <version>3.12.9</version>
</dependency>

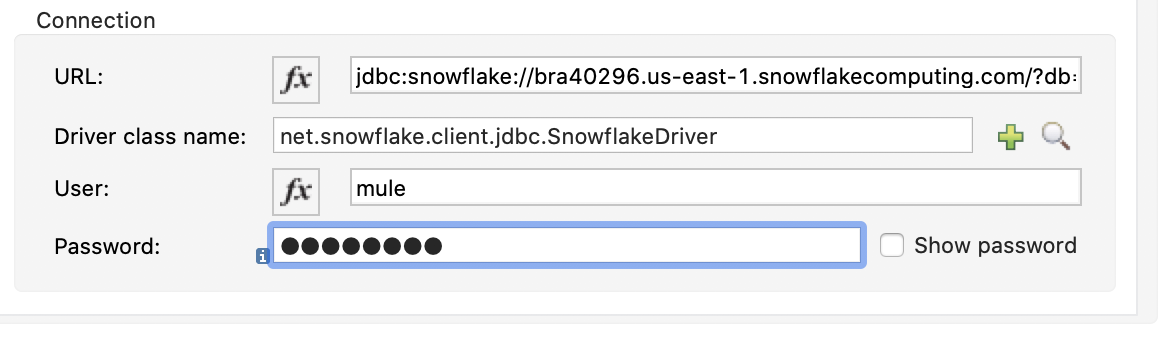
Back in the Database Config window, paste the following into the URL field in the Connection section.
| jdbc:snowflake://<Account Name>.snowflakecomputing.com/?db=MULESOFT&schema=PUBLIC |
Be sure to replace the Account Name field with your corresponding Snowflake instance.
| Note: If you’re using AWS for your instance, be sure to include your region in the URL (e.g. mule123456.us-east-1.snowflakecomputing.com). |
You can find your account name in the URL of your Snowflake instance URL.

Next, copy and paste the following in to Driver class name
| net.snowflake.client.jdbc.SnowflakeDriver |
And fill in the User and Password field with credentials for your Snowflake instance.
The connection section will look like this:
Click on Test Connection…

If everything was configured correctly, you’ll see Test connection successful, if not, go back and check your credentials and settings.
Otherwise, click on OK to continue.
Execute DDL – Create Stage
Instead of the standard way of looping through and inserting records in bulk, we’re going to be calling the Snowflake COPY INTO command to load data from a set of CSV files in AWS S3..
But before we can call COPY INTO, we need to let Snowflake know where and how to grab these files from a staging area. Snowflake provides a command called CREATE STAGE to handle this. The stage can be in AWS S3, Azure, or Google Cloud Storage. You can learn more about the CREATE STAGE command by following this link.
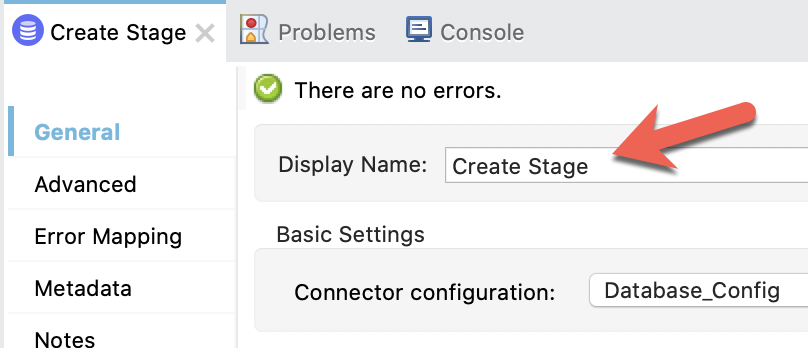
Back in the Mule canvas, click on the first Execute DDL processor to open the Mule properties tab.
For readability, change the Display Name to Create Stage
Next, copy and paste the following SQL query text into the SQL Query Text field.
| CREATE OR REPLACE STAGE S3_EXT_STAGE URL='<S3 BUCKET URL>’ CREDENTIALS=(aws_key_id='<AWS KEY>’ aws_secret_key='<AWS SECRET>’); |
The <S3 BUCKET URL> should be in the format s3://<bucket name>/<OPTIONAL key>

Execute DDL – File Format
The next operation defines the format of the file being used for the COPY INTO command. Snowflake provides support for CSV, JSON, XML, AVRO, ORC, and PARQUET. Additional parameters can be found by following this link for the CREATE FILE FORMAT command.
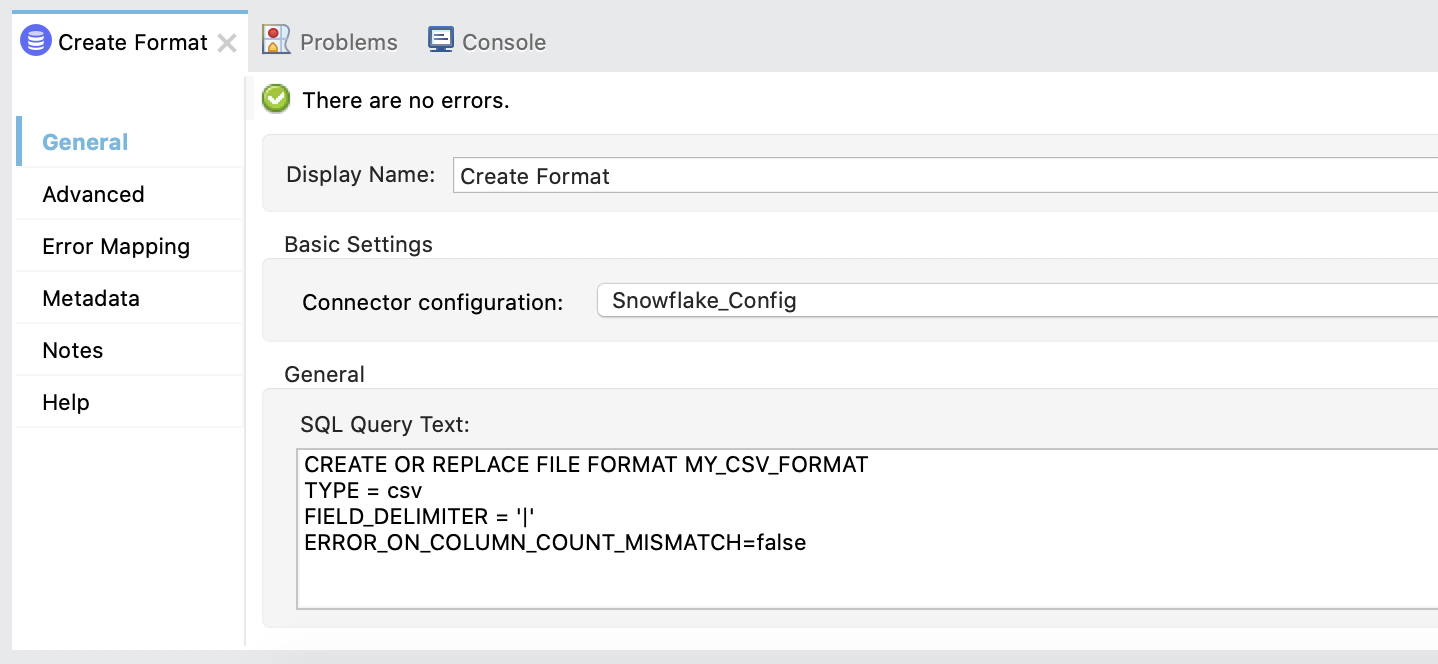
Back in the Mule canvas, click on the second Execute DDL processor to open the Mule properties tab. Change the Display Name field to Create Format and change the Connector configuration dropdown to Database_Config

Under the General section, copy and paste the following SQL query text into the SQL Query Text field.
| CREATE OR REPLACE FILE FORMAT MY_CSV_FORMATTYPE = csvFIELD_DELIMITER = ‘|’ERROR_ON_COLUMN_COUNT_MISMATCH=false |
The tab should look like the following:
Execute DDL – Copy Into
The last Execute DDL operation will run the COPY INTO command. This will read the files from the external S3 stage and leverage the file format that we defined for the CSV file that we’ll be using. You can read more about the COPY INTO command by following this link.
Click on the 3rd Execute DDL operation and change the Connector configuration dropdown to Database_Config
Change the Display Name field to Copy Into

Lastly, under the General section, copy and paste the following SQL query text into the SQL Query Text field.
| COPY INTO PRICE FROM @S3_EXT_STAGE FILE_FORMAT = (FORMAT_NAME = ‘MY_CSV_FORMAT’) PATTERN=’.*.csv’ ON_ERROR = ‘SKIP_FILE’; |
The tab should look like the following:

Transform Database Response
Create DataWeave Script
Once the Database Connector processes the SQL scripts, it returns the number of records processed. Let’s go ahead and transform that and output the result as JSON data.
From the Mule Palette drag and drop a Transform Message module into the canvas. Place it after the Execute DDL – Copy Into operation.

In the Mule Properties tab for the Transform Message component, modify the DataWeave script and paste the following:
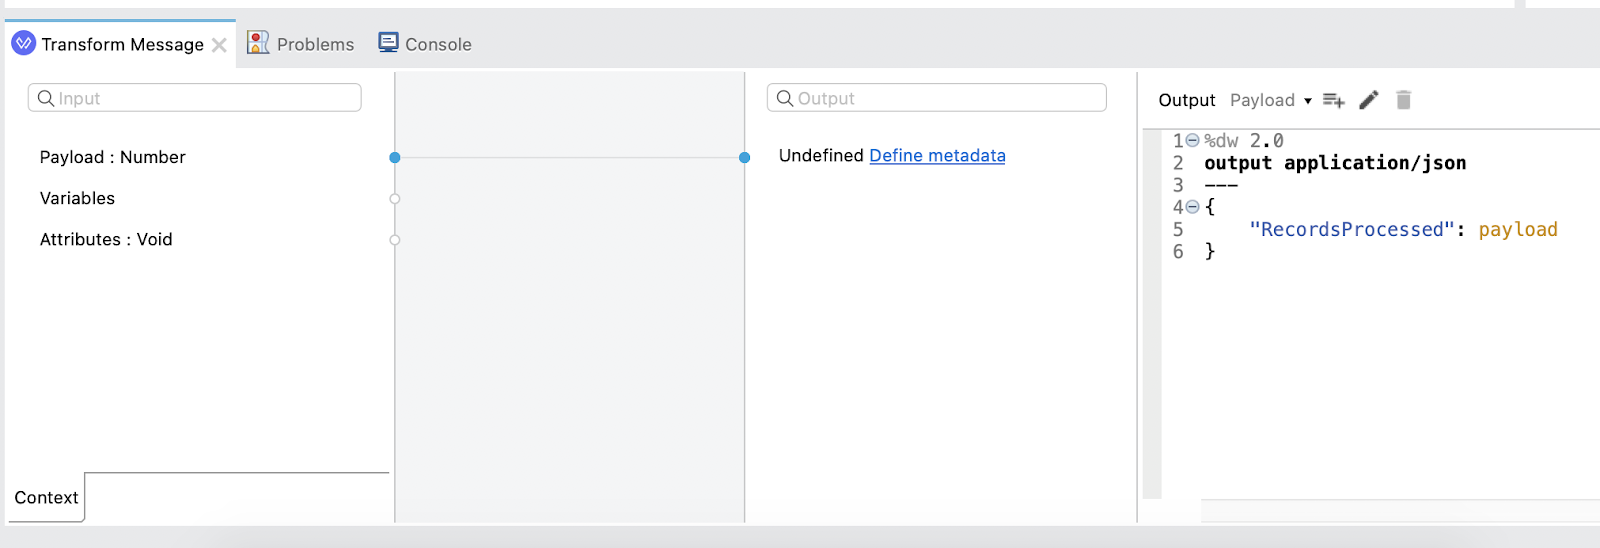
%dw 2.0
output application/json
---
{
	"RecordsProcessed": payload
}
Run the Application
Run Project
Our next step is to test the flow we’ve built. Right click on the canvas and click on Run project snowflake-copy

The Console tab should pop-up now. Wait for the status to show DEPLOYED before moving onto the next step.

Test Flow
Let’s test out our flow now. Switch to your web browser or Postman and enter the following URL:
http://localhost:8081/copy
If everything was configured correctly, you should see the following response in your browser or Postman:

Switch back to Snowflake and click on History

In the table below, you can see the results of the COPY INTO command. The total duration will vary of course but should be under 20 seconds for the 10 million records.

Click on the Query ID for the row to see more details.

You can see that it loaded the two CSV files from the S3 bucket and the corresponding SQL text that was used to run the operation.
Summary
Congratulations, you’ve successfully loaded 10 million records in Snowflake in under 20 seconds. While this is a very basic example, you can extend this application further and harness the power and flexibility of Anypoint Platform.
If you have data that resides in another system, you can use DataWeave to generate CSV files and also leverage the AWS S3 connector to upload the files into the bucket that the applications reads from.
This pattern gives you the ability to transform, enrich, and orchestrate data from multiple sources before loading the data into Snowflake. The end result is the separation of ETL between MuleSoft and Snowflake. MuleSoft can easily handle the extraction and transformation of data and then Snowflake can handle the loading of the data.