

Unlocking the full potential of your data has never been easier than with the seamless integration of MuleSoft and Microsoft Power BI. In today’s data-driven world, businesses are constantly seeking ways to harness the power of their information for smarter decision-making. In this step-by-step tutorial, we’ll guide you through the process of using MuleSoft, a robust integration platform, to connect any data source with Power BI, a common business intelligence tool. Whether you’re a data analyst, a business intelligence professional, or an IT enthusiast, this blog post will empower you to master the art of data integration, enabling you to transform raw data into actionable insights.
Setup PowerBI
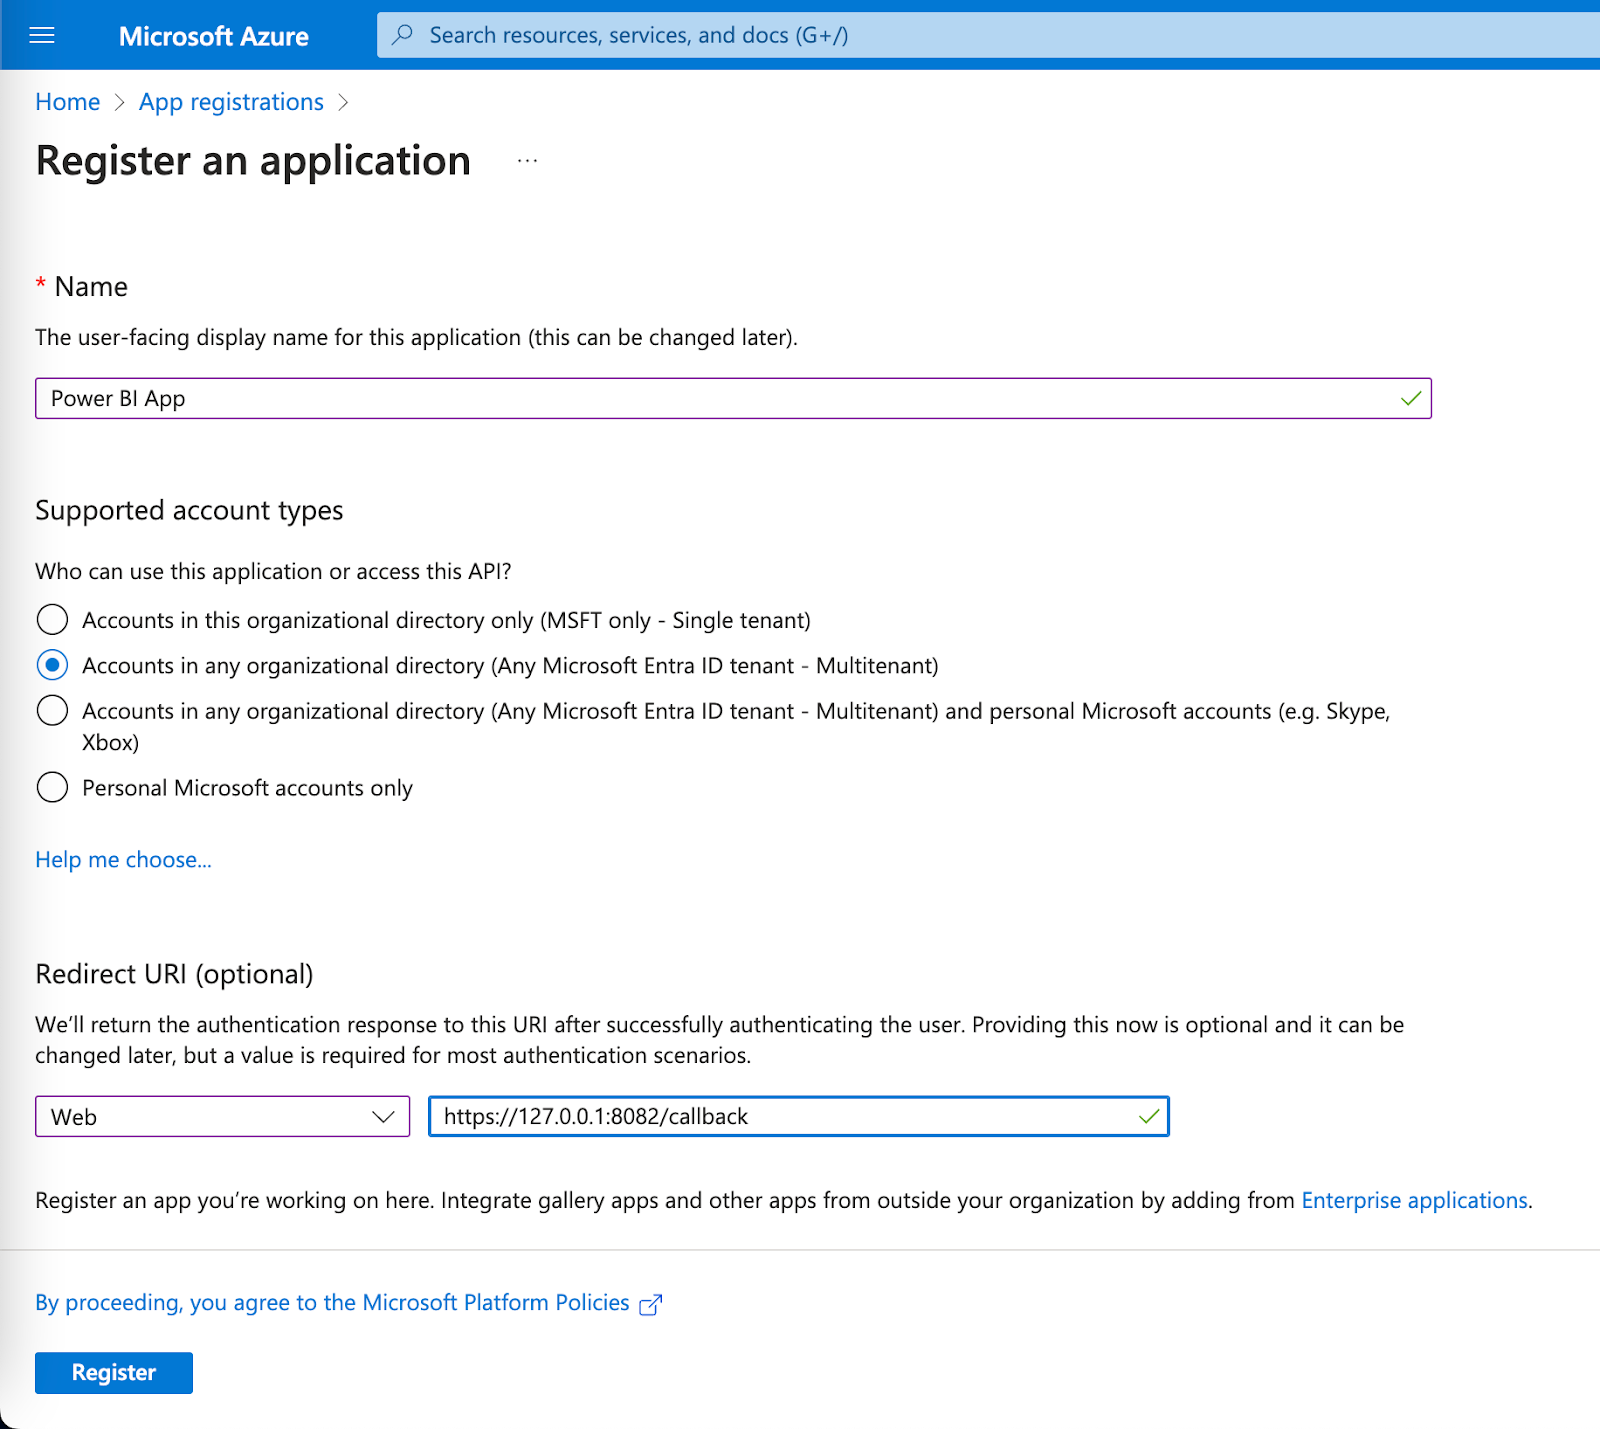
Before we can connect to Power BI, we need to setup an Azure AD application. Login to Azure and navigate to App registrations and click on New registrations.

Give the application a name (e.g. Power BI App), check Accounts in any organizational directory for Supported account types. Under Redirect URI, select Web from the dropdown and type in https://127.0.0.1:8082/callback. Click on Register
In the newly created app, click on Certificates & secrets and click on New client secret
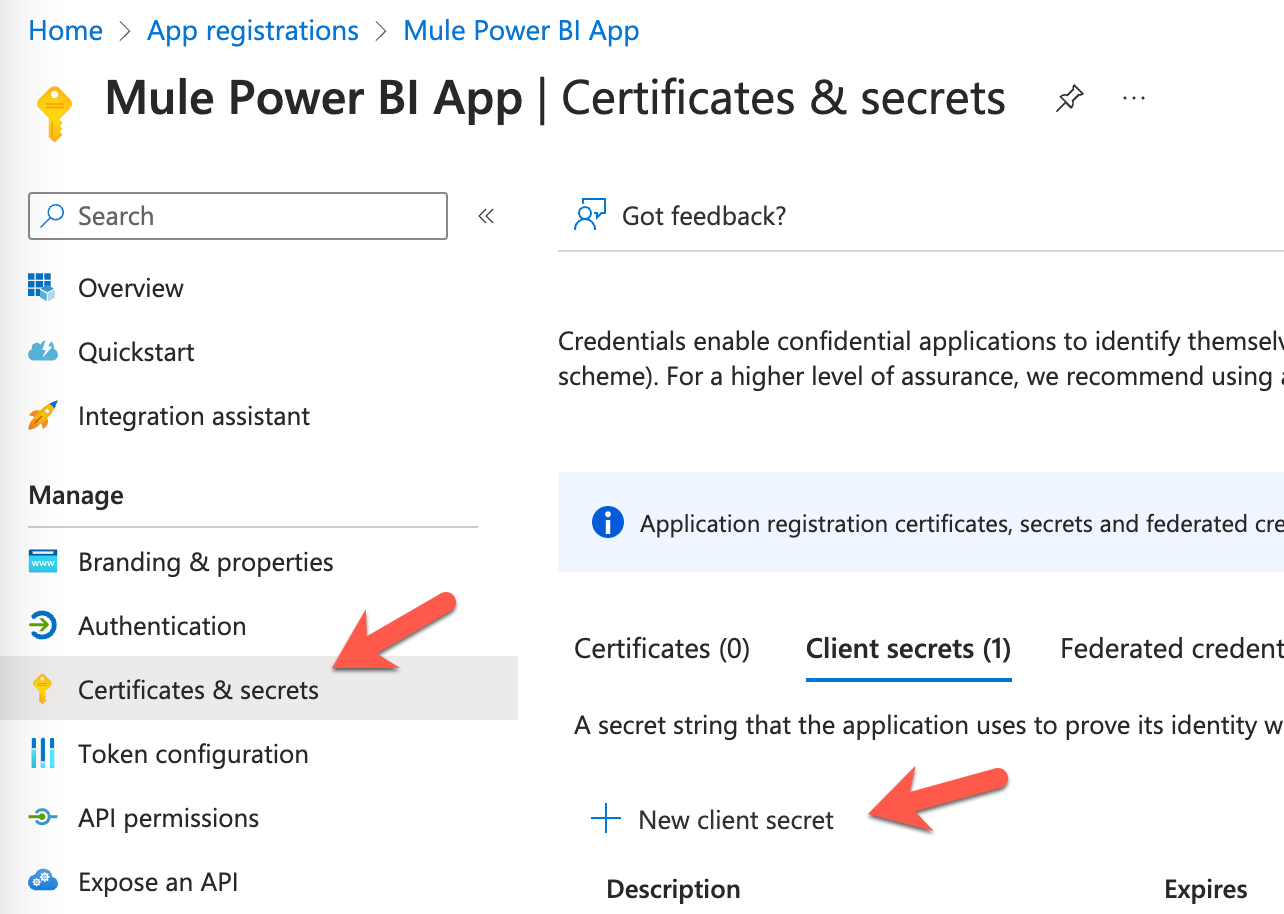
Give the secret a name and set the expiration date.

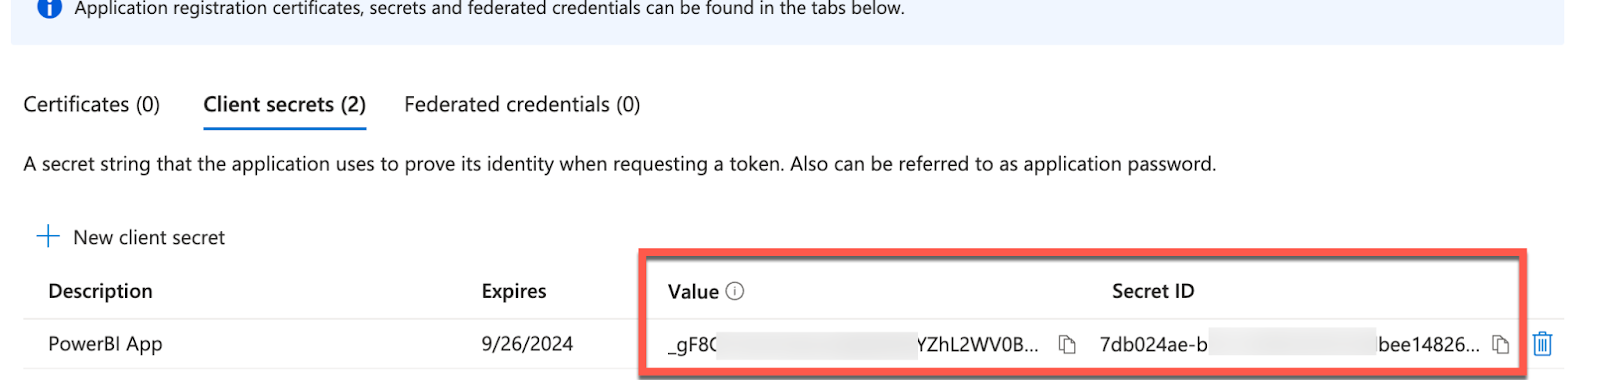
Copy down the value and secret ID, you’ll need these when you configure the Mule application.
Next click on API permissions and click on Add a permission
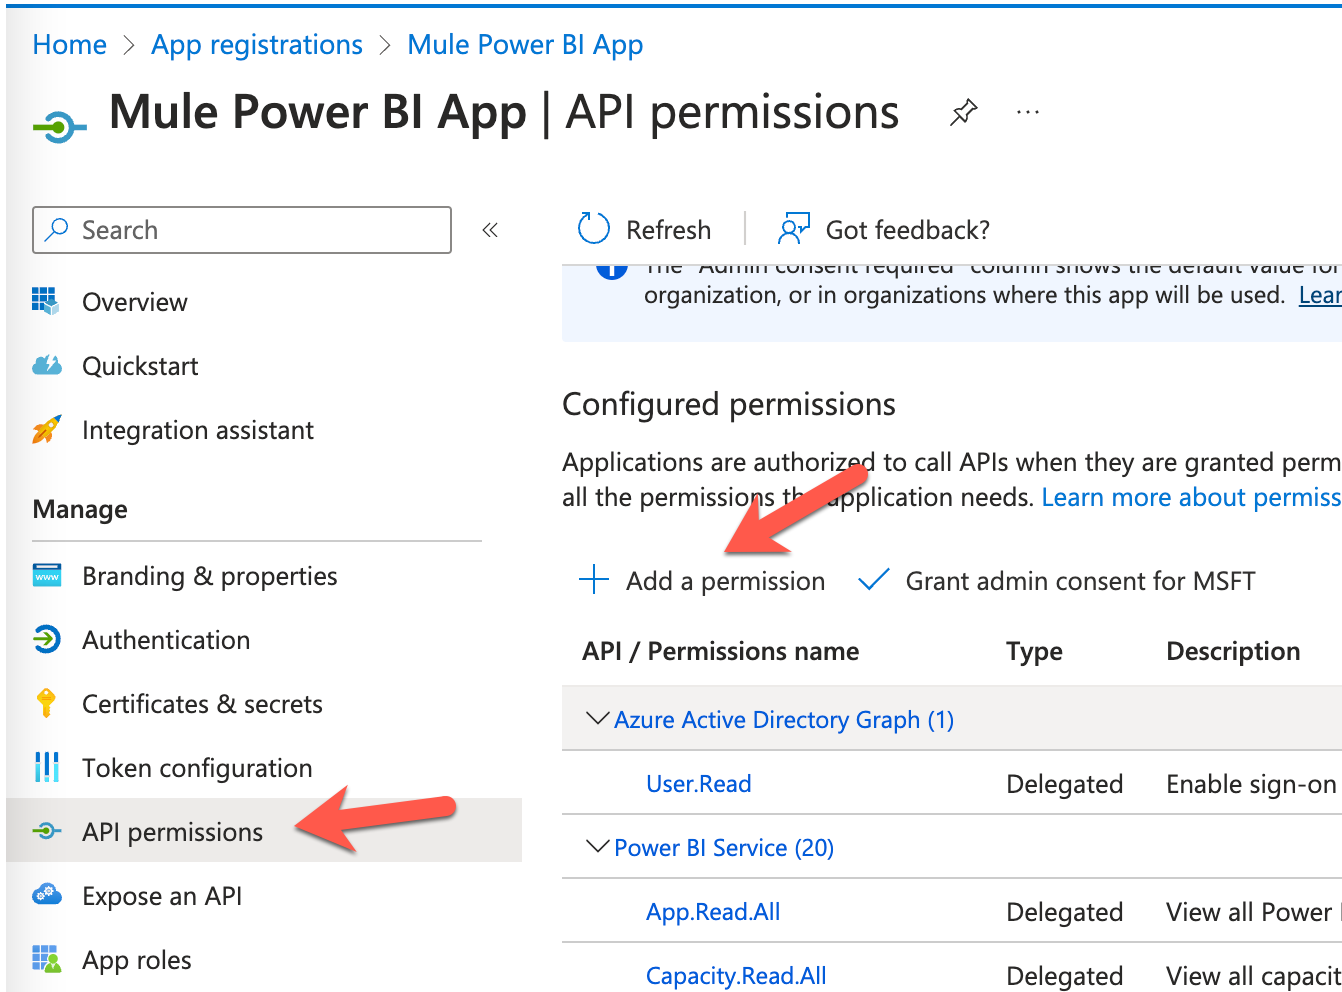
Select Power BI Service
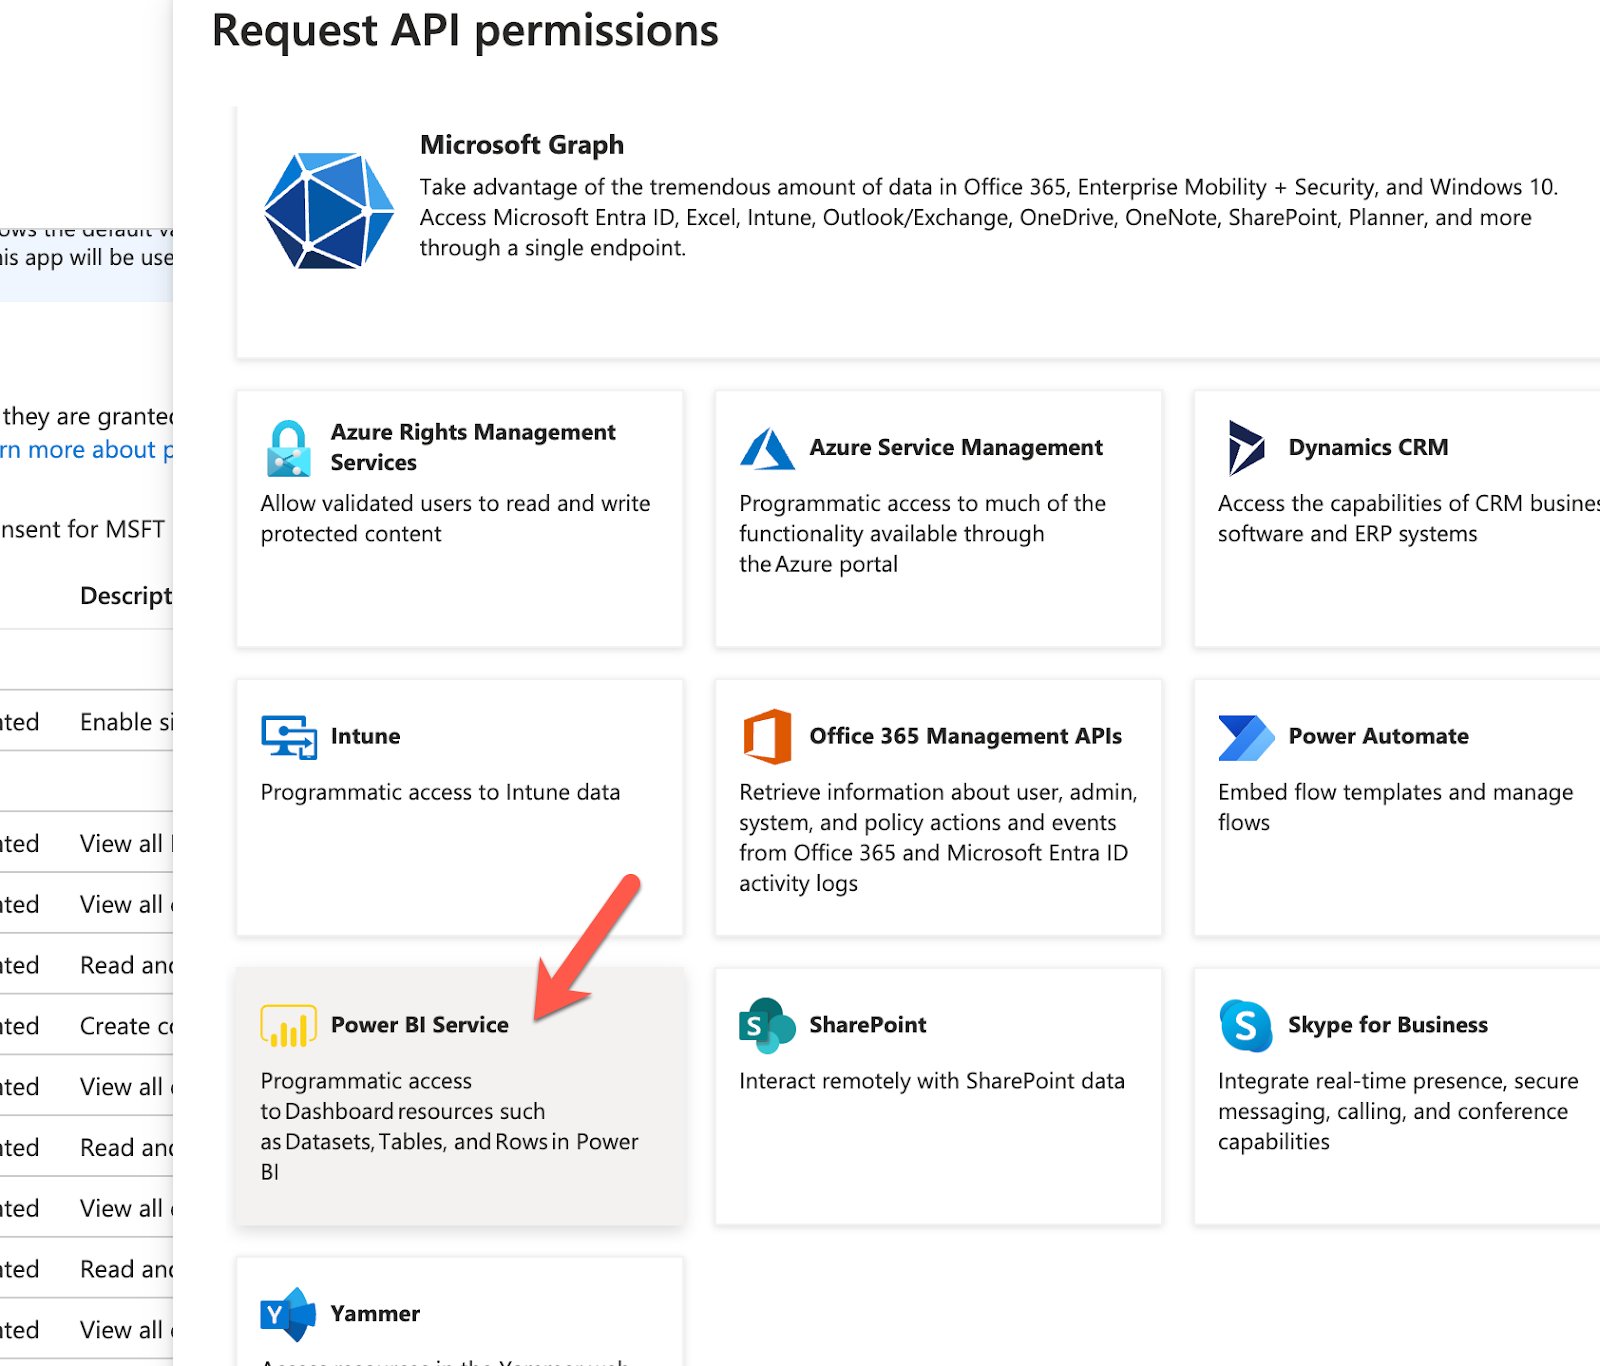
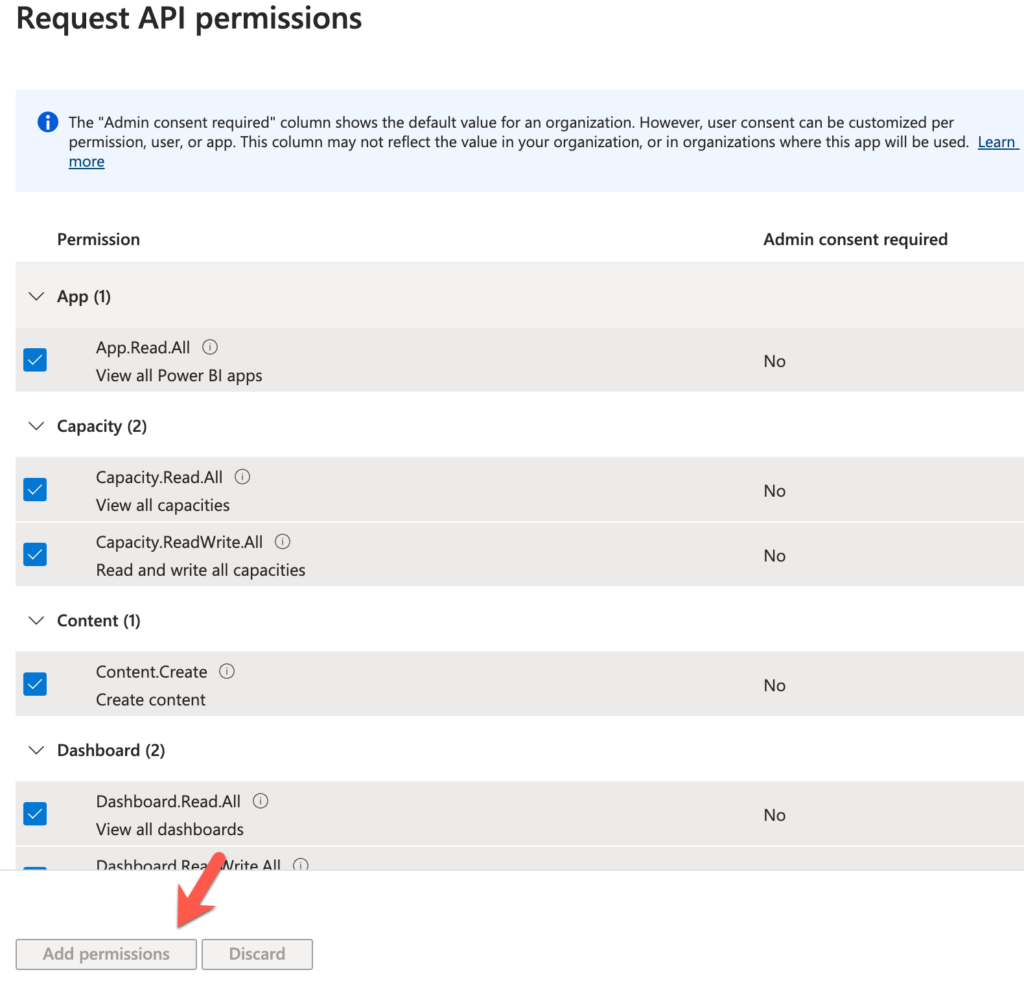
Click on Delegated permissions

Select all the items or just the items that you’d like to provide access to the user/connector and click on Add permissions
That’s it from the Azure side. You can leave this tab open because you’ll need to come back and reference some URLs and IDs as you setup the connector.
Create MuleSoft Application
This tutorial assumes you already know how to build a Mule flow so I’ll skip to the configuration steps of the main pieces of this flow.
HTTP Listener
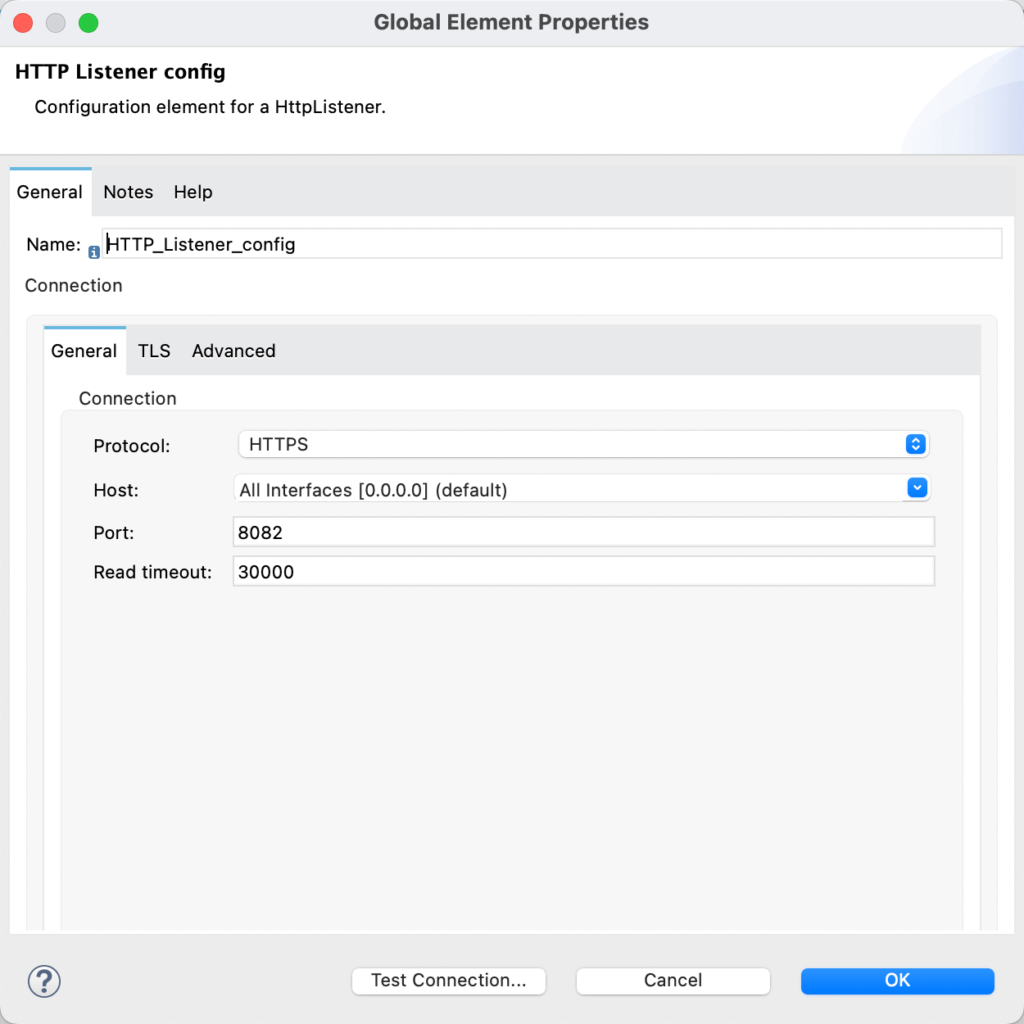
Let’s start with the HTTP Listener. Because we’re using OAuth to connect to Power BI, we need to configure the flow to expose an HTTPS endpoint in order for the redirect URL to work. In the General tab, select HTTPS for the Protocol and set the Port to 8082.
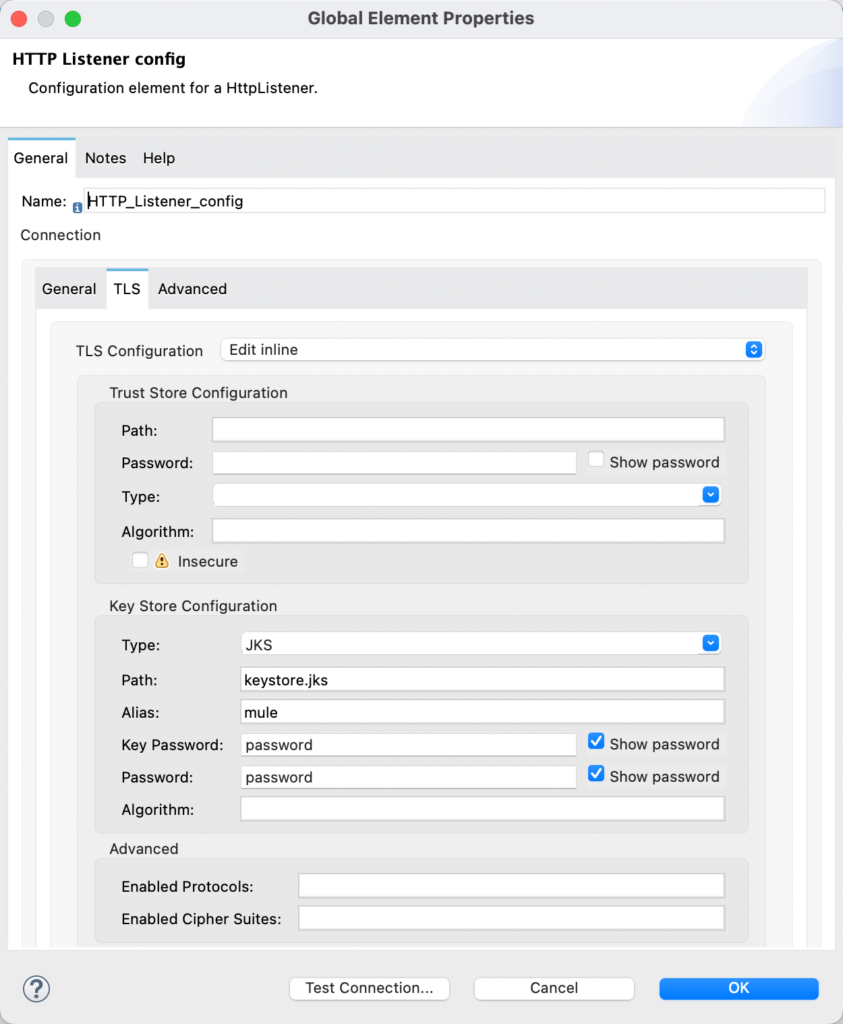
Under the TLS tab, configure the Key Store Configuration. You can use your own *.jks file or use the one here as an example. The settings are in the screenshot below.
Back in the Mule configuration properties tab, configure the following:
That’s it for the HTTP Listener. Move to the next step to see how to configure the Power BI connector.
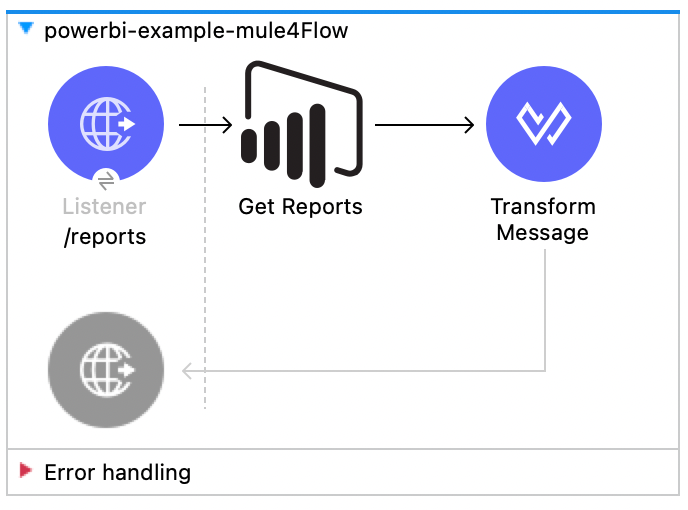
Power BI – Get Reports
We’re going to use the Get Reports operation to get a list of reports from your Power BI workspace. The properties tab is pretty straighforward:
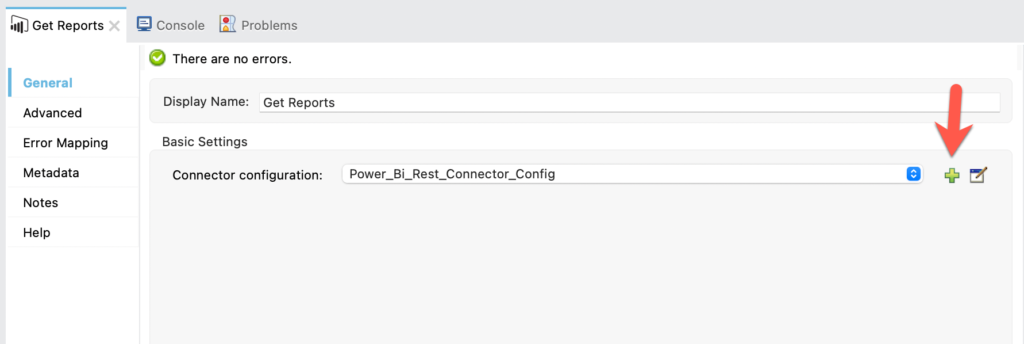
In the Global Element Properties window, here are the fields that need to be configured.
The Consumer key and Consumer secret fields are from the Certificates & secrets section when you setup the App in Azure.
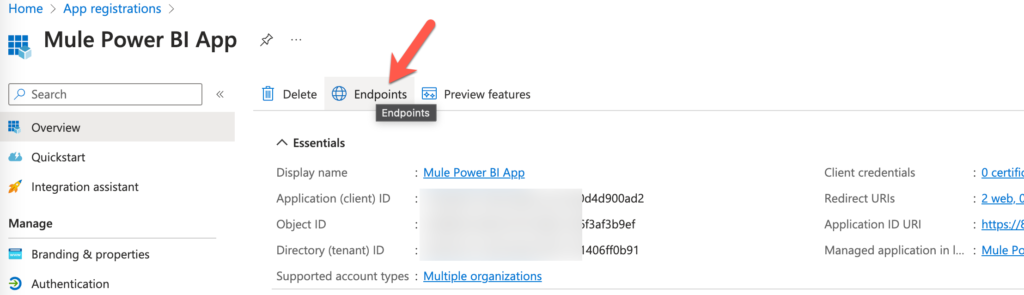
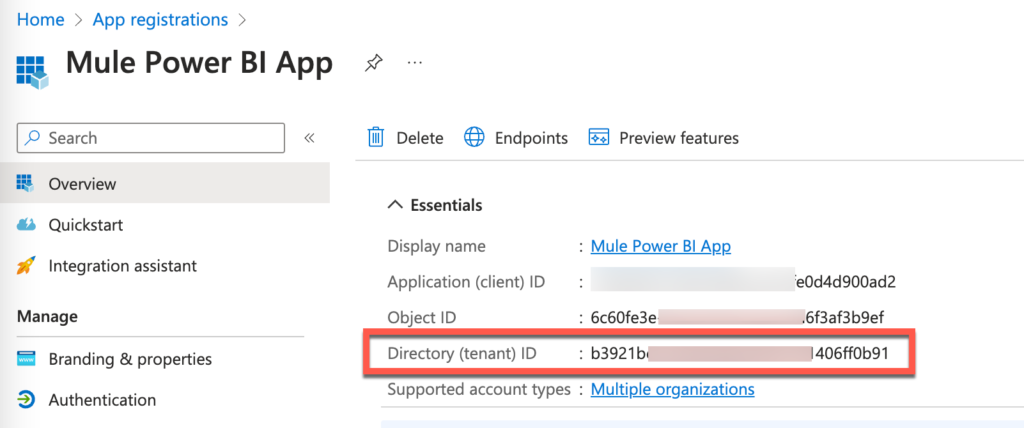
You can get the Tenant ID from the Overview page:
The Scope field should be set to https://analysis.windows.net/powerbi/api/.default
Lastly the Callback path and Authorize path should be set to \callback and \authorize respectively.
Move on to the next step to transform the output to JSON.
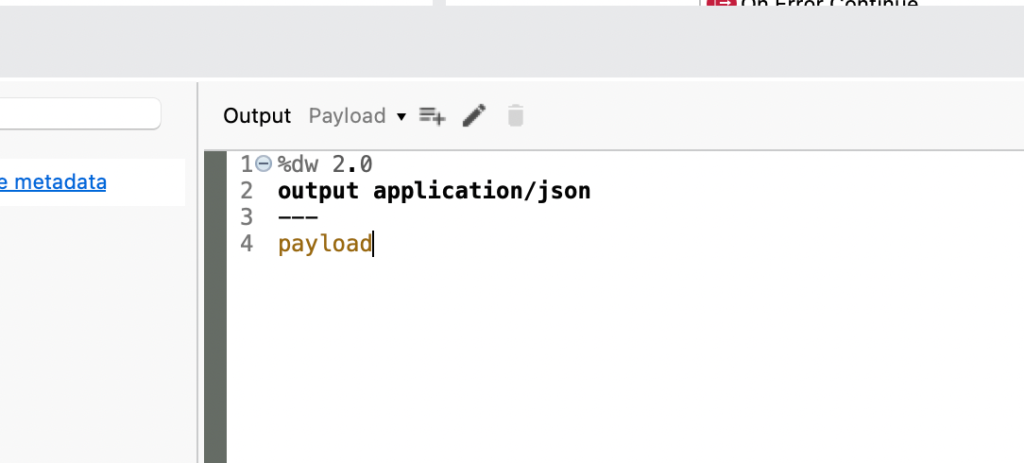
Transform Message
The last component will just transform the response from Power BI to JSON and return that back to the user in the browser:
%dw 2.0
output application/json
---
payload
That’s for the flow. In the next section, we’re going to run the application and test it out.
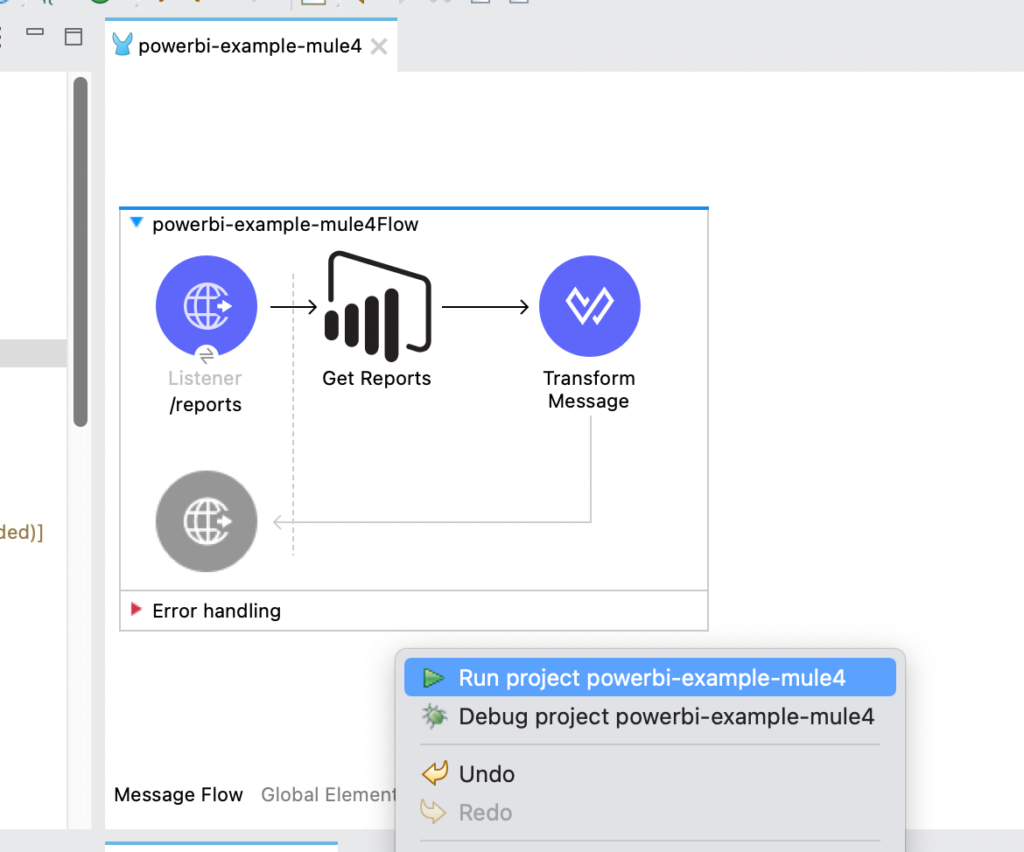
Test Application
Let’s test the application, right click on the canvas and click on Run
Once the app is deployed successfully, switch to a browser and navigate to the following URL
| https://localhost:8082/authorize |
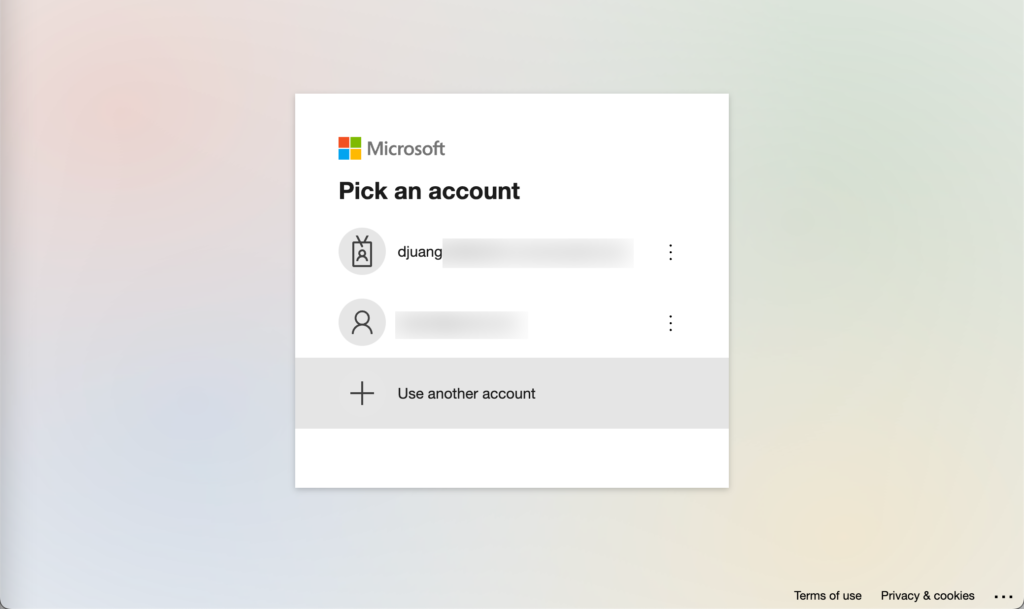
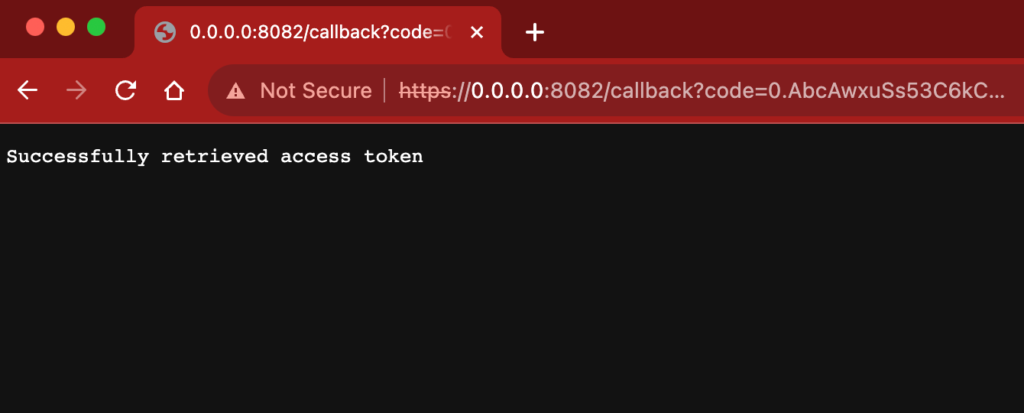
Because we’re using OAuth, it’ll direct you to login to your Azure account.
If configured correctly, you’ll be redirected back to the callback URL.
Either open a new tab or change the URL to the following:
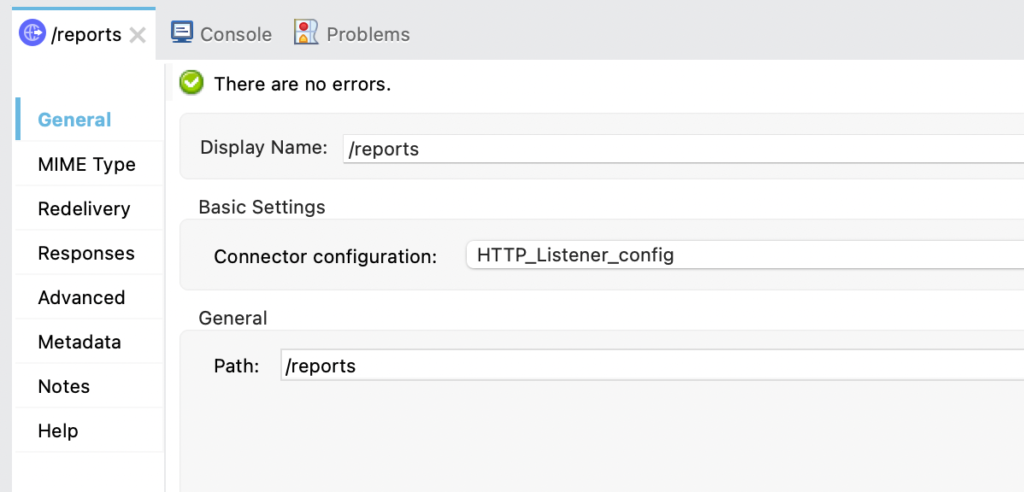
| https://0.0.0.0:8082/reports |
The Power BI connector will used the access token that was generated and authenticate the user and make the call to the Power BI endpoint to retrieve the list of reports.
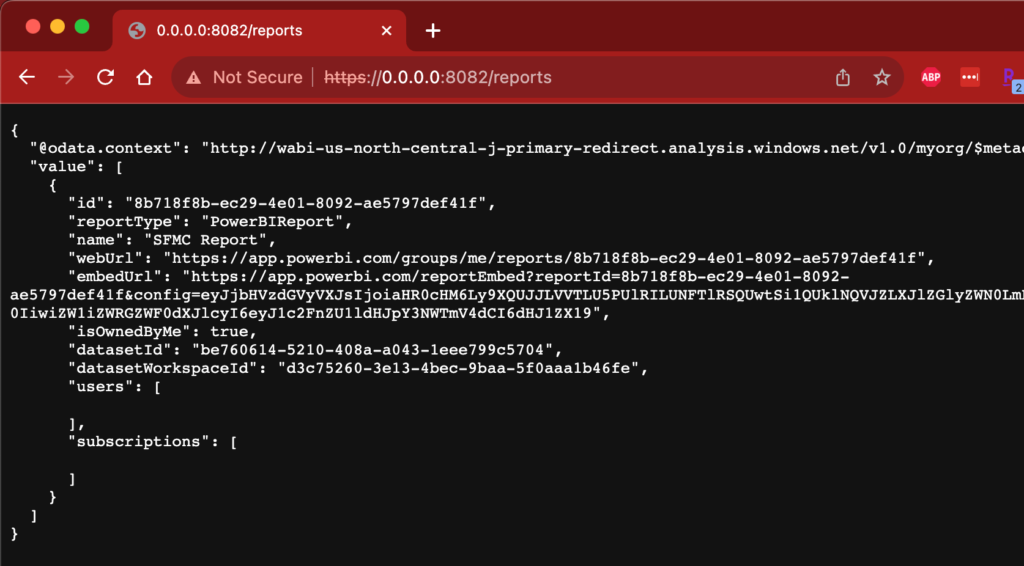
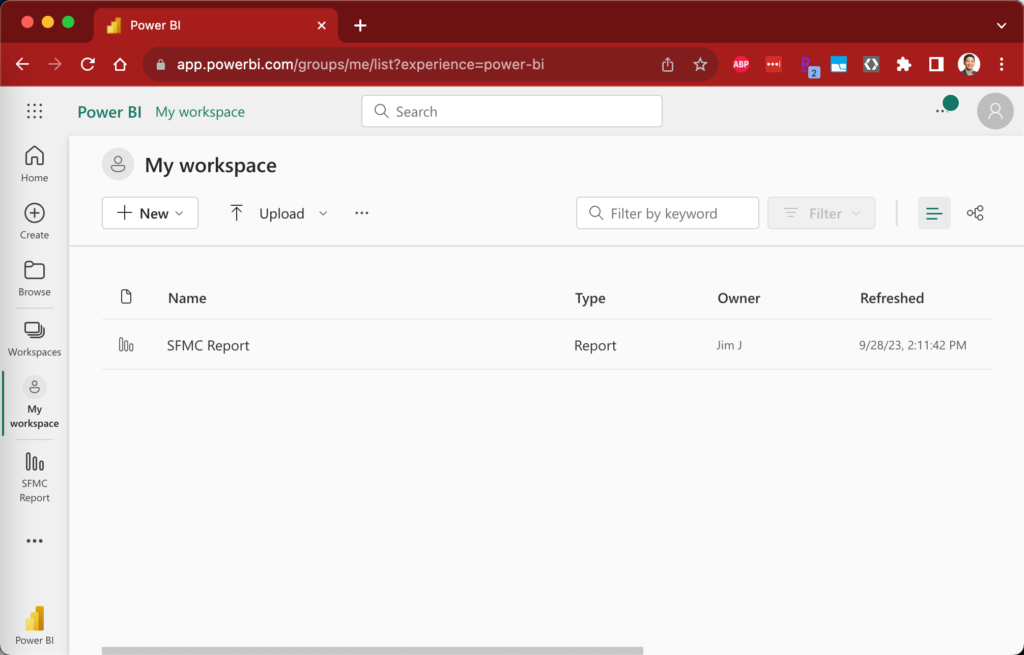
This will correspond to your workspace in Power BI
And that’s it! You’ve successfully configured the Power BI connector. You can use the configuration with any of the available operations. Just be sure to authorize the connector before making any of the calls.
Summary
As we conclude this tutorial, you’ve taken a significant step toward becoming a data integration expert. By using MuleSoft to connect any data source to Power BI, you’ve learned how to seamlessly bridge the gap between data sources and visual insights, putting you in the driver’s seat when it comes to harnessing the power of your organization’s data. Remember that mastering this integration is an ongoing journey, and there are countless opportunities to refine and expand your skills. With this newfound knowledge, you can empower your organization to make data-driven decisions, gain a competitive edge, and drive success.
If you have any questions or need further assistance, feel free to reach out. Stay tuned for more insightful tutorials and guides as we continue to explore the exciting world of data integration and analytics!
Leave a Reply