

With over 900 million users a month, the Facebook Messenger platform has a pretty big audience. The introduction of Messenger Bots earlier this year helped extend this adoption by helping drive personalized, scaled experiences with customers. Instead of building an app, just build the message thread as the place where you connect and interact with your users.
I was curious though to see how easy it was to build my own Bot using MuleSoft and the Anypoint Platform. Instead of writing custom code and running my own dedicated server, I leveraged Anypoint Studio to configure an app and CloudHub for my server needs. The following is a walk-through that shows you how you can create your own Facebook Messenger Bot.
Setup Facebook App and Page
To get started, setup a new app in Facebook under the developers site: https://developers.facebook.com/apps/
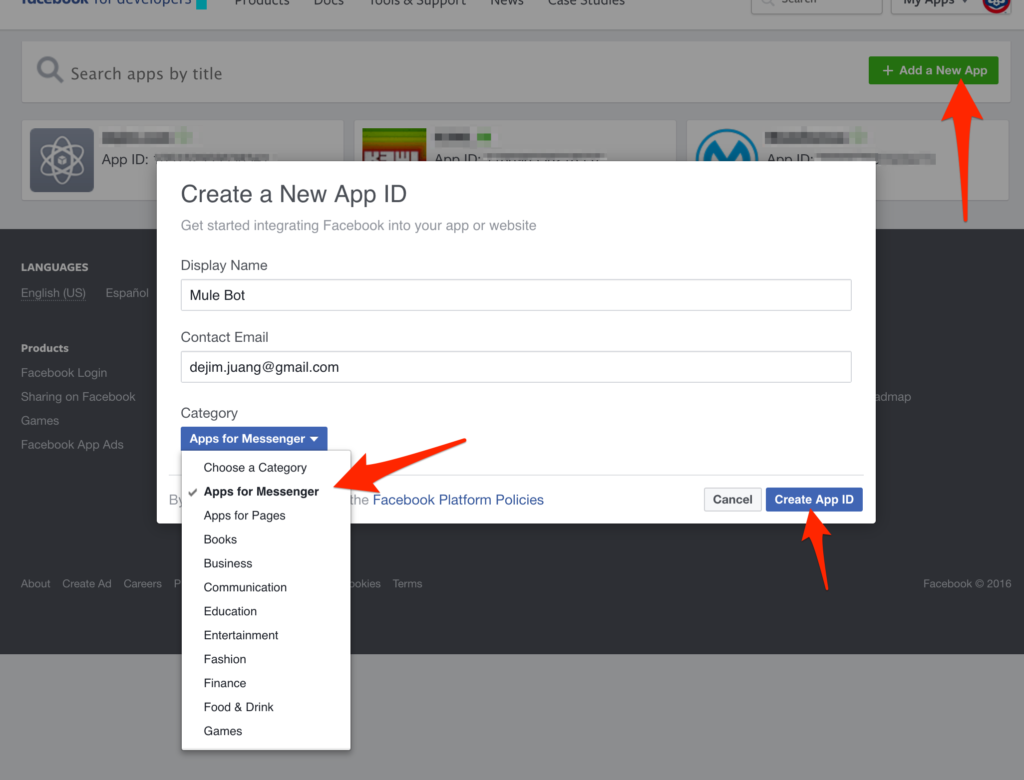
Be sure to select Apps for Messenger under the Category dropdown before clicking Create App ID.
Once the app gets created, scroll down to the Token Generation section and click on Create a new page. You’ll be re-directed to the Facebook site to create a new page.
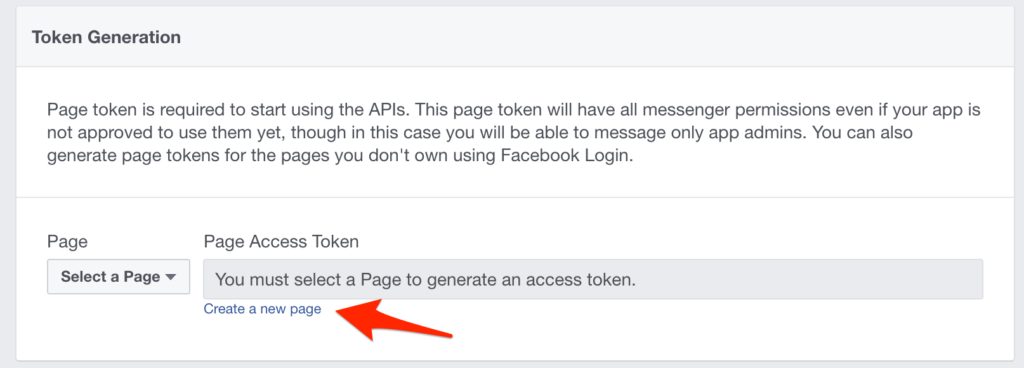
Select any category (I selected Brand or Product > Software) and give it a name (e.g. MuleSoft Demos). Skip through the setup steps and jump back to the Facebook Developer site. Once you refresh the page, the new Facebook Page with show under the Token Generation section under the Page dropdown.
Select your new page and it will create a Page Access Token. You’ll need this for your Mule app to call the Send API later.

Deploy App to CloudHub
Next, deploy the example app to CloudHub. You can download a copy of the project from Github here: https://github.com/djuang1/mule-facebook-bot and import it into Anypoint Studio.
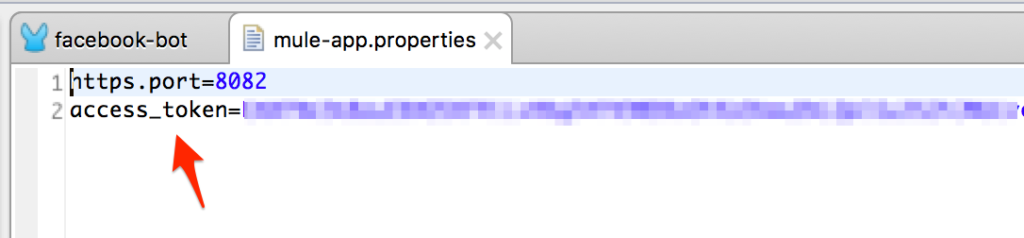
Before you deploy it to CloudHub, open the the mule-app.properties file and copy and paste the Page Access Token to the access_token variable.
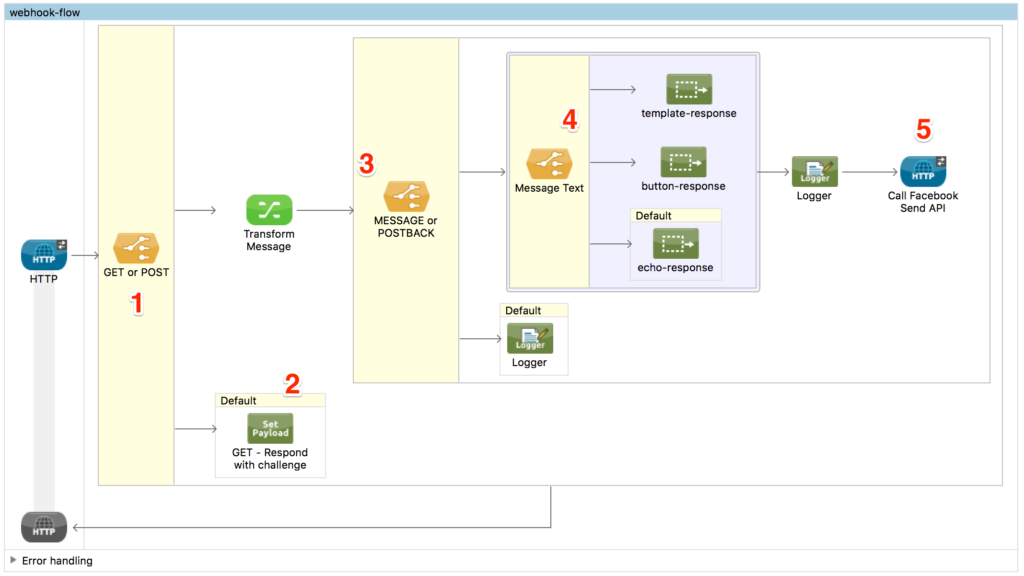
The example app is built to demonstrate a few of the the required event listeners for the Facebook Messenger platform. It handles the webhooks for messages and postbacks. Messages are parsed for keywords such as ‘template’, ‘button’, etc.. and all other messages are echoed back to the user using the Send API.
When the app is deployed and running in CloudHub, navigate to the app URL (e.g http://facebook-bot.cloudhub.io/) and test out the webhook challenge using the following URL:
https://<app_name>.cloudhub.io/webhook?hub.challenge=1234
You should get the challenge returned like the following screenshot:

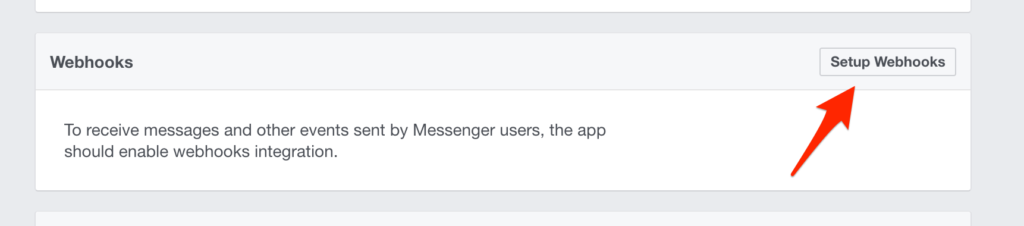
Setup Webhooks
With the challenge returned successfully, we can setup the webhooks in Facebook now. Switch back to the Facebook Developers site and click on Setup Webhooks under the Webhooks section.
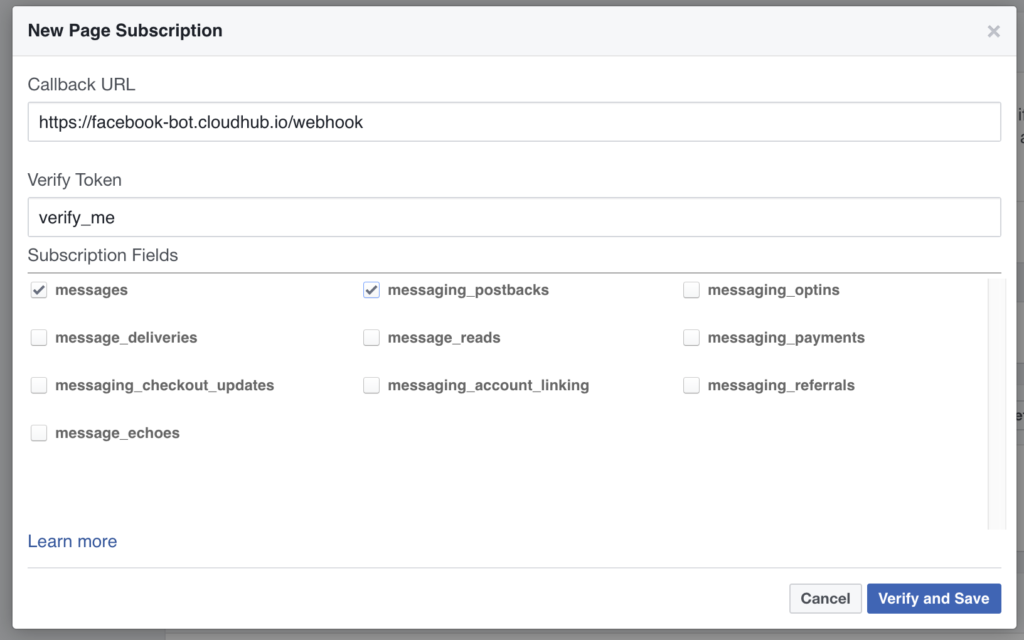
Enter the app URL under Callback URL with the path webhook. Enter any text under the Verify Token field. Under the Subscription Fields section, check messages and messaging_postbacks and then click on Verify and Save.
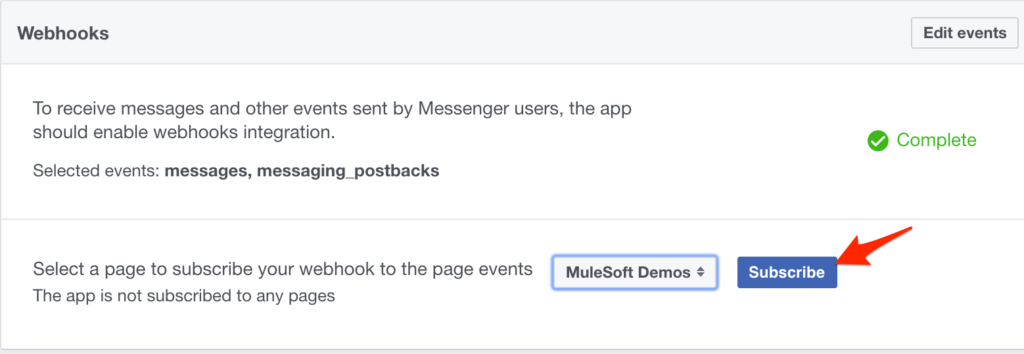
Once the webhook setup is complete, select the Facebook Page that was created previously and click on Subscribe in the Webhooks section.
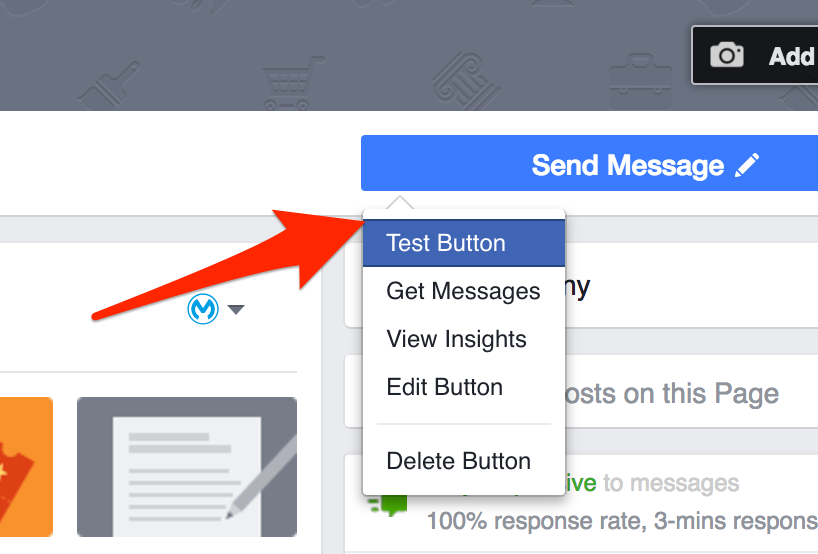
Test Messages
Everything should be setup and running now on both CloudHub and Facebook. Let’s go ahead and test out the messages. Switch back to Facebook and open up the Page you created. You should see a button that says Send Message. Mouseover that button and then click on Test Button.
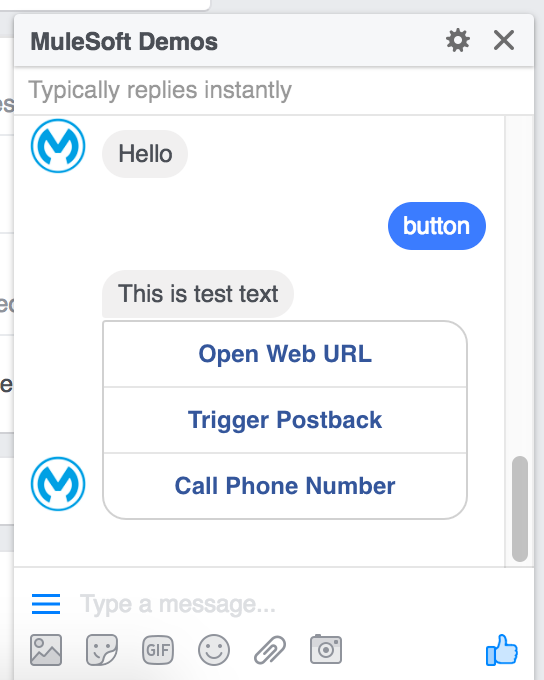
Go ahead and test out various messages and see their responses. When you type in messages that contain keywords such as button or template, you’ll see specific message formats returned.
You can also review the live console in CloudHub for the app to see the logs for the request and response.

Summary
If you go back and look at the flow in Anypoint Studio, it’s a surprisingly simple flow that handles the requests and response from the Facebook Messenger platform. The benefit of using MuleSoft is the ability to route messages to other platforms without having to write code. A keyword for ‘orders’ can be routed to Salesforce to retrieve a list of orders for the user using the Salesforce Connector. Try out the code and let me know if you run into any issues or create a useful Bot for Facebook.
Leave a Reply