Apache Kafka, developed by LinkedIn and donated to the Apache Software Foundation, is used for building real-time data pipelines and streaming apps. It is horizontally scalable, fault-tolerant, and incredibly fast. Confluent launched as a commercial entity on top of the open-source project in 2014 and just recently released a free tier to their service called Confluent Cloud. This article is a quick walk-through showing you how to connect to that service using the MuleSoft Kafka Connector for Mule 4.
Requirements
- Anypoint Studio 7.3.x
- Kafka Connector (3.0.7)
- Confluent Cloud
Confluent Cloud Setup
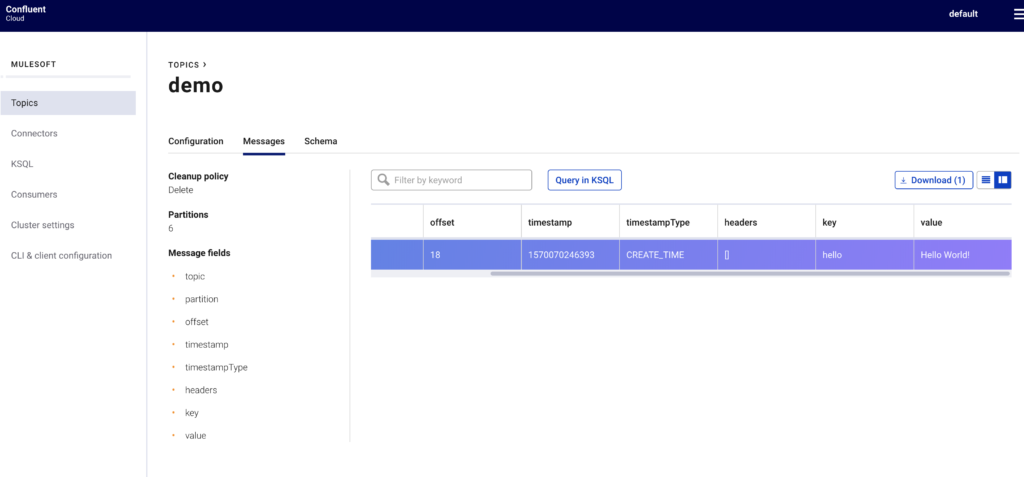
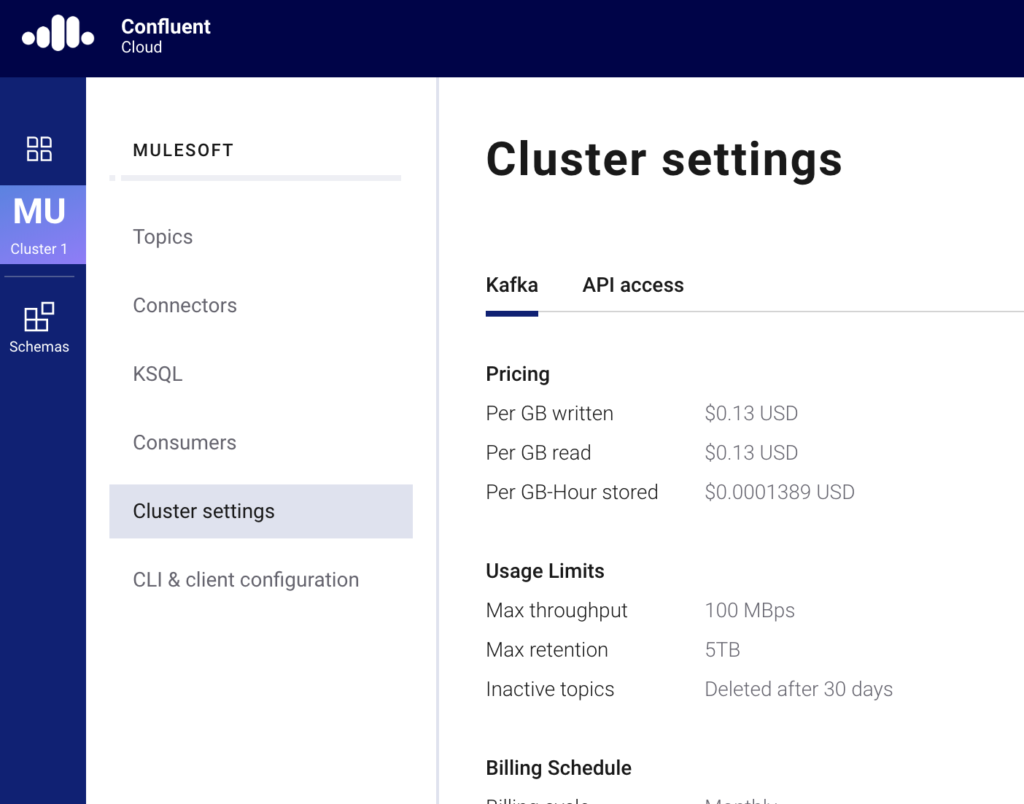
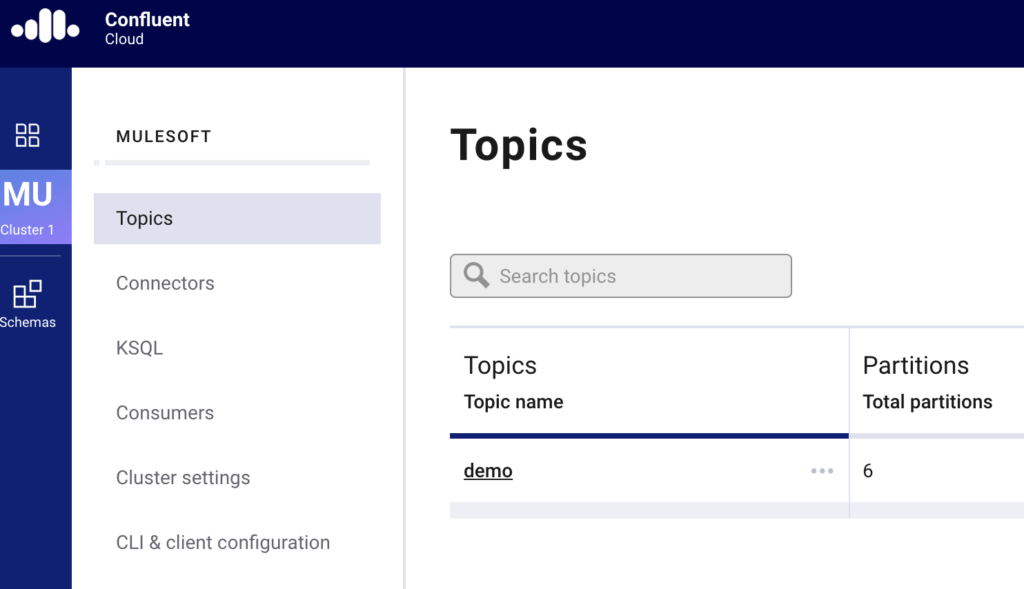
On the Confluent side, the first thing you need to do after setting up an account is create a cluster and create a topic for the Kafka Connector to publish a message to and also consume a message from. For this article, I named the cluster ‘mulesoft’ and created a topic called ‘demo’
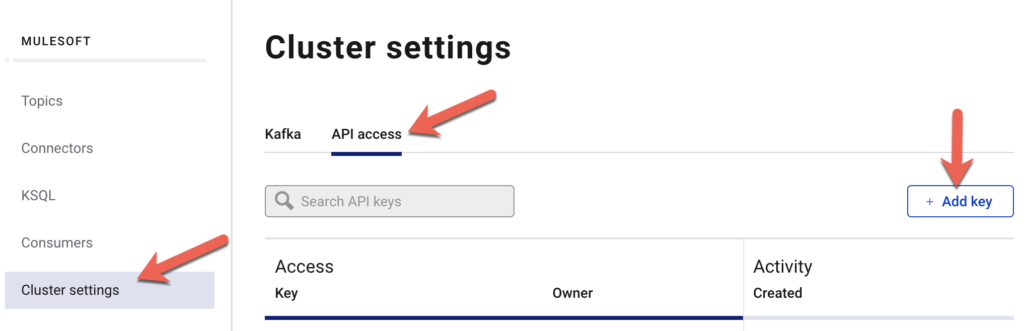
After you create the cluster and topic, you’ll need to setup API access and add a key. You can do this by navigating to Cluster settings, clicking on API Access, and then clicking on Add Key
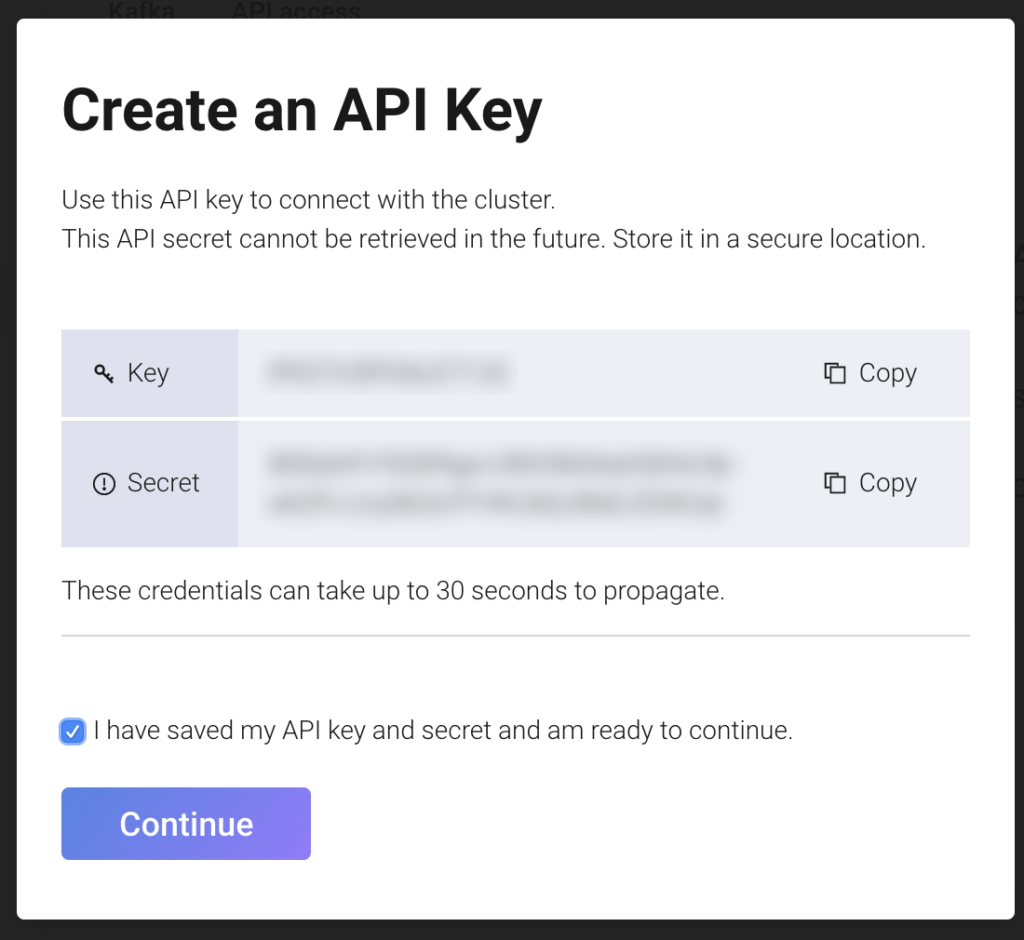
When the Create an API Key window pops up, be sure to write down the Key and Secret before continuing. You’ll need these for the saal.jass.config setting when you setup the connection in Anypoint Studio. Otherwise you’ll have to create a new one because the keys can’t be retrieved again once you close the window.
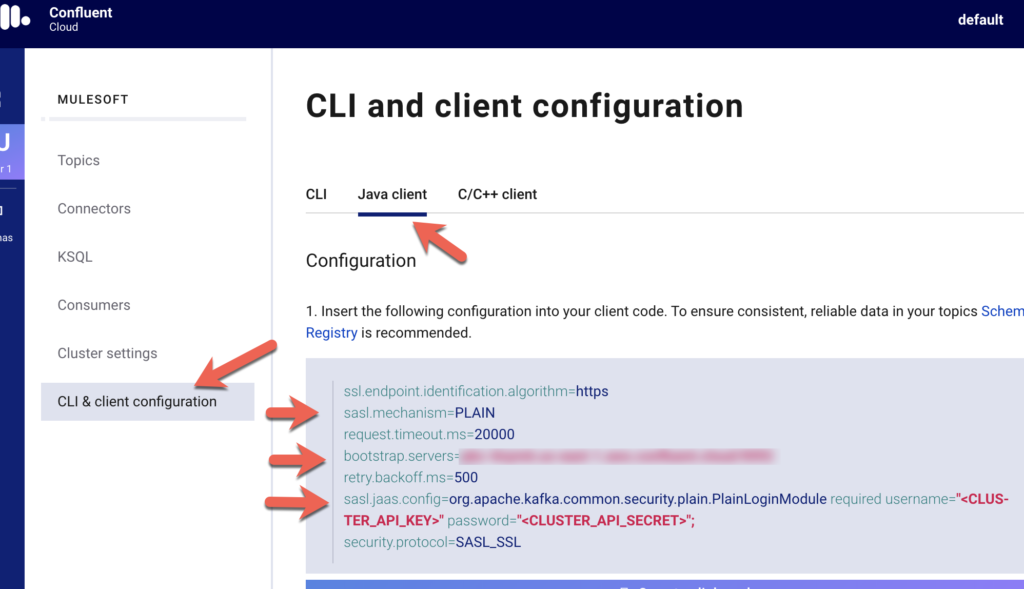
Lastly, you’ll need to get the configuration settings in order to connect from the Mule flow. In the left-hand navigation bar, click on CLI & client configuration, click on Java client, and copy down the configuration.
Anypoint Studio / Mule Application Setup
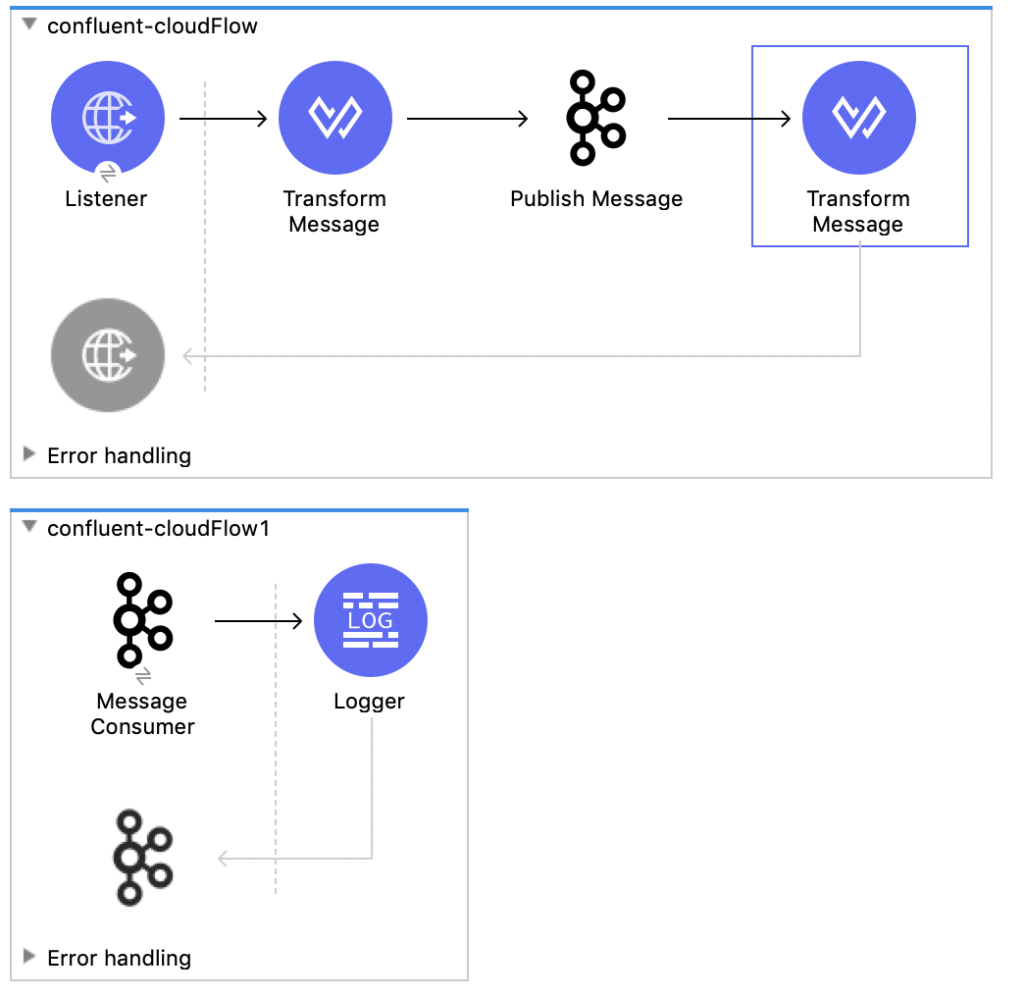
Now that the configuration and cluster are setup in Confluent, let’s go ahead and create the project in Anypoint Studio to test out connectivity with Confluent Cloud. Switch over to Anypoint Studio and create a new project. This article assumes you know how create a flow, so go ahead and create the following flows. We’ll go through the configuration of each component separately.
Publish Message
We’ll keep the HTTP listener simple in the publish flow and use the defaults that come out of the box. In this case, localhost and port 8081. For the path, we’ll use /test so the config looks like the following:

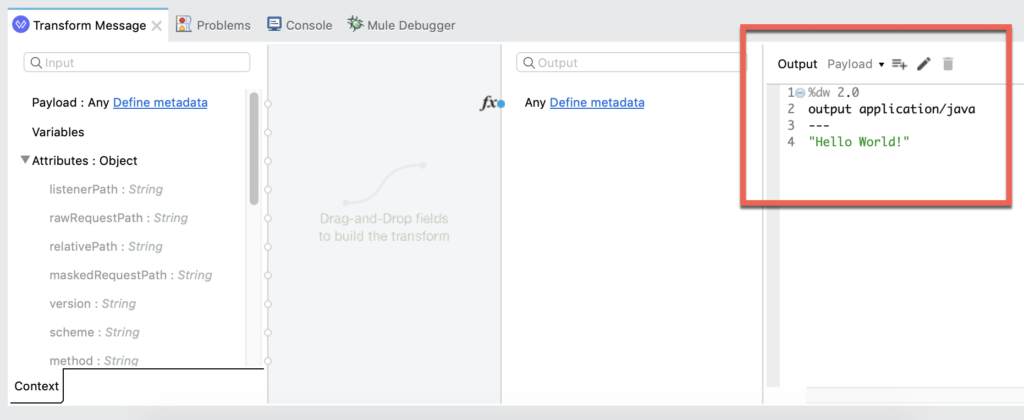
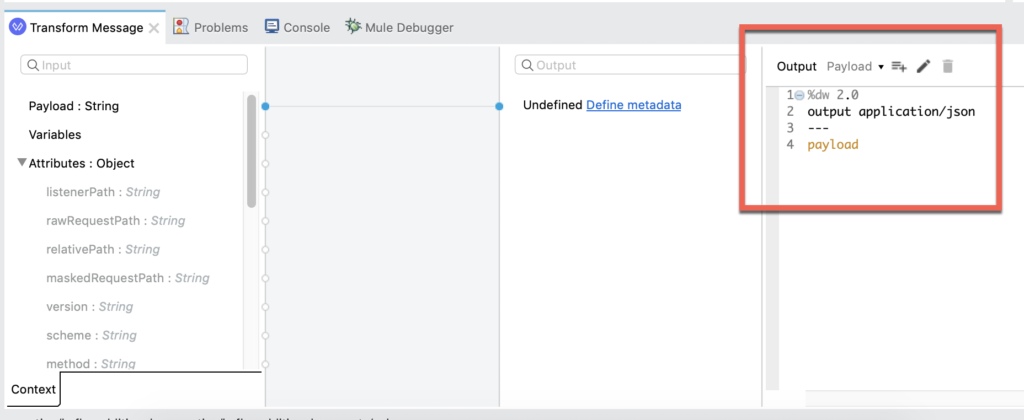
In the first Transform Message component before Publish Message, we’ll configure the script to look like the screenshot below. We’ll pass the string “Hello World!” and publish that to the Kafka topic.
In the Publish Message component, let’s configure the Connector configuration to Confluent Cloud. Under the Basic Settings section, click on the green plus sign to add a new configuration. In the window that pops up, change the following fields:
- Change the Connection drop down to Kafka Basic Producer Connection
- Set the Bootstrap servers field to the variable bootstrap.servers that you copied down from Confluent Cloud when you were in the CLI & client configuration section. (e.g. test.us-east-1.aws.confluent.cloud:9092)
- Change Additional properties to Edit Inline and enter the following Key/Value pairs:
- sasl.jaas.config = org.apache.kafka.common.security.plain.PlainLoginModule required username=“<CLUSTER_API_KEY>” password=“<CLUSTER_API_SECRET>”;
- ssl.endpoint.identification.algorithm = https
- security.protocol = SASL_SSL
- sasl.mechanism = PLAIN
- serviceName = Kafka
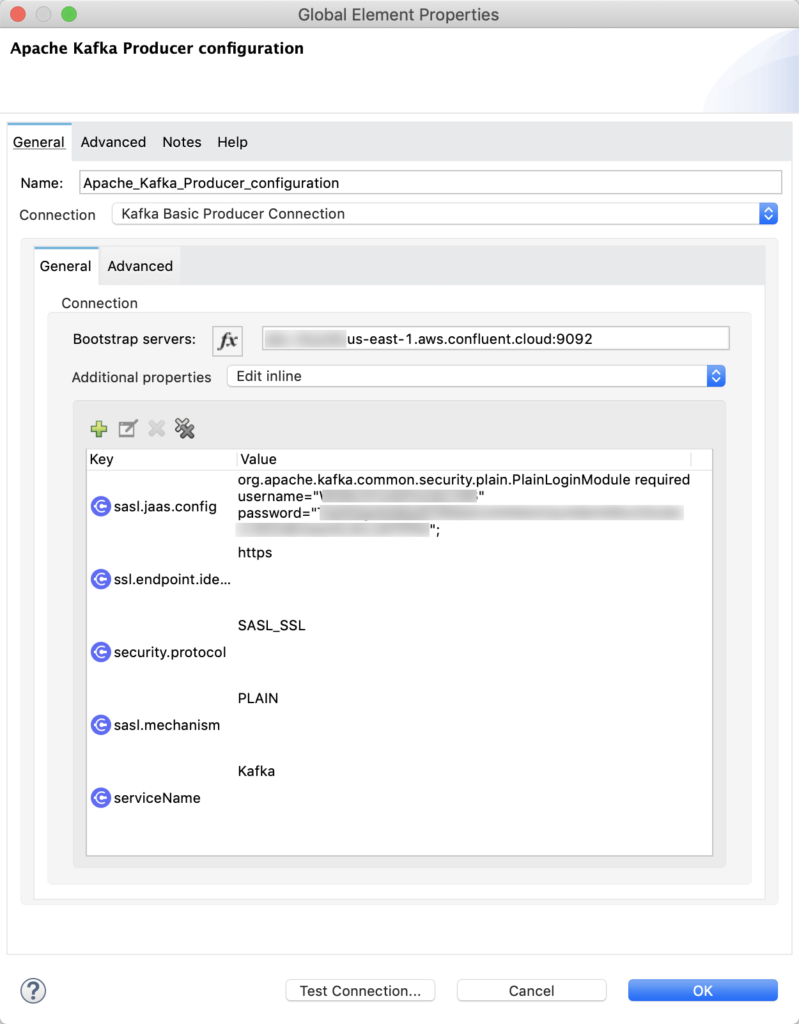
Click Test Connection… to make sure the configuration is correct and then click OK.
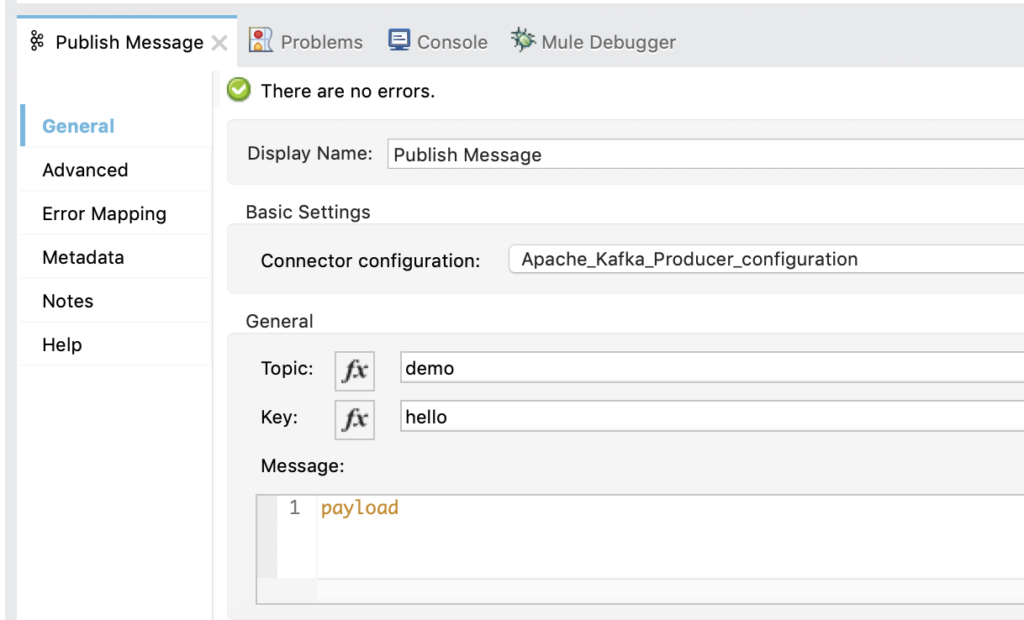
Back in the Publish Message properties window, set the Topic to demo and the Key to hello and leave the Message field as payload.
In the Transform Message after the Publish Message component, configure the DataWeave script to output the payload as application/json. The script should look like the following:
And that’s it for the Publish Message flow in order to send data to Confluent Cloud / Kafka. While this is a simple example showing you how to write a string, you can easily swap out the component for any other connector such as the Database or Salesforce component and publish that data to Confluent Cloud.
Consume Message
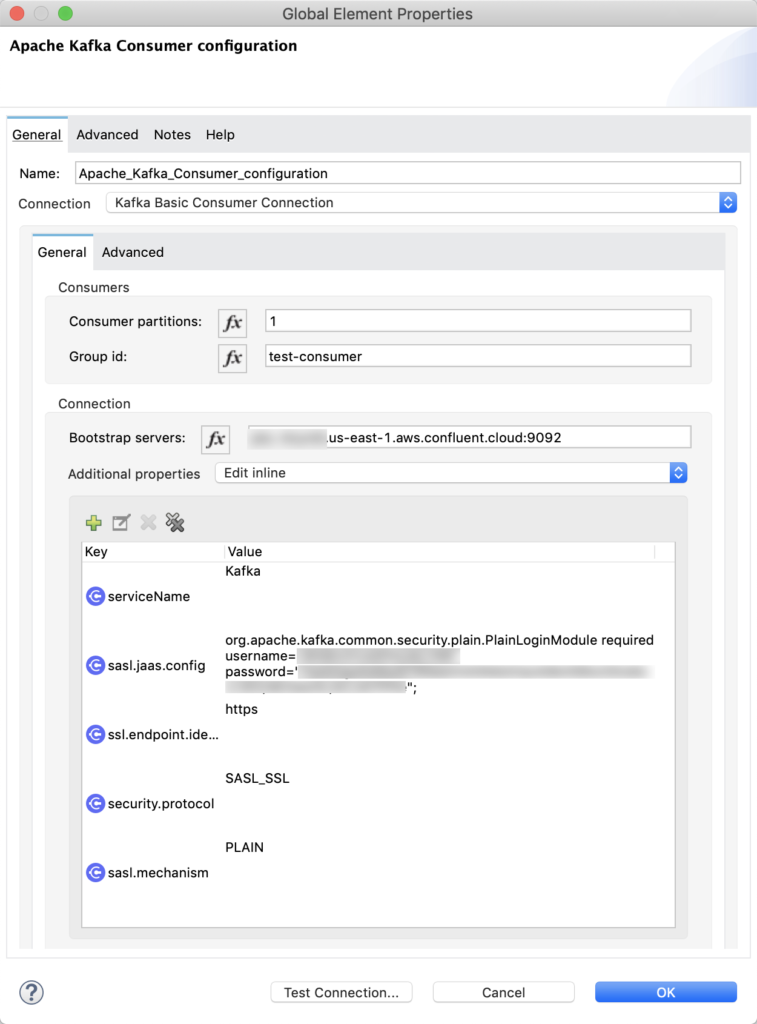
Consuming the message off of the topic is just as easy as publishing it. The Connector configuration is a different config from the producer config but the settings are essentially the same. Below is a screenshot of the config screen. The only difference is the Consumers section. I set the Consumer partitions to 1 and the Group id to test-consumer.
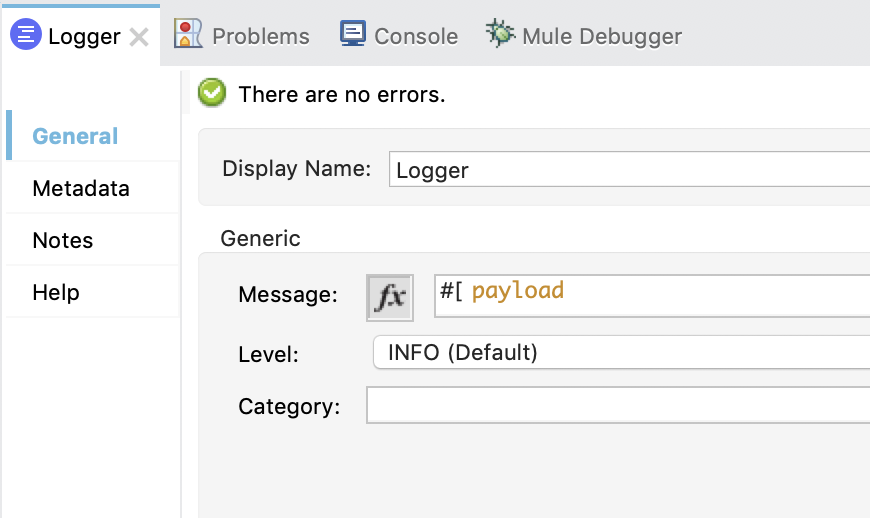
After the Message Consumer, I dropped in a Logger component. For the Message of the Logger, I just set that to be the payload.
Test Flow / Summary
As you can see, setting up the flow was pretty easy using Anypoint Studio. Without writing any code, the flow that we created allows you to easily write data to a Kafka topic and also consume a message off of the same topic. You can take this project and extend it further to meet your use cases now. If you run into any issues or have any questions, please leave a comment below.