Overview
The Tableau Hyper API is a game-changer for real-time analytics, ETL transformations, and interactive exploration. MuleSoft, with its versatile integration capabilities, can seamlessly connect disparate systems and facilitate advanced data workflows with Tableau Hyper. In this blog post, we’ll explore how MuleSoft can be used to write and read from Hyper files, unlocking new possibilities for automating data processes and enabling actionable insights.
Steps
To get started, you can download the Mule project from Github using this link.
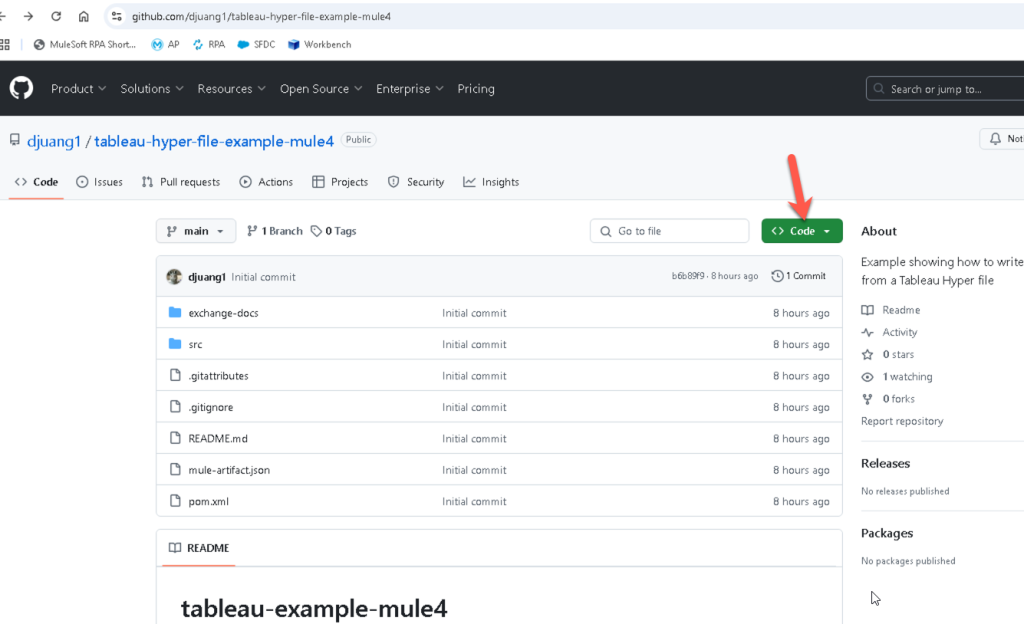
Once you download the project and unzip the file, import the project into Anypoint Studio.

Next, you need to download the Hyper API libraries before you can run this project. Here’s the link to get those files.
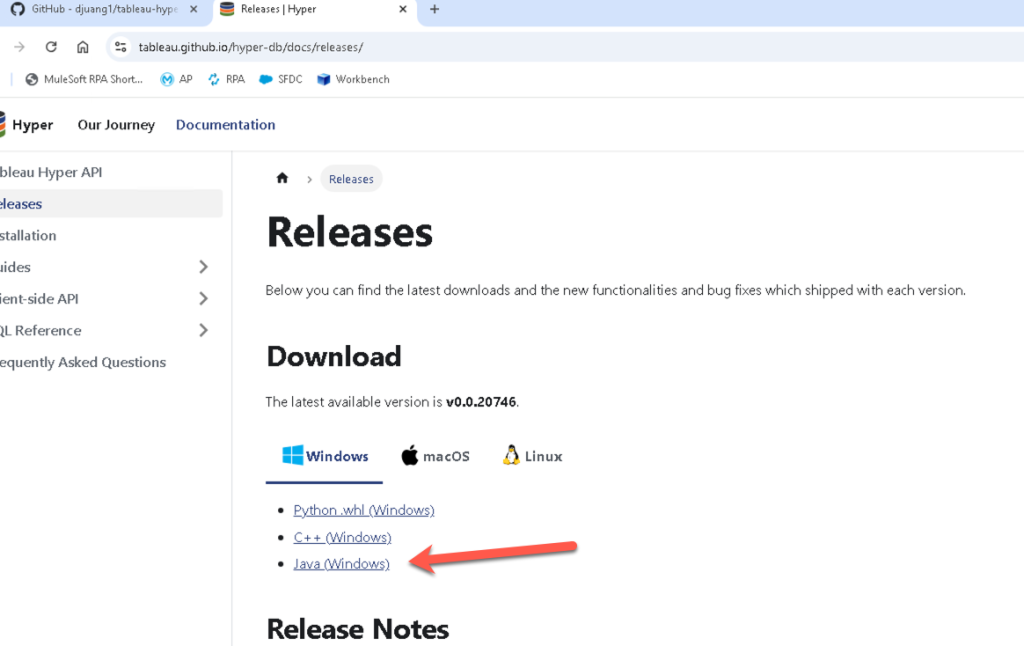
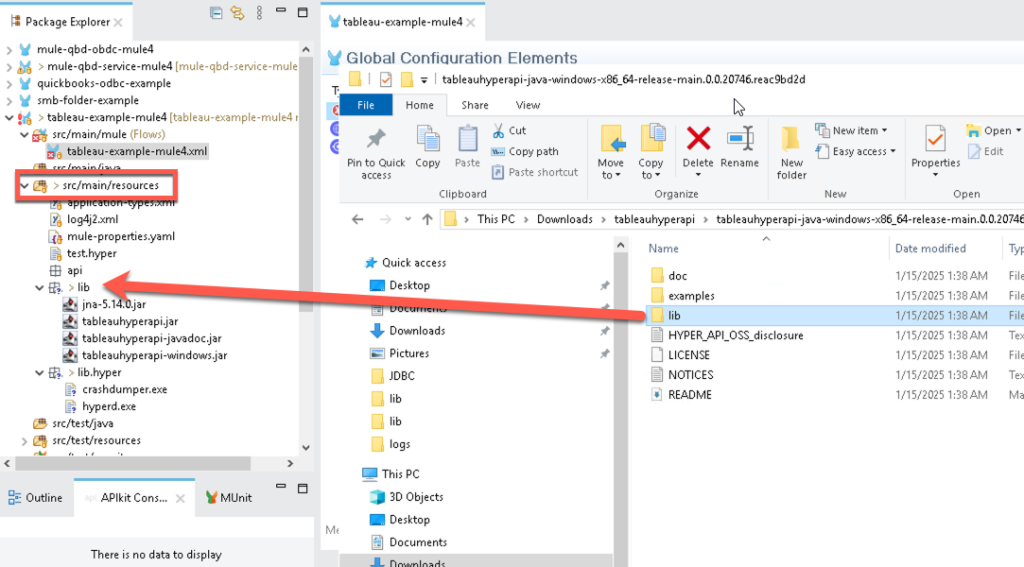
Once you unzip those files, copy the lib folder to the src/main/resources folder in the Mule project in Anypoint Studio.
In order for the project to know where the Tableau Hyper API files are, we need to change the properties file. Navigate to the src/main/resources folder again and open the mule-properties.yaml file. Modify line 2 to point to the directory where the project is located.

Once that is configured, we need to modify the configuration elements to point to the right files. Open (1) the tableau-example-mule4.xml file if it isn’t open yet. Click on (2) the Global Elements tab at the bottom and then double click on (3) the Tableau Specialist Hyper configuration to open the properties window.
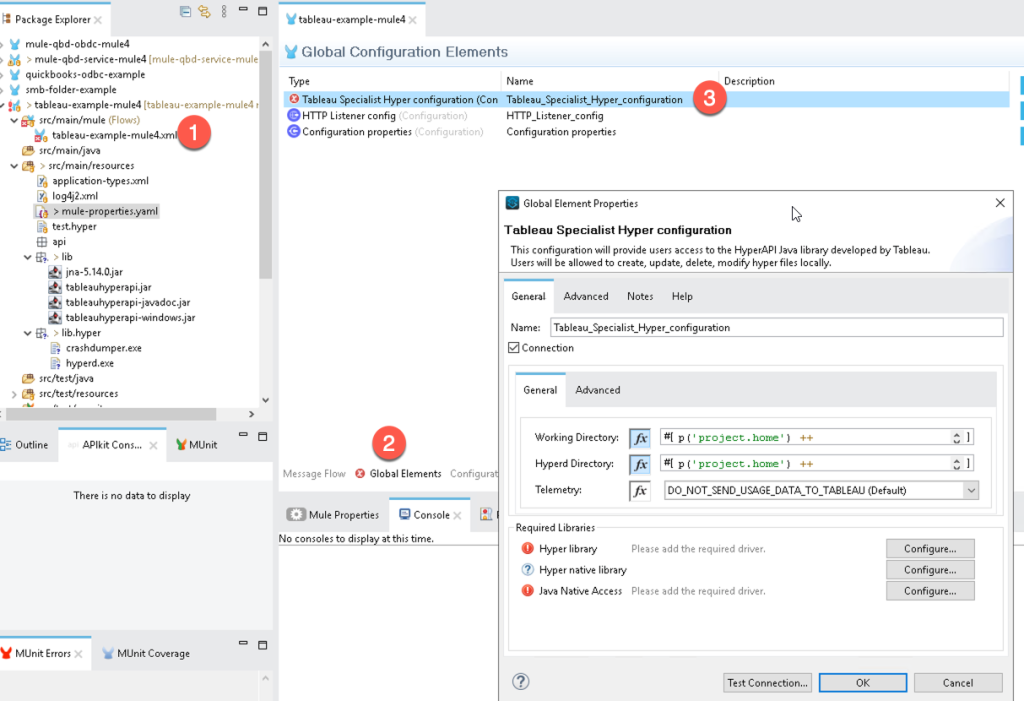
Let’s setup the required libraries now, click on the first Configure and select Use local file

Navigate to the lib folder that you dropped into the project earlier and select the tableauhyperapi.jar file.

If configured correctly, the line will have a green checkmark.

Repeat the same process for the Java Native Access library. For that library, select the jna-5.14.0.jar file.

Once configured, click on Test Connection. If the Test connection successful message pops up, you’re good to continue on.

Switch back to the Message Flow view, right click on the canvas, and select Run project tableau-example-mule4

When the Console tab shows Deployed, switch over to a browser window

Goto the following URL – http://localhost:8081/loaddata

This will load the data into a Hyper file located in the src/main/resources folder. Switch to Anypoint Studio and check out the flow:
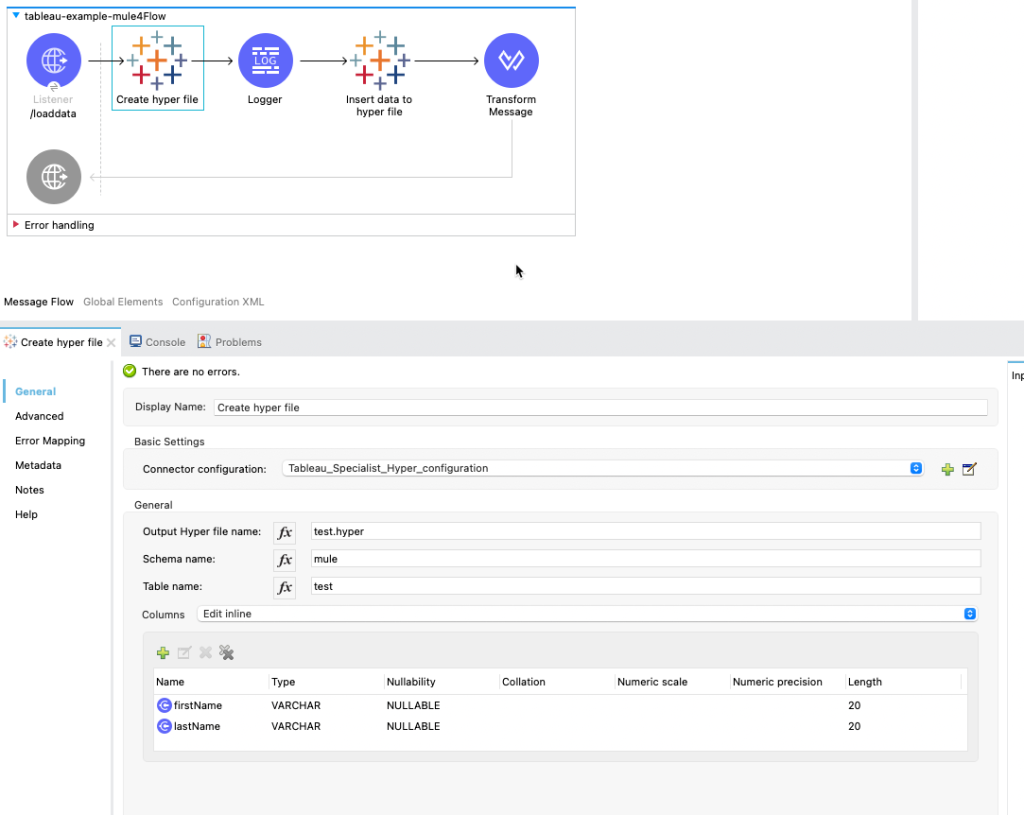
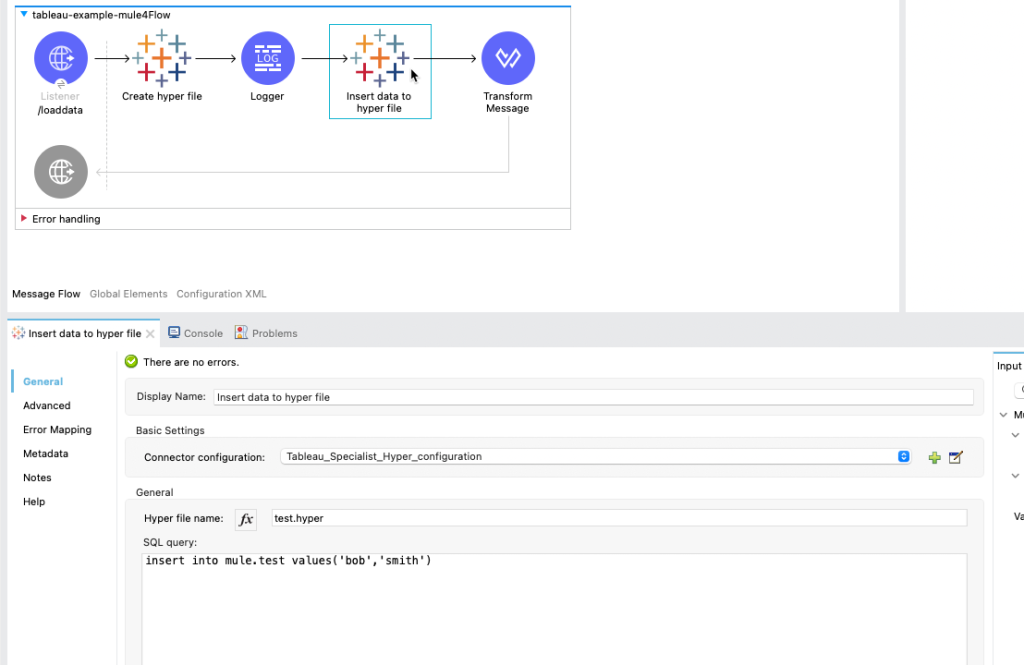
You can see the Create hyper file is where you define the schema, table name, and the columns you want the Hyper file to contain. In the next Tableau component in the flow, this is where you insert the data using the Insert data to hyper file component. It’s a simple SQL query to insert the data into the schema and table.
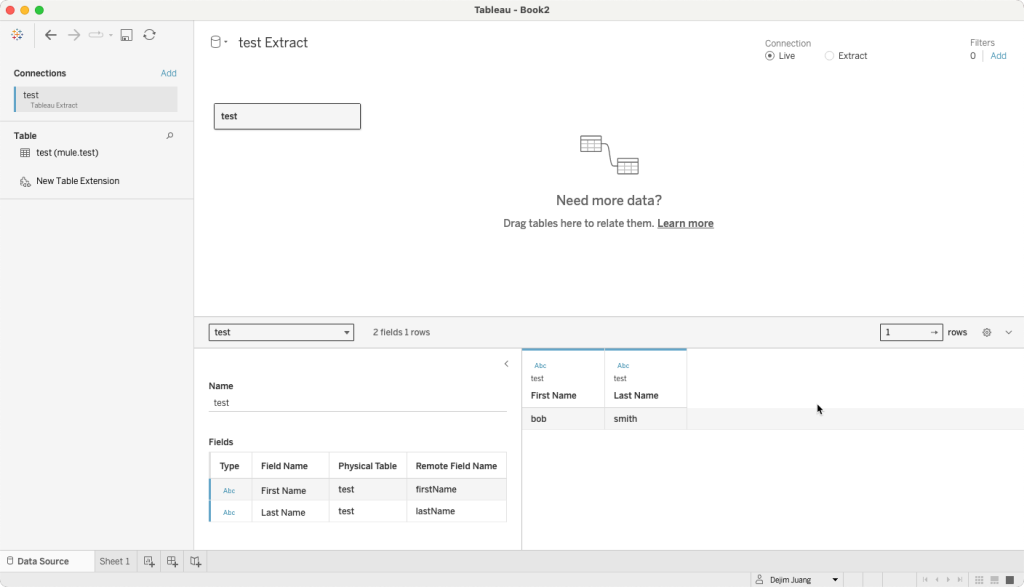
If you have Tableau Desktop installed, you can open the Hyper file and see the data in there as well.
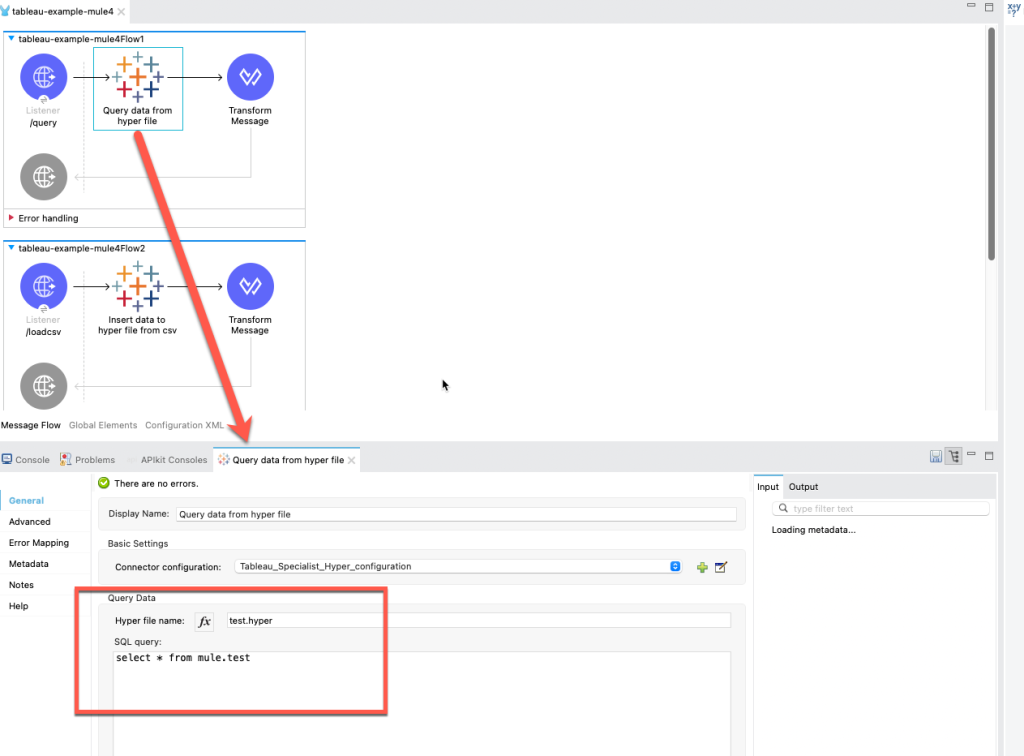
Next, let’s look at the other flow in the project and see how we can extract data from the Hyper file using Mule. Switch back to your browser and navigate to http://localhost:8081/query to see the data extracted from the Hyper file we just created.

Switch back to Anypoint Studio and check out the flow that you called. You can see the Query data from hyper file component and see how it uses a simple SQL query to extract the data from the table that we created and inserted data into.
Conclusion
By integrating MuleSoft with Tableau Hyper API, organizations can harness the power of real-time analytics, automate data operations, and bridge the gap between siloed systems. This synergy enables businesses to make data-driven decisions faster and more efficiently, ensuring Tableau dashboards reflect the freshest insights.

Leave a Reply