Amazon MQ is a managed message broker service for Apache ActiveMQ, and as a result, connectivity with Amazon MQ and MuleSoft has been there since day one. Amazon MQ makes it easy to set up and operate message brokers in the cloud and it gives direct access to the ActiveMQ console and industry standard APIs and protocols for messaging including JMS, NMS, AMQP, STOMP, MQTT, and WebSocket.
This post will walk you through the process of setting up a broker in Amazon MQ and building a Mule application that connects to Amazon MQ using the JMS Connector.
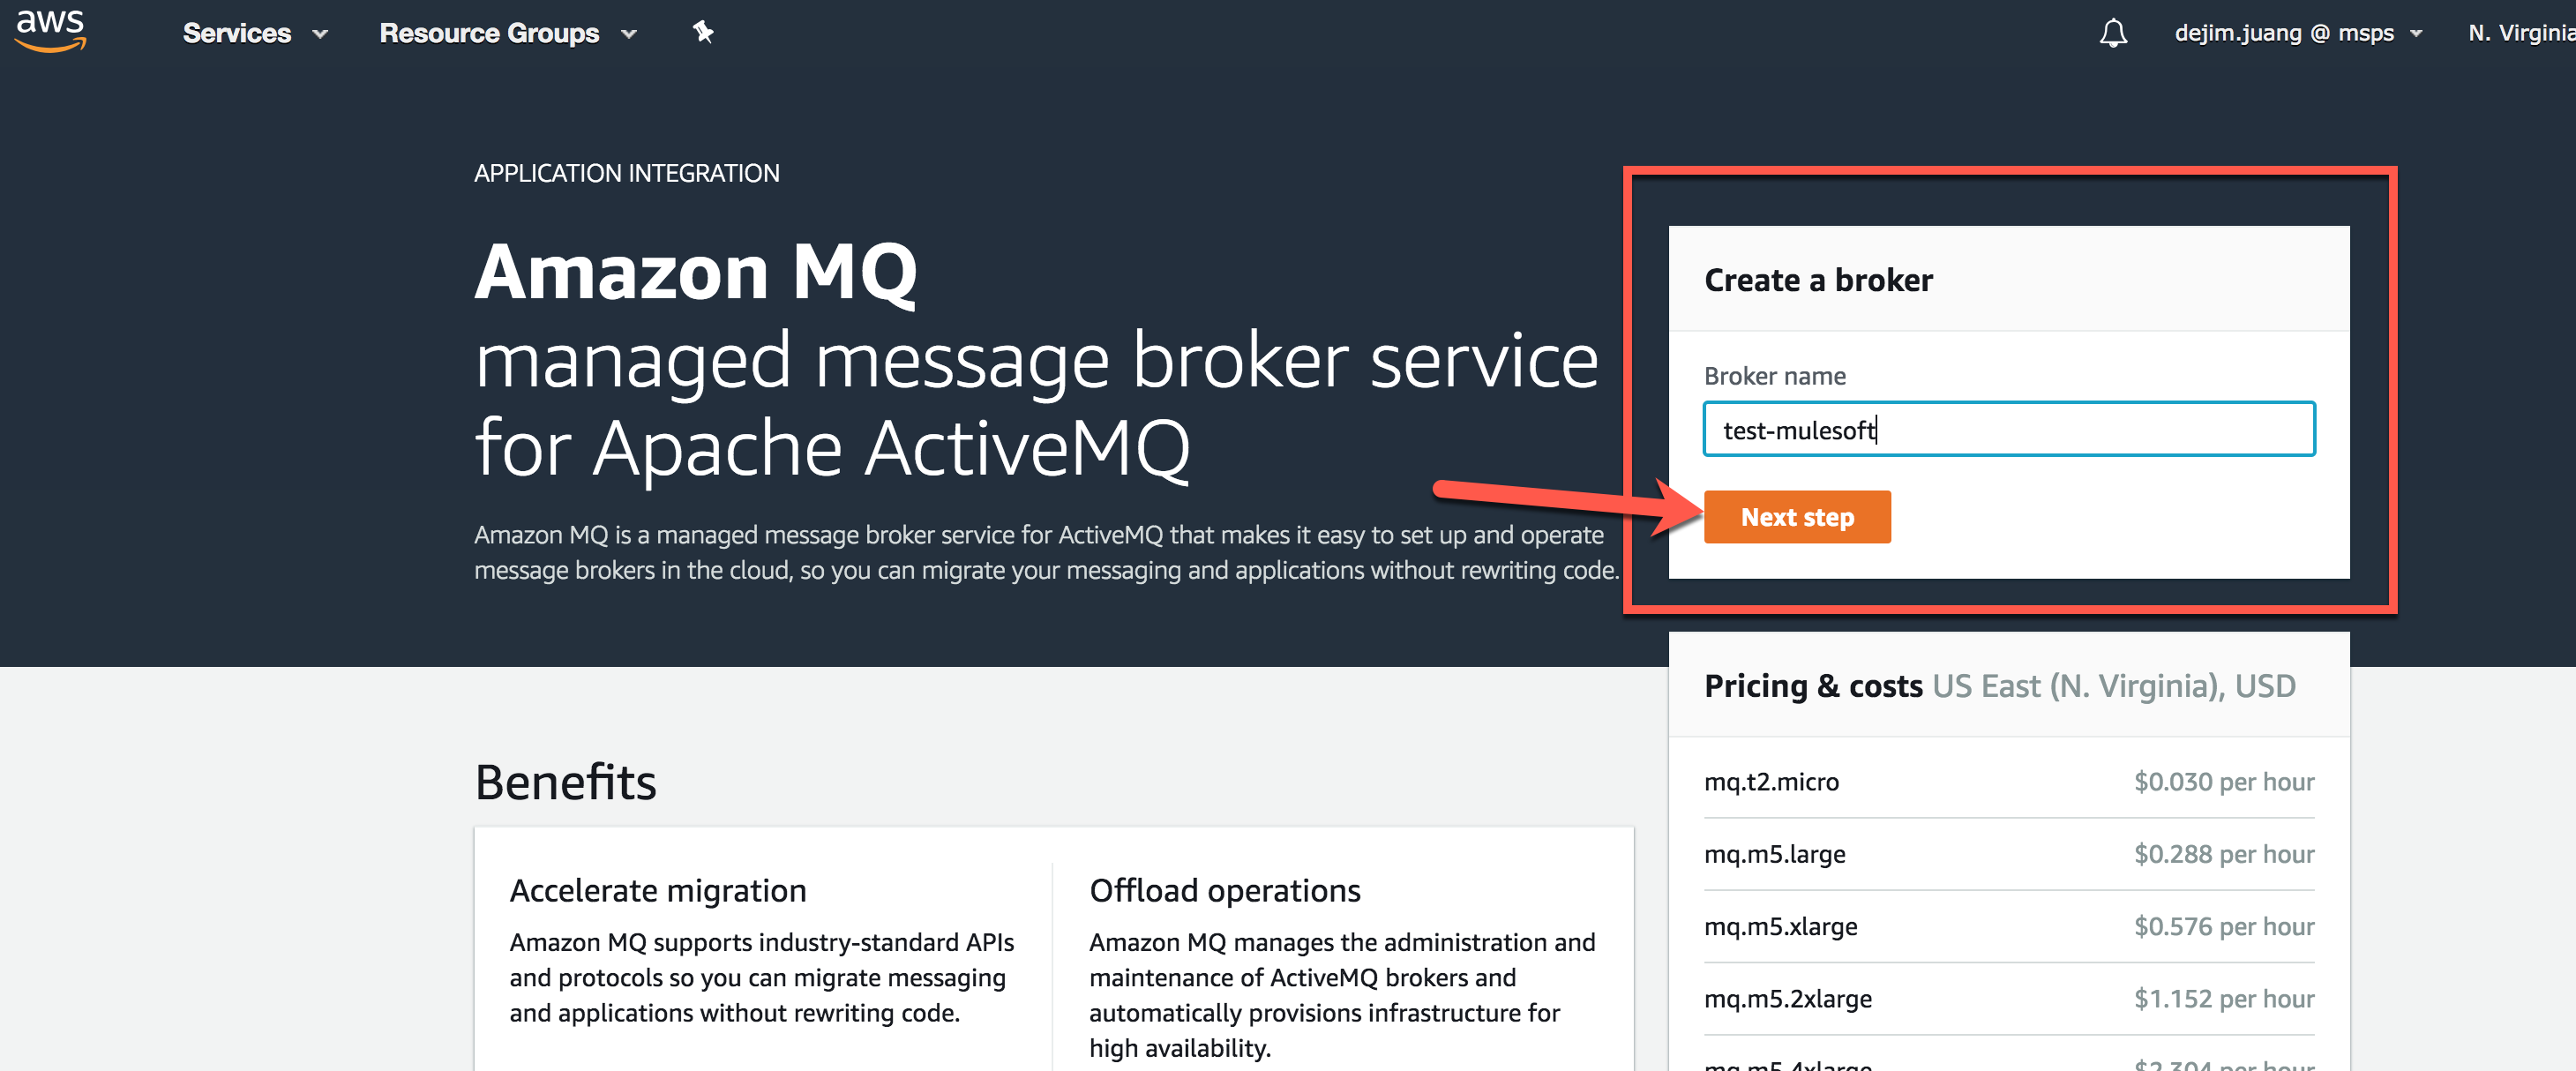
In the AWS Console, locate and open the Amazon MQ service. Under Create a broker, in the top-right, enter a name for your broker and click on Next step.
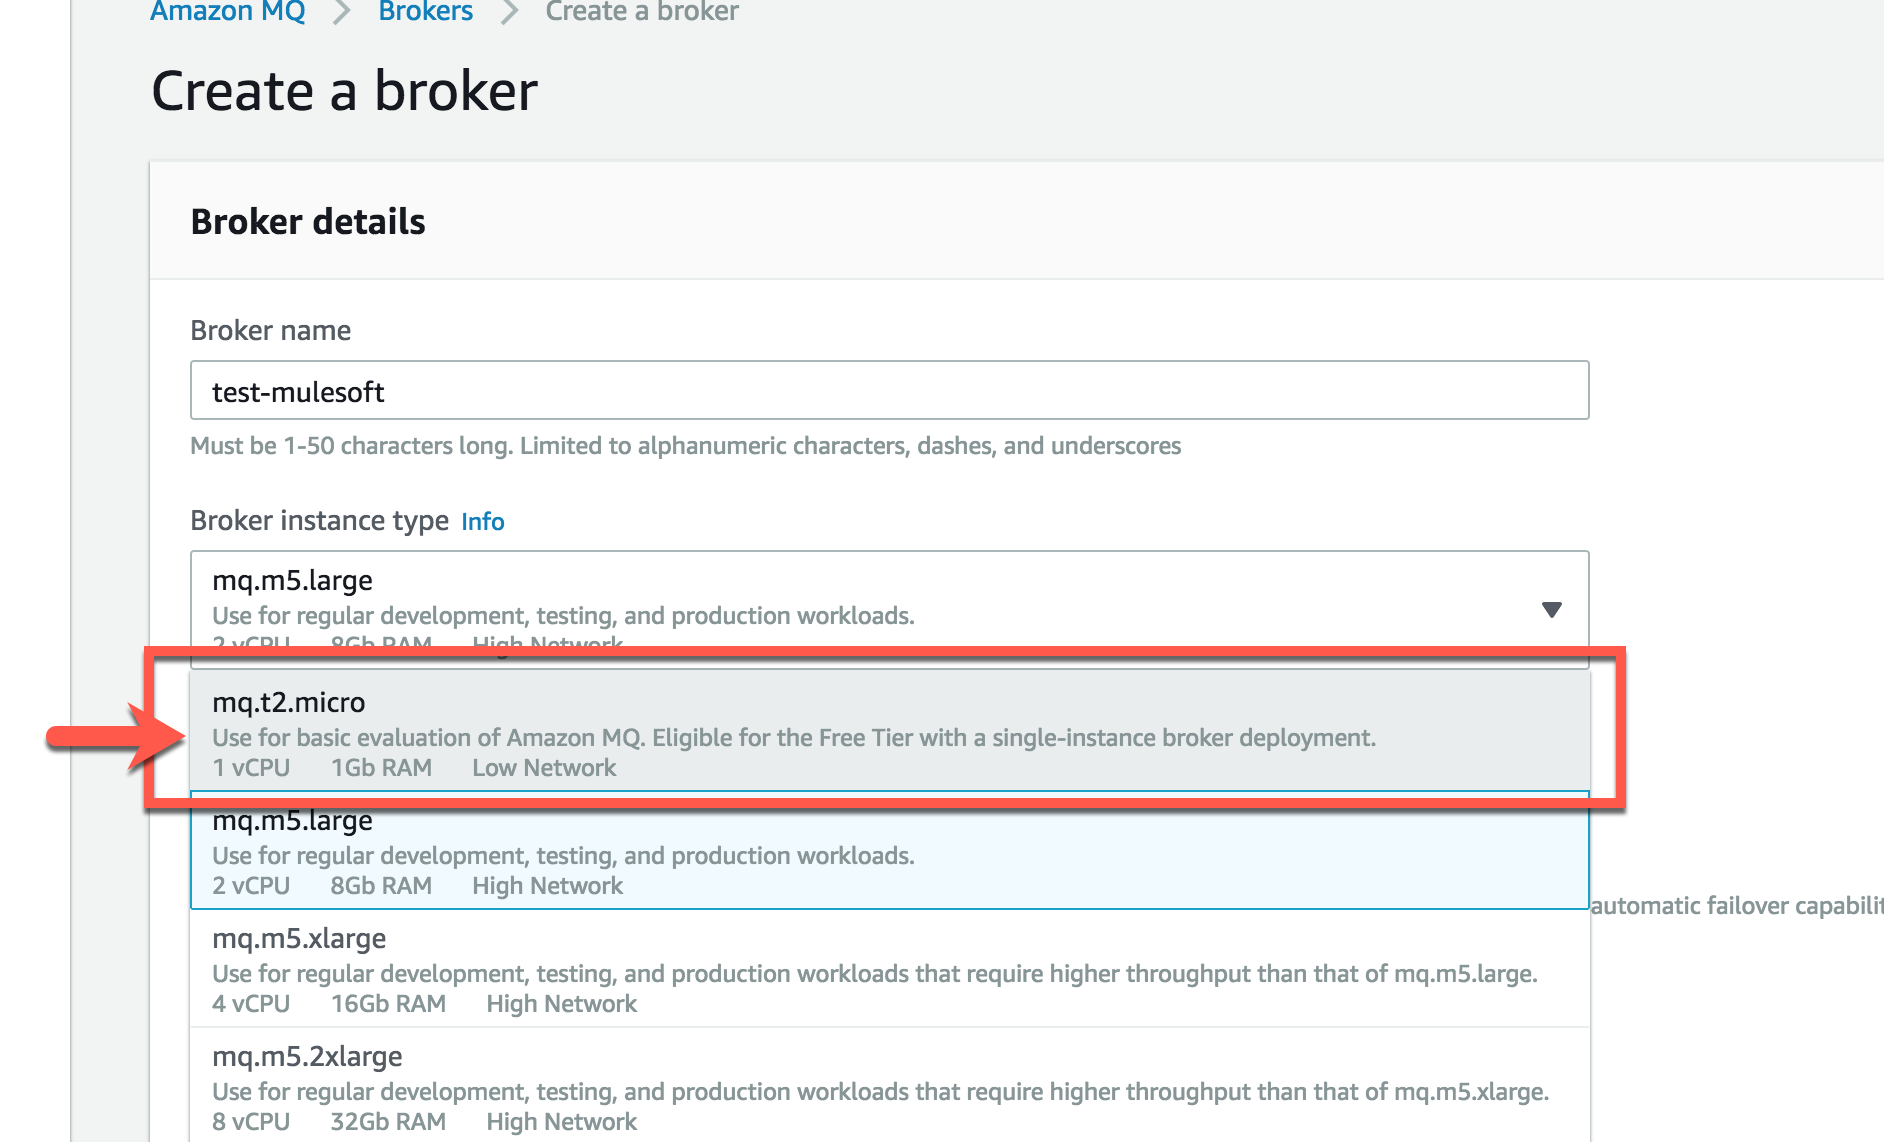
Next, select the Broker instance type. For testing purposes, chose the mq.t2.micro instance, which is eligible for the Free Tier.
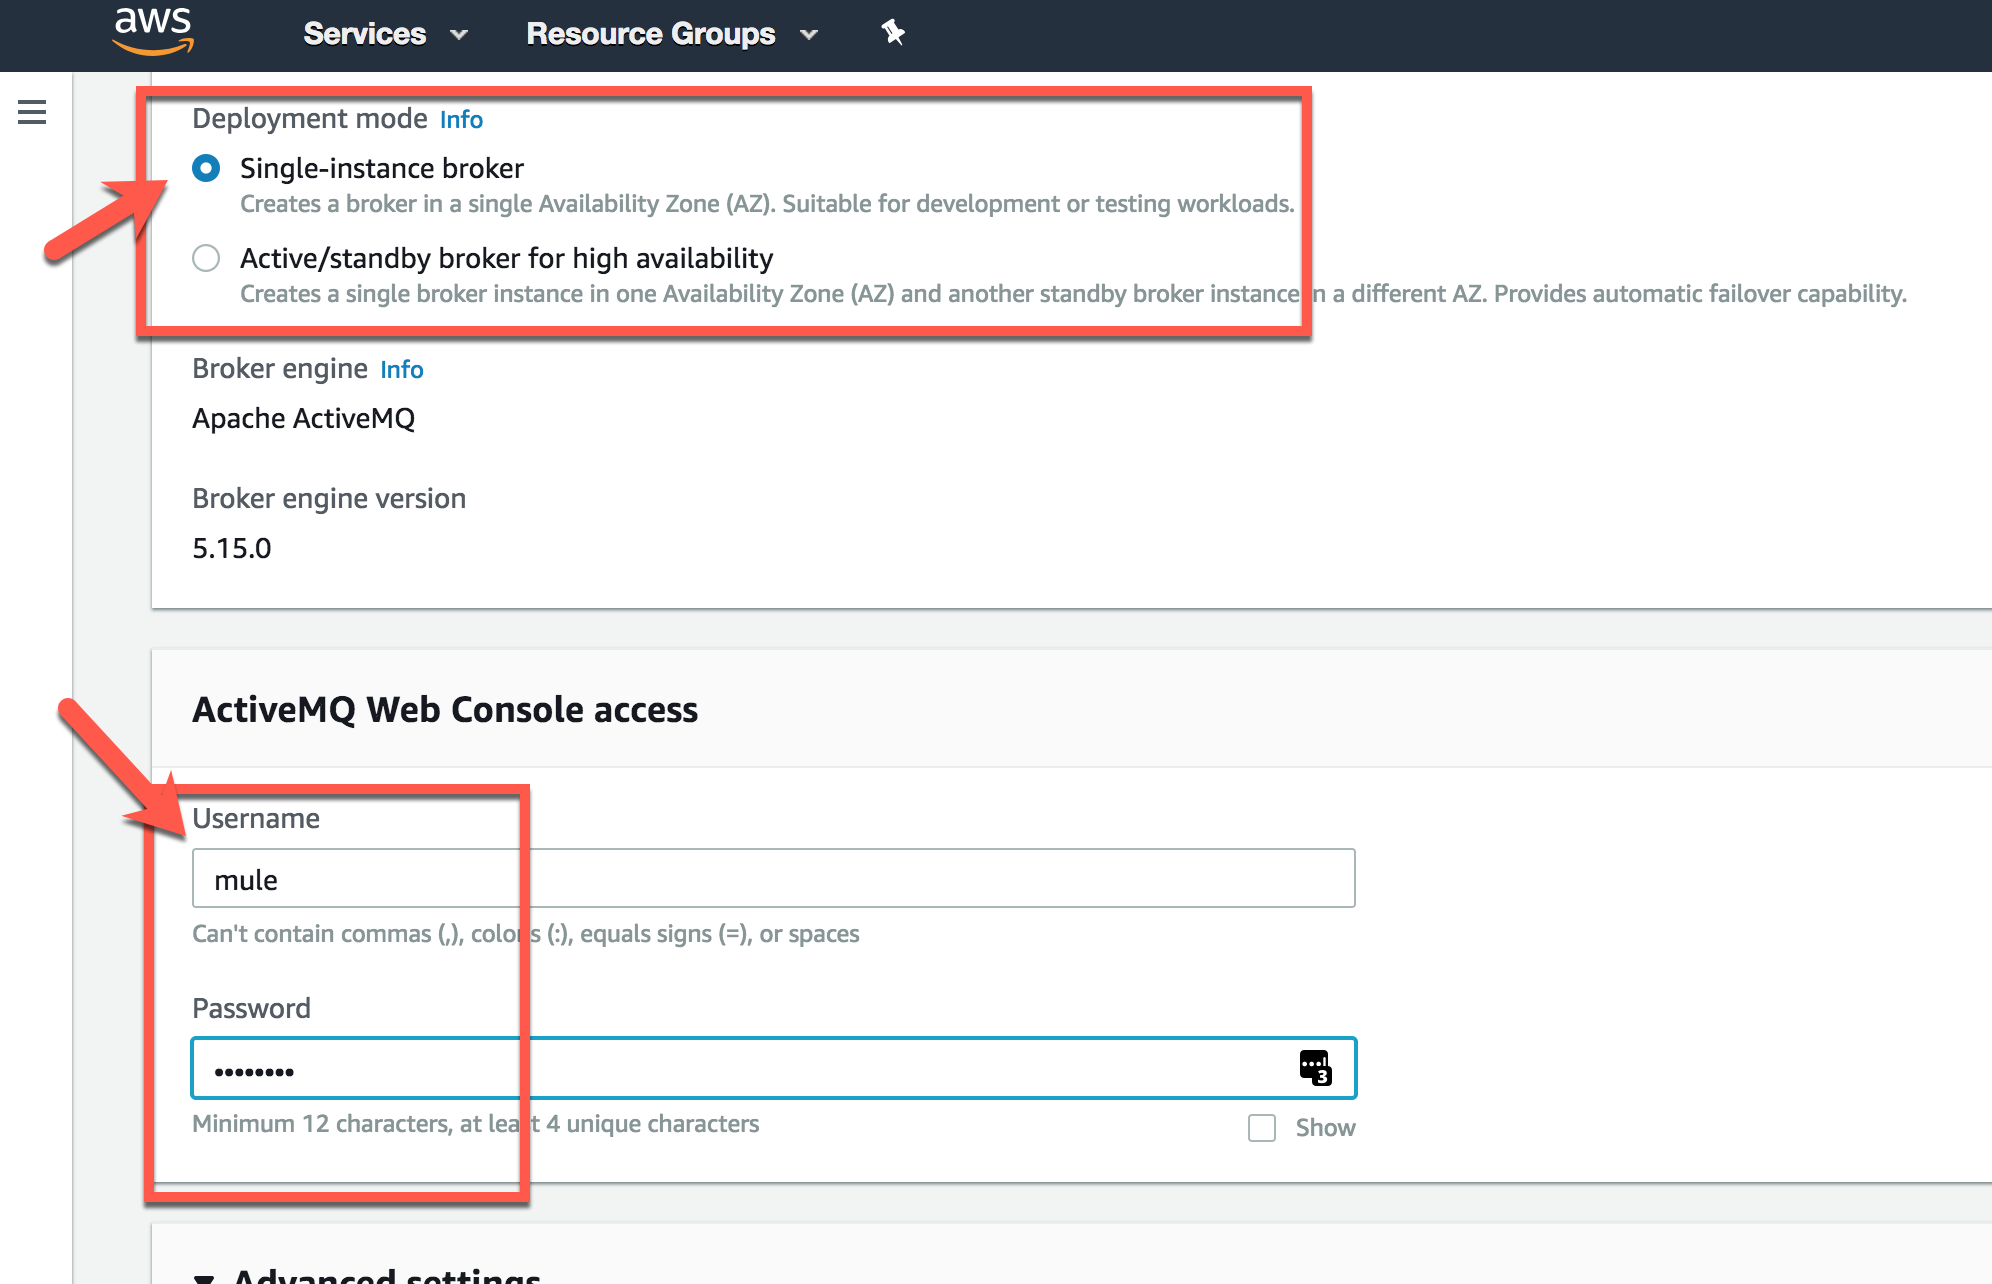
Select Single-instance broker for the Deployment mode, and then set the username and password under the ActiveMQ Web Console access section.
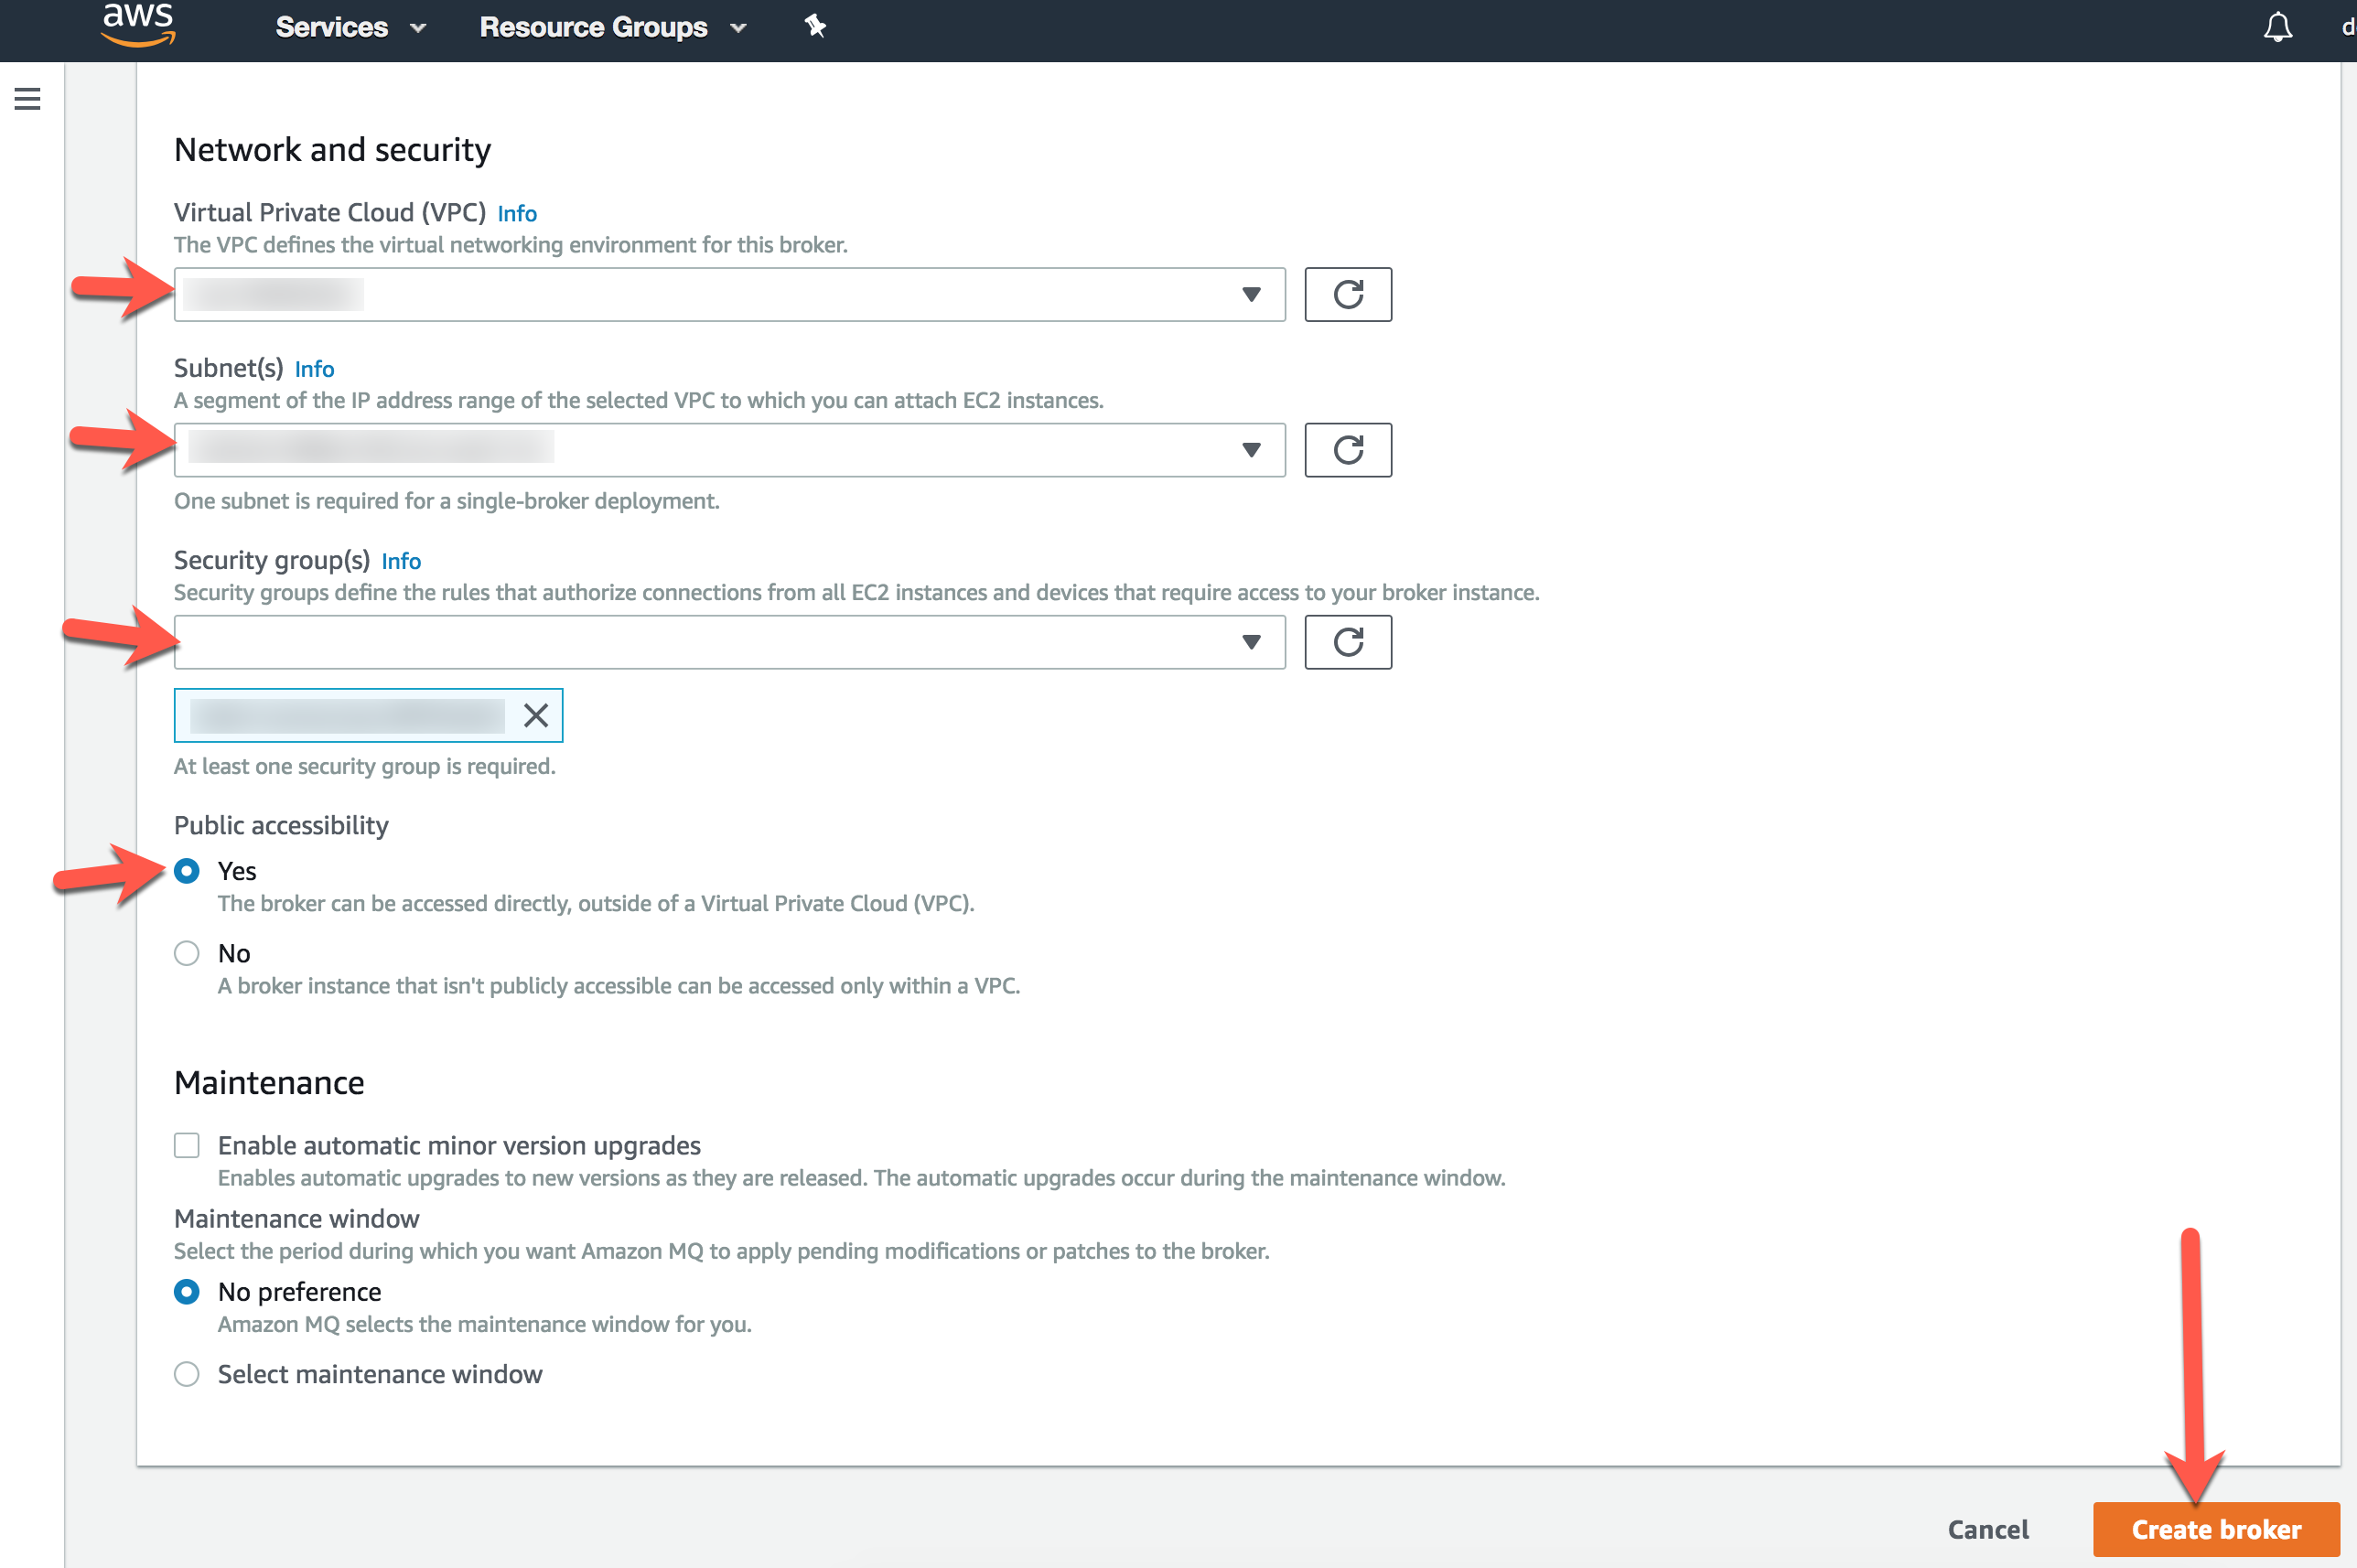
In the Network and security section, set up the Virtual Private Cloud, Subnet, and Security group(s). Set the Public accessibility to Yes, and then leave the Maintenance section with the default values. Click on Create broker. It takes about 15 minutes to spin up a new broker.
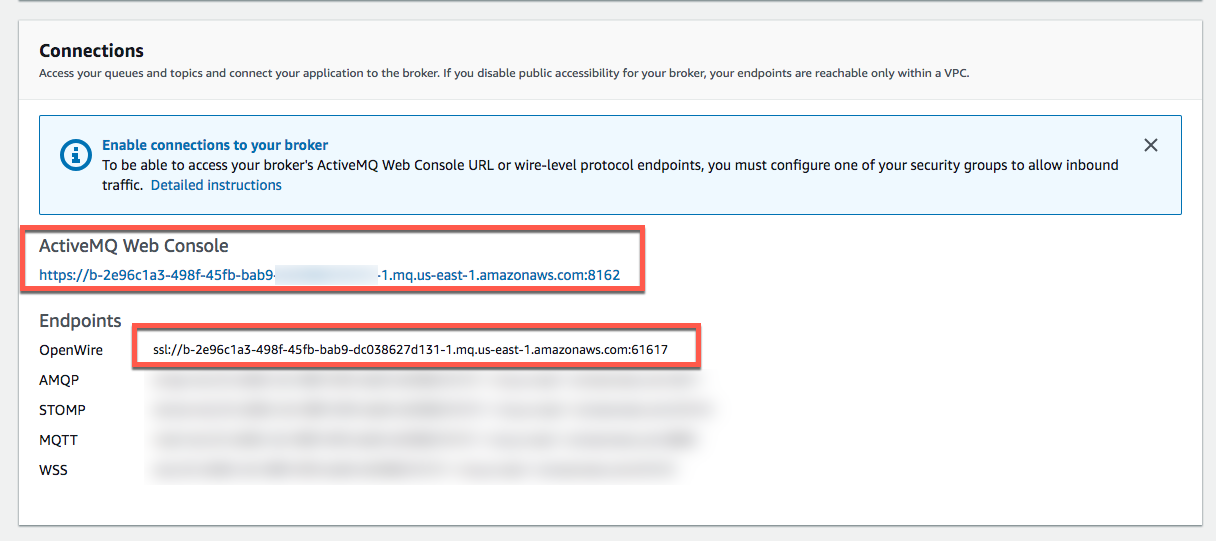
Once the broker is setup, we’ll want to log in to the ActiveMQ Web Console and set up a new queue for Mule to publish to and consumer a message from. To be able to access your broker’s ActiveMQ Web Console URL or wire-level protocol endpoints, you’ll need to configure your security groups to allow inbound traffic on those ports. Specifically, port 8162 and 61617.
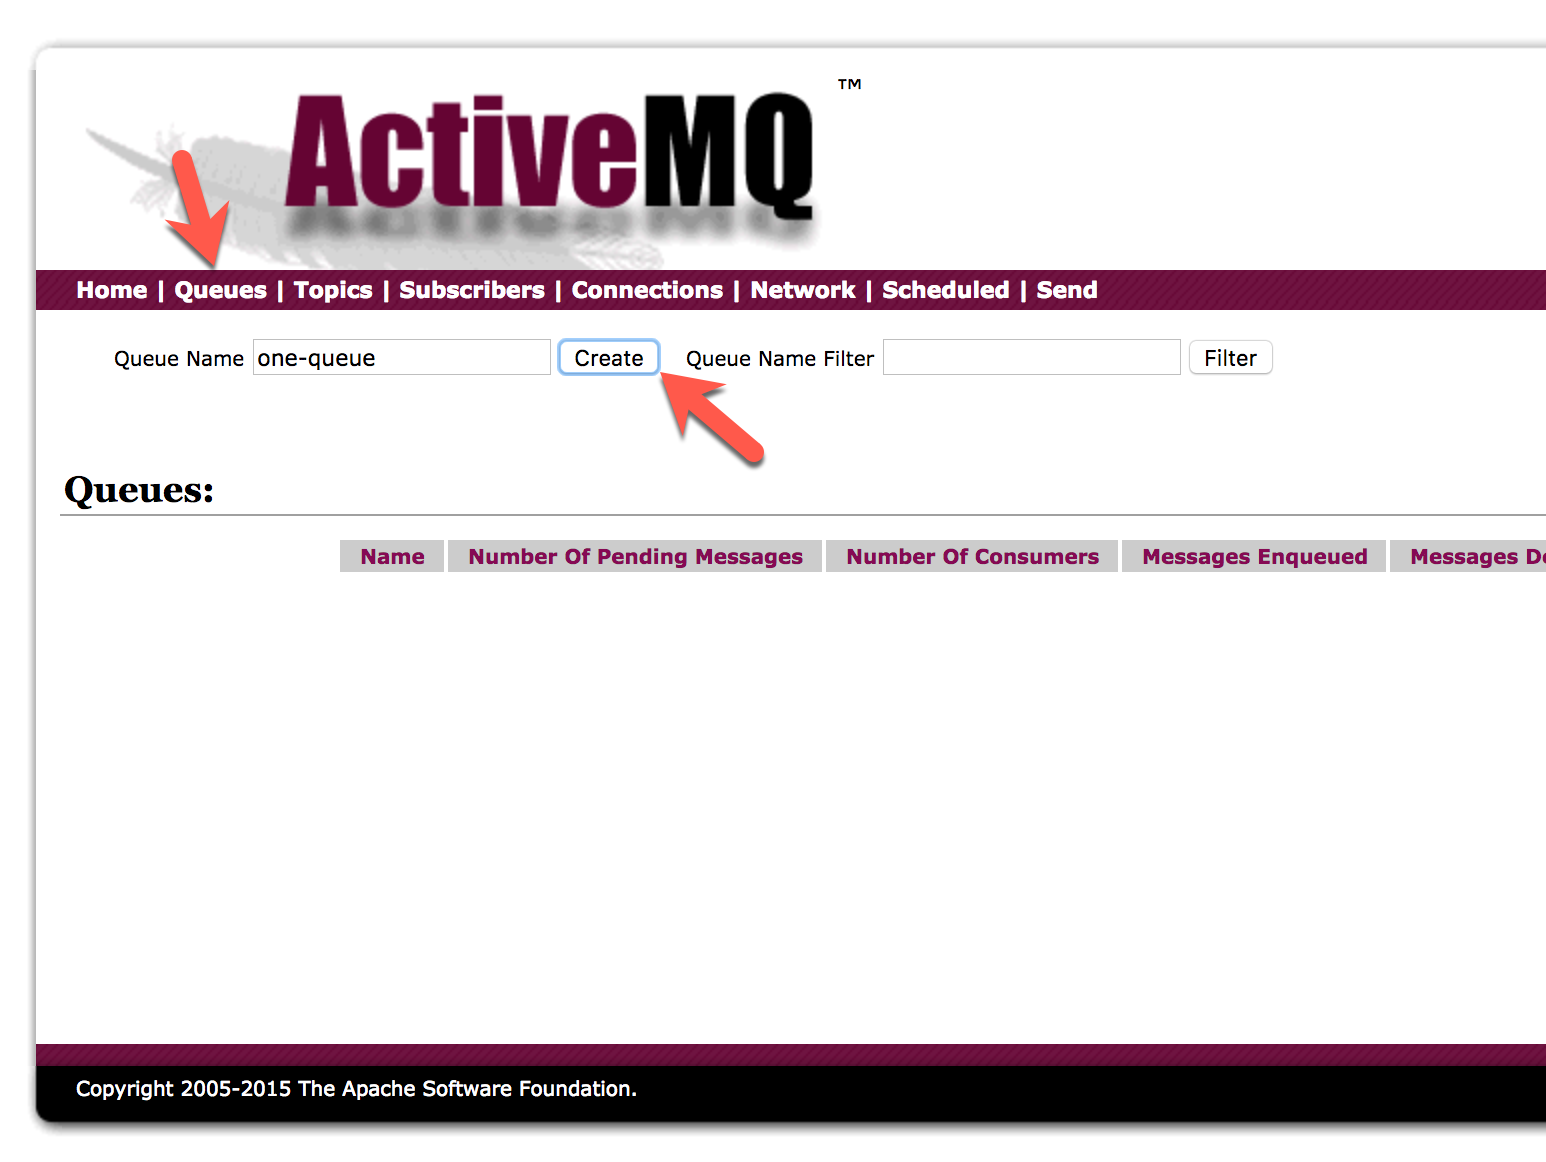
Once you allow inbound traffic to those ports, open the URL to the web console and click on the Manage ActiveMQ broker link. Login with the username and password you configured when setting up the broker. Next, click on Queues and type in a name for a queue and click on Create.
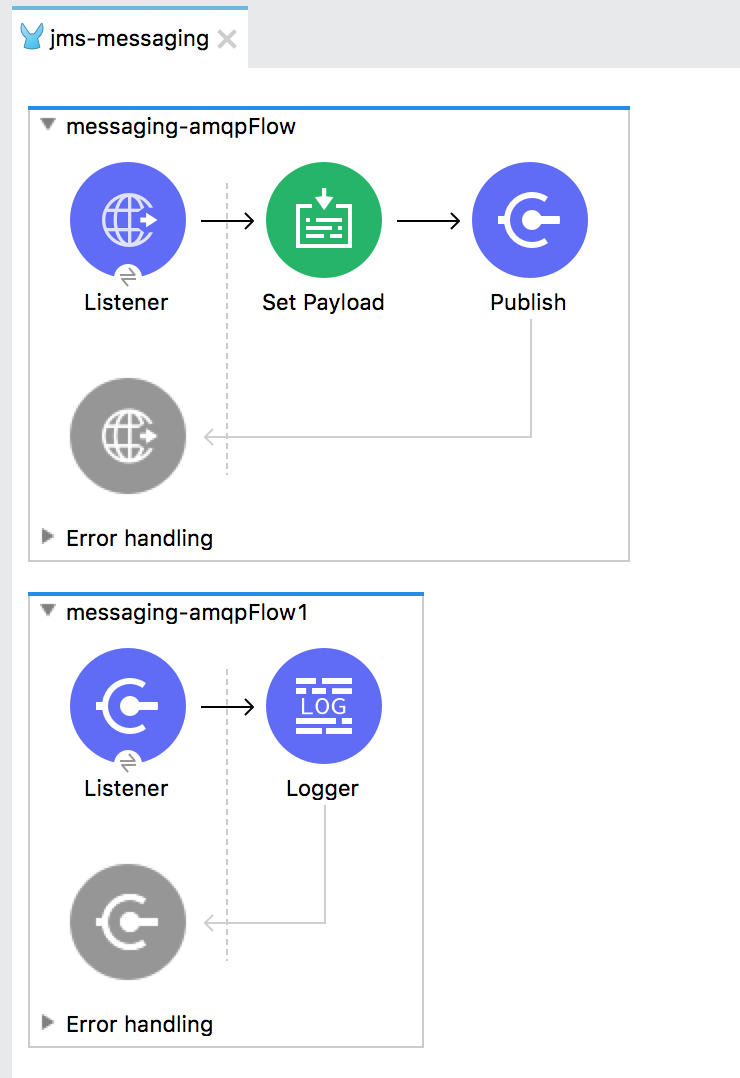
Now that we have the broker up and running and a queue configured, let’s talk about the Mule application that will publish to and consume a message from the queue. You can download an example project from Github here (https://github.com/djuang1/jms-example-mule4). It’s a pretty simple example with the first flow publishing a message to the queue and the second flow listening and writing the message to the console.
The key to this example is just showing you how to configure the JMS connector to connect to Amazon MQ. Click on the Publish component and click on the Edit button next to the Connector configuration field for JMS_Config.
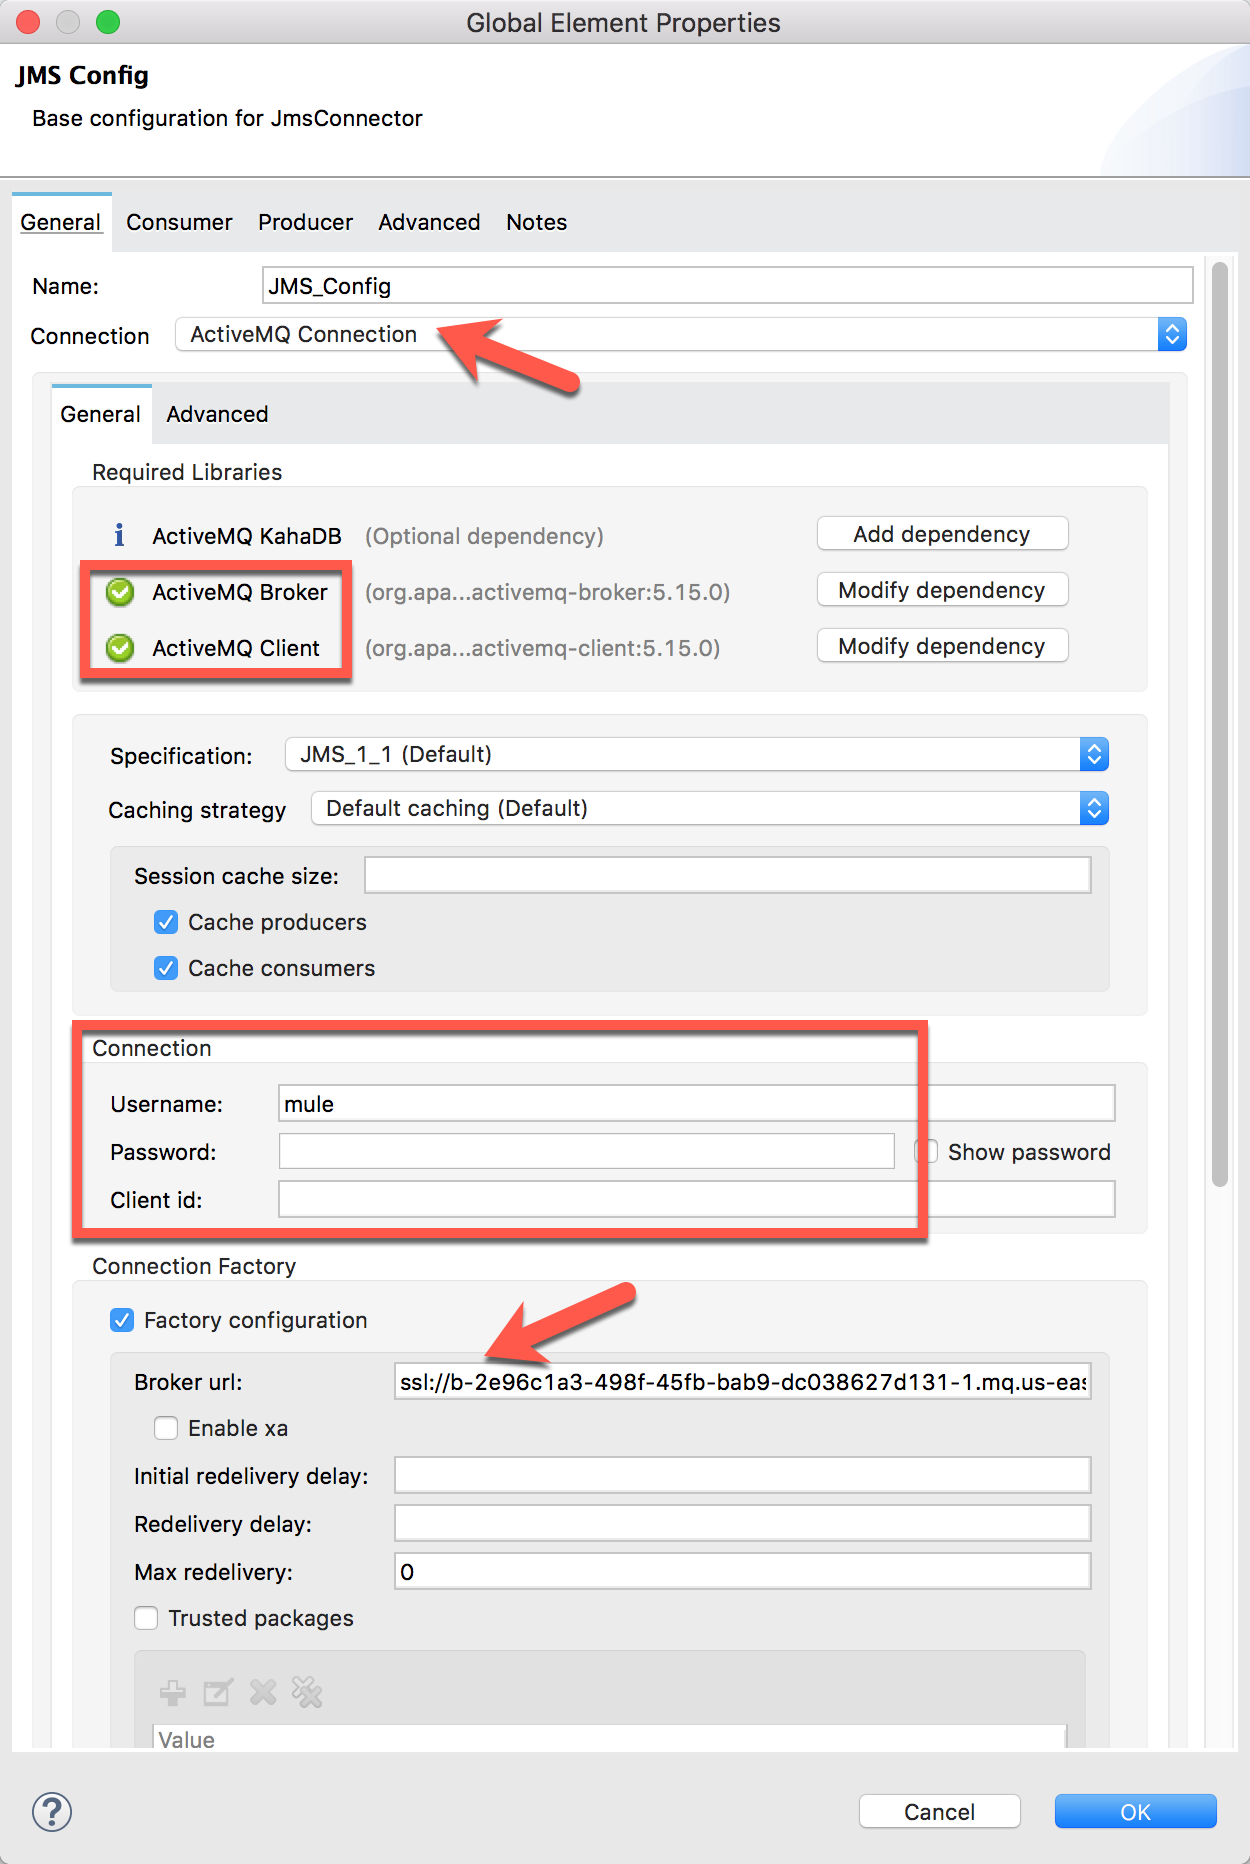
Within the Global Element Properties window, you can see what needs to be configured. The library for the ActiveMQ client is the only required library you need unless you plan to use the Broker or KahaDB. When you click on Add dependency, it comes pre-populated with the artifact definition which makes setup easy.
Once that is added, you just need to configure the connection with the username and password for the ActiveMQ broker. You can set up a different user if you prefer to not use the Administrator account.
Lastly, for the Broker url field, just copy and paste the OpenWire URL from the Amazon MQ configuration page.
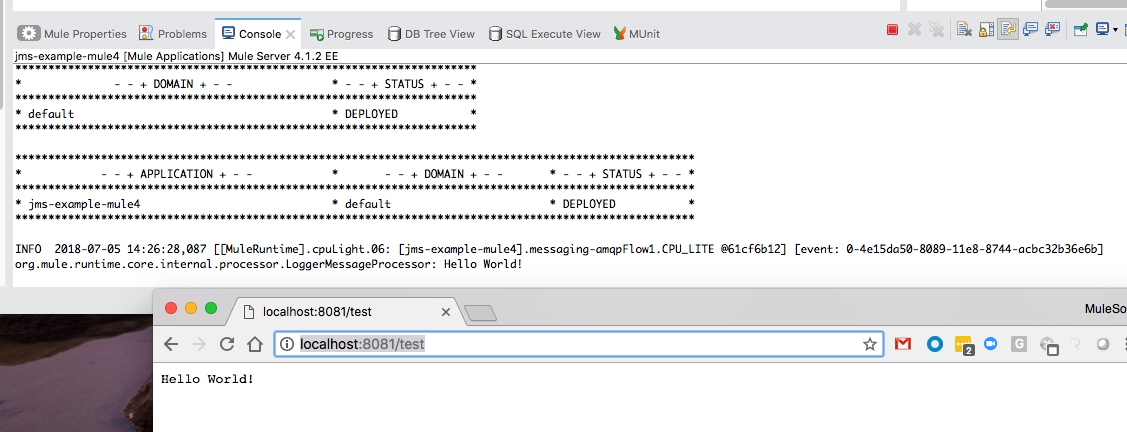
After you configure the settings for your own broker, run the project in Studio and then open up a browser to test out the flow. Navigate to http://localhost:8081/test to kick off the publishing of the message, and then you can see the consumption in the Console window once the flow picks the message off the queue.
As you can see, it’s pretty easy to set up and connect to Amazon MQ. The JMS Connector, which is included out of the box, is easy to setup and configure. To find out more about the JMS Connector, you can click here and read up on more configuration options in the MuleSoft documentation. (https://docs.mulesoft.com/connectors/jms-connector)
If you have any questions or issues, leave a comment or feel free to reach out to me.